Are you looking to elevate your cake decorating skills? Learning how to use the cake decorating tools is essential for creating stunning and professional-looking designs on your cakes. From piping bags and tips to sculpting tools and airbrushing techniques, each tool plays a crucial role in bringing your cake creations to life.
Cake decorating tools are not just accessories; they are indispensable instruments that allow you to unleash your creativity and precision when decorating cakes. Whether you are a beginner or an experienced baker, having the right tools will make a significant difference in the outcome of your cakes. Understanding the importance of these tools and how to use them effectively is key to achieving beautiful and intricate designs.
In this article, we will explore the various types of cake decorating tools available, from basic essentials for beginners to more advanced tools for seasoned bakers looking to take their creations to the next level. From piping bags and tips for delicate designs to fondant tools for professional-looking decorations, we will provide a comprehensive guide on how you can make the most out of your cake decorating tools.
Let’s dive into the world of cake decoration and discover how these tools can enhance your baking experience.
Types of Cake Decorating Tools
Cake decorating tools come in a variety of forms, each designed to enhance the beauty and creativity of your cakes. Whether you are a beginner or an experienced baker, having the right tools can make all the difference in the outcome of your creations. In this comprehensive guide, we will explore the different types of cake decorating tools available in the market and how to use them effectively to achieve stunning designs.
Piping Bags and Tips
Piping bags and tips are essential cake decorating tools that are used to create intricate designs on cakes, cupcakes, and other baked goods. To use these tools effectively, start by inserting the desired tip into the piping bag and filling it with frosting or icing. Squeeze gently from the top of the bag while guiding the tip along the surface of your cake to create shapes, borders, flowers, and more. Experiment with different tips to achieve various textures and patterns.
Fondant Tools
Fondant tools are indispensable for creating professional-looking decorations on cakes. These tools include fondant cutters, embossers, smoothers, shaping tools, and more. To use fondant tools effectively, start by rolling out your fondant on a clean surface using a rolling pin.
Use cutters to create shapes like flowers, leaves, or letters. Embossers can add texture and detail to your fondant pieces. Smoothers help you achieve a polished finish on your cakes while shaping tools assist in molding fondant into various shapes for decorations.
Sculpting and Modeling Tools
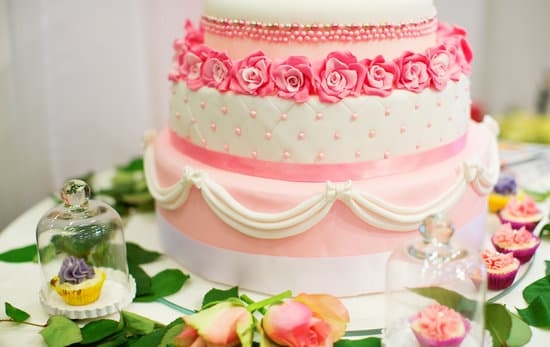
Sculpting and modeling tools are ideal for creating 3D cake designs like figures, animals, or objects. These tools typically include sculpting knives, ball tools for shaping curves, veining tools for adding details like veins or textures, among others. To use sculpting and modeling tools effectively, begin by shaping your base material (fondant or gum paste) into a basic form using your hands.
Then use sculpting knives to carve out details and refine the shape before adding finer details with veining or ball tools. Practice is key when using these tools to perfect your 3D cake designs.
Essential Cake Decorating Tools
When starting your journey into cake decorating, having the right tools is crucial to achieve professional-looking results. Here are some must-have items that every beginner should invest in:
1. Piping Bags and Tips: Piping bags come in various sizes and materials, such as reusable silicone or disposable plastic. Coupled with different tips, they allow you to create intricate designs like borders, flowers, and lettering on your cakes. To use piping bags effectively, fill them with frosting or icing, twist the top to secure the contents, and gently squeeze while guiding the tip to create your desired design.
2. Offset Spatula: An offset spatula is essential for spreading frosting smoothly on cakes, creating sharp edges on square cakes, and leveling off excess frosting. Its angled shape allows for easy maneuvering around the sides of a cake without smudging the decorations on top. To use an offset spatula properly, hold it at a slight angle against the cake and glide it gently across the frosting to spread it evenly.
3. Turntable: A turntable is a rotating platform that makes it easier to decorate cakes evenly from all angles. By placing your cake on a turntable, you can spin it smoothly while piping designs or applying icing for a more uniform finish. To use a turntable effectively, place your cake in the center of the platform and spin it gradually as you work on each section of the cake.
These essential cake decorating tools are just the beginning of your collection as you delve into the world of creative confections. Mastering how to use these tools will set a strong foundation for developing your skills and unleashing your creativity in decorating beautiful cakes.
| Cake Decorating Tool | Importance |
|---|---|
| Piping Bags and Tips | Allows for intricate designs like borders, flowers, and lettering |
| Offset Spatula | Smoothly spreads frosting, creates sharp edges, levels excess frosting |
| Turntable | Makes decorating easier from all angles by allowing smooth rotation of cakes |
Advanced Cake Decorating Tools
When it comes to elevating your cake decorating skills, having the right tools at your disposal can make a world of difference. Advanced cake decorating tools go beyond the basics and allow you to create intricate designs and impressive decorations that will wow your friends and family. From specialty piping tips to advanced sculpting tools, these items are essential for taking your cakes to the next level.
Here are some must-have advanced cake decorating tools that every budding pastry chef should consider adding to their collection:
- Offset Spatula: Perfect for smoothing out frosting and creating clean edges on cakes.
- Decorating Comb: Ideal for creating textured designs on buttercream-covered cakes.
- Luster Dust: Adds a touch of shimmer and sparkle to fondant decorations and sugar flowers.
In order to make the most out of these advanced cake decorating tools, it’s important to understand how each one works and how they can be used effectively. For example, an offset spatula is great for achieving smooth finishes on cakes by spreading frosting evenly, while luster dust can be applied with a soft brush to add a subtle sheen to fondant accents.
Experimenting with different techniques and being patient with your creations will help you master these tools in no time.
Top Tips for Using Advanced Cake Decorating Tools
- Practice using each tool on a spare piece of fondant or cake before applying them to your final creation.
- Clean your tools thoroughly after each use to prevent any leftover residue from affecting future decorations.
- Don’t be afraid to try new techniques and get creative with how you use your advanced cake decorating tools – that’s where the real magic happens.
How to Use Piping Bags and Tips for Intricate Designs
Piping bags and tips are essential cake decorating tools that can help you achieve intricate designs and decorations on your cakes. To use piping bags effectively, start by selecting the appropriate tip for the design you want to create. Different tips produce different shapes and patterns, so it’s important to choose the right one for the desired effect. Attach the selected tip to the piping bag securely before filling it with frosting or icing.
Once your piping bag is filled, gently squeeze from the top of the bag to release the frosting or icing through the tip. Hold the piping bag at a slight angle to the surface of the cake and apply even pressure to create smooth lines or intricate designs. For more control over your decorating, practice on a piece of parchment paper before moving on to your actual cake.
To create specific shapes or patterns with your piping bag, you can try using techniques like rosettes, shells, swirls, or writing messages on cakes. Experiment with different pressure levels and angles to see how they affect the outcome of your design. With practice and patience, you’ll be able to master using piping bags and tips for beautiful cake decorations.
| Tips for Using Piping Bags | Instructions |
|---|---|
| Choose the right tip for the design | Select a tip that matches the desired pattern |
| Securely attach the tip to the piping bag | Make sure it is properly fitted before filling with icing |
| Practice on parchment paper first | Get comfortable with applying even pressure for smooth lines |
Utilizing Fondant Tools for Professional-Looking Decorations
Fondant tools are essential for creating professional-looking decorations on cakes. These tools help you achieve intricate designs and add a touch of elegance to your baked creations. Whether you are a beginner or an experienced baker, utilizing fondant tools can elevate the appearance of your cakes to a whole new level.
To effectively use fondant tools for cake decorating, here are some tips to keep in mind:
- Rolling Pin: A rolling pin is necessary for rolling out the fondant to the desired thickness. Ensure that your work surface is dusted with powdered sugar or cornstarch to prevent sticking.
- Cutting Tools: Fondant cutting tools come in various shapes and sizes, allowing you to cut out different shapes and create intricate patterns on your cakes.
- Embossing Tools: These tools help create textures and designs on the fondant. Simply press them onto the rolled-out fondant to create beautiful patterns.
Using fondant tools may seem intimidating at first, but with practice and patience, you can master the art of cake decorating with fondant. Experiment with different techniques and designs to find what works best for you and adds a personal touch to your creations. With the right fondant tools and a little creativity, you can impress your friends and family with stunning cakes for any occasion.
Tips for Using Sculpting and Modeling Tools for 3D Cake Designs
When it comes to creating stunning 3D cake designs, sculpting and modeling tools are essential for achieving intricate details and unique shapes. These tools allow bakers to bring their creative visions to life by shaping fondant, gum paste, or marzipan into various forms and figures. Whether you’re a beginner or a seasoned baker looking to enhance your skills, mastering the use of sculpting and modeling tools can take your cake decorating game to the next level.
One of the key tips for using sculpting and modeling tools effectively is to start with a clear vision of the design you want to create. Sketching out your ideas beforehand can help guide your sculpting process and ensure that you have a roadmap for shaping your cake decorations. Additionally, having a variety of tools on hand, such as different-sized modeling sticks, shaping molds, and detailing brushes, can give you more versatility in bringing your design to life.
Another important aspect of using sculpting and modeling tools is paying attention to detail. Small adjustments and delicate touches can make a big difference in the overall look of your 3D cake design. Take your time when working with these tools, building up layers of fondant or gum paste gradually to achieve the desired shape or texture.
Practice makes perfect when it comes to using sculpting and modeling tools, so don’t be afraid to experiment with different techniques until you find what works best for you. By honing your skills with these tools, you’ll be able to create show-stopping 3D cakes that are sure to impress any crowd.
Mastering Airbrushing Techniques With Cake Decorating Tools
Airbrushing is a popular technique in cake decorating that allows for intricate designs and precise detailing. By using a specialized airbrush tool, decorators can create beautiful gradients, patterns, and even textures on their cakes. Mastering airbrushing techniques with cake decorating tools can elevate your creations to a professional level.
Choosing the Right Airbrush Tool
When it comes to airbrushing cakes, it’s essential to choose the right airbrush tool for your needs. Look for an airbrush kit specifically designed for use with food-safe colors and materials. These kits typically include an air compressor, airbrush gun, and various nozzles for different effects. Take the time to familiarize yourself with the components of the kit and how they work together before diving into your decorating project.
Preparing Your Workspace
Before you start airbrushing your cake, it’s important to set up a dedicated workspace that is well-ventilated and free of any items that could be damaged by overspray. Cover your work surface with paper or a disposable tablecloth to catch any excess color.
Make sure your cake is positioned securely on a turntable so you can easily rotate it while airbrushing. It’s also a good idea to practice on a piece of parchment paper or fondant before moving on to your actual cake to get a feel for how the colors flow from the airbrush.
Applying Color Gradually
When using an airbrush tool on a cake, remember that less is often more. Start by applying a light layer of color to build up intensity gradually rather than spraying too much color all at once. Hold the airbrush gun about 6-8 inches away from the cake surface and move in smooth, even motions to ensure consistent coverage.
Experiment with different pressures and angles to achieve different effects such as shading, blending, or creating delicate patterns. Practice patience and precision when using the airbrush tool to achieve professional-looking results on your decorated cakes.
By following these tips and practicing regularly, you can master airbrushing techniques with cake decorating tools and enhance the visual appeal of your baked creations. Remember that practice makes perfect when it comes to using new tools and techniques in cake decorating.
Maintenance and Care Tips for Prolonging the Life of Your Cake Decorating Tools
In conclusion, mastering the art of cake decoration goes beyond just having the right tools – knowing how to use and care for them is equally important. Whether you are a beginner or an experienced baker, understanding the maintenance and care tips for your cake decorating tools can significantly prolong their lifespan and ensure consistent results in your creations.
Properly cleaning and storing your cake decorating tools is essential to prevent any damage or contamination that could affect the quality of your decorations. Regularly washing piping bags, tips, fondant tools, sculpting tools, and airbrushing equipment with warm soapy water is crucial in maintaining hygiene. Additionally, storing these tools in a clean, dry place away from direct sunlight will prevent any potential deterioration or discoloration.
Moreover, investing in high-quality cake decorating tools from reputable brands can make a difference in the longevity of your equipment. While it may require a bigger initial investment, durable and well-made tools will last longer and provide better results in your decorating projects. By following these maintenance and care tips diligently, you can ensure that your cake decorating tools continue to enhance your creations for years to come.
Frequently Asked Questions
How Do You Use a Cake Decorating Gun?
A cake decorating gun is a versatile tool used to create beautiful designs on cakes, cupcakes, and cookies. To use it, you first need to choose the desired tip and fill the chamber with frosting. Then, simply apply pressure to the trigger while guiding the gun to create various designs or write messages on your baked goods.
How Do You Use Frosting Tools?
Frosting tools come in a variety of shapes and sizes, each serving a different purpose when it comes to decorating cakes and other baked goods. Some common frosting tools include offset spatulas, piping bags with tips, fondant smoothers, and decorating combs. To use these tools effectively, practice is key in mastering different techniques for frosting and decorating.
How Do You Use Icing Couplers?
Icing couplers are essential tools when using piping bags with multiple tips for decorating cakes. They allow you to easily switch out different icing tips without having to change the entire bag of frosting.
Simply insert the coupler into the piping bag before adding the desired tip, then secure it tightly with a ring. This enables you to experiment with various designs without hassle or wasting icing.

Welcome to our cake decorating blog! My name is Destiny Flores, and I am the proud owner of a cake decorating business named Cake Karma. Our mission is to provide delicious, beautiful cakes for all occasions. We specialize in creating custom cakes that are tailored specifically to each customer’s individual needs and tastes.


