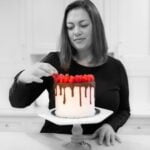
When decorating a cake with fondant, one of the essential elements is ensuring that the decorations stay in place. In this article, we will discuss how to stick fondant decorations to cakes effectively. Whether you are a novice or an experienced baker, mastering this skill can elevate your cake decorating game to the next level.
Fondant decorations are versatile and can be shaped and molded into various designs, making them popular among bakers for creating intricate details. There are different types of fondant available, such as rolled fondant, marshmallow fondant, and modeling chocolate, each with its own unique properties and textures.
To successfully adhere fondant decorations to a cake, choosing the right adhesive is crucial. Edible glue or sugar syrup are commonly used options that help ensure the decorations stick securely without compromising the overall look of the cake. Preparing the surface of the cake for fondant decorations is also essential to create a smooth and stable base for applying the embellishments.
Different Types of Fondant
Fondant is a versatile and popular choice for decorating cakes due to its smooth finish and ability to create intricate designs. When it comes to fondant decorations, there are different types of fondant that you can choose from, each with its own characteristics and uses. Here are the most common types:
- Rolled Fondant: This type of fondant is commonly used for covering cakes entirely or creating large decorations. It has a pliable texture that makes it easy to roll out and drape over the cake.
- Gum Paste: Gum paste is a stiffer and more elastic type of fondant, making it ideal for creating delicate decorations like flowers, bows, and figurines that need to hold their shape well.
- Modeling Chocolate: Modeling chocolate combines the best of both worlds – the pliability of fondant with the taste of chocolate. It is excellent for creating detailed decorations that need to be sculpted or shaped.
When deciding on the type of fondant to use for your cake decorations, consider the intricacy of your design, the climate you are working in, and personal preferences such as taste and ease of use.
Now that you have chosen the right type of fondant for your decorations, it’s essential to ensure they stay put on your cake. One crucial aspect is knowing how to stick fondant decorations to your cake securely. There are several methods you can use:
- Edible Glue: Edible glue is specifically designed for attaching fondant pieces together or sticking them onto a cake surface. You can easily make edible glue at home using water and tylose powder or by purchasing pre-made options from baking supply stores.
- Water: Plain water can also work as an adhesive for fondant decorations. Dip a small brush in water and lightly brush it onto the back of your decoration before placing it on the cake.
- Corn Syrup: Another common adhesive for fondant is corn syrup, which acts as a sticky glue when applied sparingly between layers.
By selecting the right adhesive method based on your project’s needs, you can ensure that your fondant decorations stay securely attached to your cake while also achieving a professional-looking finish.
Choosing the Right Adhesive for Fondant Decorations
Fondant decorations are a popular choice for decorating cakes due to their versatility and ability to create intricate designs. When it comes to sticking fondant decorations to a cake, choosing the right adhesive is crucial to ensure that the decorations stay in place throughout the event. There are several options available for adhering fondant decorations to cakes, each with its own pros and cons.
One common adhesive for fondant decorations is edible glue, which is specifically designed for use with food items. Edible glue is safe to consume and provides a strong bond between the fondant decoration and the cake surface. It is easy to apply and dries clear, making it ideal for delicate designs that require precision placement.
Another option for sticking fondant decorations to a cake is royal icing, which is made from powdered sugar, egg whites, and sometimes lemon juice or cream of tartar. Royal icing can be used as an adhesive for heavier fondant decorations or when a sturdier bond is needed. However, royal icing dries hard and can be difficult to adjust once set, so it requires careful planning when applying fondant decorations to a cake.
When deciding on the right adhesive for your fondant decorations, consider the weight of the decorations, the complexity of the design, and how long you need them to stay in place. Experiment with different adhesives to find what works best for your specific project, keeping in mind that proper preparation of the cake surface and technique in application are also essential factors in ensuring that your fondant decorations stay put.
| Adhesive Type | Pros | Cons |
|---|---|---|
| Edible Glue | Safe to consume Easy application | May not provide strong adhesion for heavy decorations |
| Royal Icing | Strong bonding Ideal for heavy decorations | Dries hard Less room for adjustment once set |
Preparing the Cake Surface for Fondant Decorations
To ensure that your fondant decorations stick securely to your cake, it is crucial to properly prepare the cake surface beforehand. This step is essential for creating a seamless and professional-looking finish. Here are some key tips on preparing the cake surface for fondant decorations:
Step 1: Leveling the Cake
Before you even think about applying fondant decorations, make sure your cake is level. Use a sharp knife or cake leveler to trim any uneven or domed areas on the top of the cake. A flat surface will provide a stable foundation for your fondant decorations.
Step 2: Crumb Coating
After leveling the cake, apply a thin layer of buttercream or ganache all over the cake. This crumb coat will help seal in any crumbs and create a smooth base for the fondant. Make sure to let the crumb coat set before moving on to applying fondant decorations.
Step 3: Chill the Cake
Once you have applied the crumb coat, place the cake in the refrigerator for at least 30 minutes to allow it to firm up. Chilling the cake will make it easier to handle and reduce the risk of damaging the fondant decorations when applying them.
By following these steps and ensuring that your cake surface is properly prepared, you can create a flawless canvas for sticking fondant decorations. This preparation stage sets the foundation for successful decoration application and ultimately ensures a stunning final result on your cakes.
Applying Edible Glue to Fondant Decorations
When it comes to decorating cakes with fondant, one of the key steps in ensuring that your decorations stick and stay in place is by using edible glue. Edible glue is a safe and effective way to attach fondant decorations to your cake without leaving behind any unwanted residue or taste. In this section, we will guide you on how to properly apply edible glue to fondant decorations for a seamless and professional finish.
Making Edible Glue
There are several methods for making edible glue at home. One popular recipe includes mixing tylose powder or gum tragacanth with water until it forms a thick, sticky paste. Another option is using simple syrup made with sugar and water, which acts as a sticky adhesive when applied on fondant. Whichever method you choose, ensure that the glue has a slightly thick consistency so that it adheres well to both the fondant decorations and the cake surface.
Applying Edible Glue
To apply the edible glue onto your fondant decorations, use a small brush or toothpick for precision. Dip the brush into the glue mixture and lightly coat the back of the fondant decoration where it will come into contact with the cake.
Be careful not to apply too much glue as it can cause the fondant to become overly sticky or create clumps. Once you have applied the glue, gently press the decoration onto the desired spot on your cake surface and hold it in place for a few seconds to ensure good adhesion.
Letting It Set
After applying edible glue to your fondant decorations and pressing them onto the cake, allow some time for everything to set properly before moving or transporting the cake. This will help prevent any shifting or sliding of the decorations once they are in place.
Depending on the humidity and temperature of your environment, setting times may vary, so be sure to check periodically to ensure everything stays securely attached. Following these steps will help you achieve beautifully decorated cakes with perfectly stuck-on fondant decorations every time.
Pressing Fondant Decorations Onto the Cake
When it comes to creating a beautifully decorated cake, learning how to stick fondant decorations to the cake is essential. Whether you are a beginner or an experienced baker, mastering this technique can take your cake decorating skills to the next level. With the right tools and methods, you can ensure that your fondant decorations stay put and create a stunning final product.
To press fondant decorations onto the cake effectively, follow these steps:
- Firstly, make sure that your cake has a smooth surface free from any crumbs or imperfections. You can achieve this by using a crumb coat of buttercream or ganache before applying the fondant.
- Next, determine the placement of your fondant decorations on the cake. Once you have decided where each decoration will go, gently press them into place to create a guideline for when you add adhesive.
- Now it’s time to apply edible glue to the back of your fondant decorations. You can use a small brush or even a toothpick to dab a small amount of edible glue onto the back of each decoration.
By following these steps and paying attention to detail, you can ensure that your fondant decorations stay securely attached to your cake throughout its display. Remember that practice makes perfect, so don’t be discouraged if you encounter some challenges along the way. Experiment with different adhesives and techniques until you find what works best for you and produces picture-perfect results every time.
Ensuring Fondant Decorations Stay in Place
Fondant decorations can add a beautiful and creative touch to any cake, but ensuring that they stay in place throughout the event is crucial. After you have meticulously placed your fondant decorations on the cake, the last thing you want is for them to start falling off or shifting during transportation or display. Here are some tips on how to make sure your fondant decorations stay securely in place:
Firstly, consider the weight and size of your fondant decorations when placing them on the cake. Heavier or larger decorations may require additional support to prevent them from sliding down the sides of the cake. You can use toothpicks or skewers inserted into the cake to help hold up these larger pieces. It’s essential to ensure that these supports are not visible when serving the cake.
Another key factor in keeping fondant decorations secure on the cake is using a reliable adhesive. While edible glue is commonly used for this purpose, some bakers prefer using royal icing or buttercream as an alternative adhesive. Whichever option you choose, be sure to apply it generously to both the back of the fondant decoration and the area of the cake where it will be placed. This will create a strong bond between the decoration and the cake surface.
Additionally, if you are transporting a cake with fondant decorations or displaying it outdoors where temperature fluctuations may occur, consider using chocolate ganache as an adhesive instead of traditional options like water or edible glue. Chocolate ganache sets firmer than other adhesives, providing extra security against movement.
Overall, by considering factors such as weight, adhesive choice, and environmental conditions, you can ensure that your fondant decorations stay in place and maintain their visual appeal until it’s time to slice into the delicious creation.
| Tips | Description |
|---|---|
| Consider Weight and Size | Ensure proper support for heavier or larger fondant decorations. |
| Use Reliable Adhesive | Apply edible glue, royal icing, buttercream generously for a strong bond. |
| Transportation Considerations | Use chocolate ganache for added security during transportation or exposure to temperature changes. |
Additional Tips and Tricks for Sticking Fondant Decorations to Cake
Fondant decorations can truly take a cake to the next level, but ensuring they stick securely can sometimes be a challenge. In addition to choosing the right adhesive and preparing the cake surface properly, there are a few additional tips and tricks that can help you achieve picture-perfect results when sticking fondant decorations to your cake.
One useful tip is to make sure your fondant decorations are not too heavy for the adhesive you are using. If you are working with larger or heavier decorations, consider using royal icing or a thicker adhesive to ensure they stay in place. You can also opt for a stronger edible glue specifically designed for heavier fondant pieces.
Another helpful trick is to allow your fondant decorations to dry slightly before sticking them onto the cake. This will help prevent them from becoming misshapen or drooping once placed on the cake. To do this, simply let your decorations sit out for a little while after shaping them, until they have firmed up slightly but are still pliable enough to adhere easily.
Lastly, if you find that your fondant decorations are not staying in place as desired, you can try adding additional support by propping them up with toothpicks or small dowels inserted into the cake. This extra support can help keep larger or more intricate decorations in place while also adding dimension and visual interest to your cake design.
By following these additional tips and tricks, you can ensure that your fondant decorations stay securely attached to your cake, creating a beautiful and professional-looking finished product.
Conclusion and Final Tips for Picture-Perfect Fondant Decorations
In conclusion, mastering the art of sticking fondant decorations to a cake is all about preparation, technique, and choosing the right adhesive. By understanding the different types of fondant available and selecting the appropriate adhesive for your decorations, you can ensure that they will stay in place and create a picture-perfect finished product.
Remember to adequately prepare the surface of the cake by smoothing it out and applying a thin layer of buttercream or edible glue before attaching your fondant decorations.
When it comes to actually sticking the fondant decorations onto the cake, be sure to apply edible glue sparingly to avoid any excess seeping out. Press the decorations gently but firmly onto the cake surface to secure them in place. To ensure that your fondant decorations stay put throughout serving and display, consider using additional support such as toothpicks or skewers for larger or heavier decorations.
Lastly, here are some final tips for achieving flawless fondant decorations: allow enough time for your cake to set before adding fondant decorations, store decorated cakes in a cool, dry place to prevent drooping or melting, and practice patience when working with intricate designs. With these tips in mind, you’ll be able to create stunning cakes adorned with beautifully stuck fondant decorations every time.
Frequently Asked Questions
How Do You Attach Fondant Decorations to a Cake?
Attaching fondant decorations to a cake can be done using a small amount of water or edible glue. Simply brush a thin layer onto the back of the decoration, then gently press it onto the cake.
What Sticks Fondant Icing to Cake?
Fondant icing sticks to a cake due to its natural adhesive properties. When rolled out and placed on fresh buttercream or ganache, the fondant adheres as it slightly softens and molds to the surface.
How Do You Stick Fondant Decorations to Cake Pops?
To stick fondant decorations onto cake pops, first dip the end of a lollipop stick into melted chocolate before inserting it into the cake pop. Then, use more melted chocolate or royal icing to attach the fondant decoration securely onto the cake pop.

Welcome to our cake decorating blog! My name is Destiny Flores, and I am the proud owner of a cake decorating business named Cake Karma. Our mission is to provide delicious, beautiful cakes for all occasions. We specialize in creating custom cakes that are tailored specifically to each customer’s individual needs and tastes.

