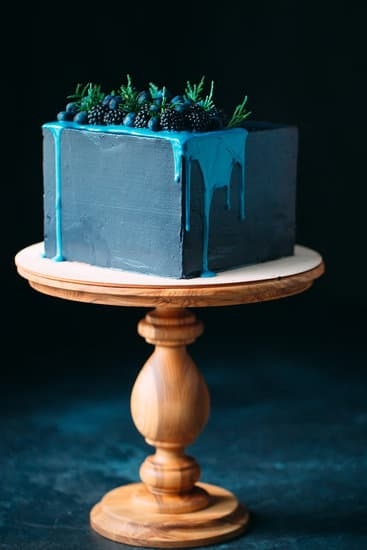
Cake decorating is a creative and enjoyable activity that allows bakers to turn simple cakes into stunning works of art. One essential tool in the world of cake decorating is the cake decorating bag, which plays a crucial role in achieving intricate designs and professional-looking decorations.
In this article, we will explore the importance of cake decorating bags, the different types available, necessary tools for setting up a cake decorating bag, and provide a step-by-step guide on how to fill it with frosting.
A cake decorating bag is essentially a disposable or reusable tool made of plastic, cloth, or silicone that holds frosting or icing for intricate designs on cakes, cupcakes, cookies, and more. The precision and control offered by a cake decorating bag make it essential for creating beautiful decorations such as borders, flowers, lettering, and other decorative elements.
Whether you are a beginner looking to enhance your baking skills or an experienced baker aiming to take your creations to the next level, mastering the use of a cake decorating bag is key.
Understanding the different types of cake decorating bags available can help you choose the right tool for your needs. From disposable plastic bags to reusable cloth or silicone options, each type has its advantages and uses.
As we delve deeper into this article, we will explore how to select the appropriate type of bag for different projects and provide tips on how to achieve professional results with your chosen tool. Let’s embark on this journey together as we unlock the secrets to mastering the art of using cake decorating bags.
Types of Cake Decorating Bags and Their Uses
When it comes to cake decorating, having the right tools can make all the difference in creating stunning designs. Cake decorating bags are essential for any baker or decorator looking to add a touch of creativity to their cakes. These bags come in various types, each serving a specific purpose in the decorating process.
Disposable Decorating Bags
Disposable decorating bags are a popular choice for many decorators because of their convenience. These bags are made of plastic or coated paper and are intended for single-use only. They are ideal for beginners or those who prefer not to deal with the hassle of cleaning up after decorating.
Reusable Decorating Bags
On the other hand, reusable decorating bags are a more sustainable option for decorators who want to minimize waste. These bags are typically made of strong fabric or silicone and can be cleaned and used multiple times. Reusable bags offer durability and flexibility, allowing decorators to experiment with different frosting techniques without having to constantly switch between disposable bags.
Parchment Paper Cones
In addition to traditional decorating bags, parchment paper cones are another option for decorators. Parchment paper cones are easy to make by cutting a triangle from parchment paper and rolling it into a cone shape. While they may not be as sturdy as regular decorating bags, parchment paper cones are great for small details or fine lines on cakes. Also, they provide an affordable alternative when you don’t have access to traditional piping bags.
No matter which type of cake decorating bag you choose, understanding their uses and benefits will help you achieve professional-looking designs on your cakes. Now that we’ve covered the different types of cake decorating bags available let’s move on to how to set them up properly for a seamless decorating experience.
Necessary Tools and Materials for Setting Up a Cake Decorating Bag
Cake decorating bags are essential tools for any baker looking to add beautiful designs and details to their cakes, cupcakes, and other baked goods. To set up a cake decorating bag properly, you will need a few key tools and materials. The first item you will need is the cake decorating bag itself. These can be made of disposable plastic or reusable cloth, depending on your preference.
Next, you will need decorating tips to attach to the end of the cake decorating bag. These tips come in various sizes and shapes, each creating different patterns when frosting is squeezed through. It’s important to choose the right tip for the design you have in mind. Additionally, a coupler can be used to easily switch out tips without emptying and refilling the bag each time.
To fill your cake decorating bag with frosting, you will need a spatula or spoon to scoop the frosting into the bag. You may also want to invest in a stand or holder to keep your filled cake decorating bags upright while working on your creations. Once you have all these necessary tools and materials on hand, you are ready to learn how to set up your cake decorating bag with ease.
Learning how to set up a cake decorating bag properly is crucial for achieving professional-looking results on your baked goods. Taking the time to gather the necessary tools and materials, such as the decorating bags, tips, couplers, spatulas, and stands, will make the process much smoother. With practice and patience, you will soon master the art of using a cake decorating bag to create stunning designs on your cakes and desserts.
Step-by-Step Guide on How to Fill the Cake Decorating Bag With Frosting
Filling a cake decorating bag with frosting may seem like a daunting task for beginners, but with the right technique and a few tips, you can easily master this essential step in cake decoration. Whether you’re using a disposable or reusable cake decorating bag, the process remains the same. Here’s a step-by-step guide on how to fill your cake decorating bag with frosting:
Preparation of Materials
Before starting the filling process, it’s important to have all your materials ready. Make sure you have your piping tip securely attached to the coupler if using one. Prepare your frosting in a bowl and ensure it’s at the right consistency for piping – not too runny or too stiff. Open up your cake decorating bag and insert the coupler or just snip off the tip if you’re not using one.
Frosting Loading Technique
To fill the cake decorating bag with frosting, use a spatula or spoon to scoop up the desired amount of frosting from the bowl. Carefully place it into the icing bag, making sure not to overfill it to prevent any spills. Hold the top of the bag securely with one hand while guiding in frosting with your other hand.
Twisting and Securing
Once you’ve loaded enough frosting into your cake decorating bag, twist the top of the bag so that none of the frosting can escape back out while you’re piping. Apply pressure on the twisted part to push down towards the piping tip until you see frosting start to come out.
You are now ready to decorate your cakes and cupcakes with beautifully piped designs. Follow these steps each time you need to refill your cake decorating bag for different colors or designs for professional results every time.
Proper Techniques for Holding and Squeezing the Cake Decorating Bag
Mastering the art of cake decorating involves not only having the right tools but also using them correctly. One crucial aspect of using a cake decorating bag effectively is learning the proper techniques for holding and squeezing it. The way you hold and apply pressure to the bag can greatly impact the outcome of your designs on cakes, cupcakes, and other baked goods.
When it comes to holding a cake decorating bag, there are a few key points to keep in mind. First, make sure you have a firm grip on the top of the bag where the frosting is contained. You want to have control over the flow of frosting, so holding it securely will help you maneuver with precision. Additionally, use your dominant hand to guide the tip of the bag while applying pressure with your non-dominant hand.
As for squeezing the cake decorating bag, it’s important to maintain steady and even pressure throughout your piping technique. Start by applying gentle pressure to get a feel for how quickly and smoothly the frosting comes out. Adjust your grip or pressure as needed to achieve different effects like creating borders, writing messages, or making intricate designs on your baked goods.
| Proper Techniques | Holding and Squeezing |
|---|---|
| Firm Grip | Control over flow |
| Steady Pressure | Maintain consistency |
Ultimately, practice makes perfect when it comes to mastering the proper techniques for holding and squeezing a cake decorating bag. Experiment with different angles, pressures, and movements to discover what works best for your desired decorations. With time and patience, you’ll develop confidence in using this essential tool for creating beautifully decorated treats that are sure to impress anyone who sees (and tastes) them.
Tips and Tricks for Achieving Beautiful Designs With a Cake Decorating Bag
Cake decorating bags are essential tools for creating beautifully designed cakes, cupcakes, and other baked goods. With the right techniques and tips, you can achieve stunning results with your cake decorating bag. Here are some tips and tricks to help you create beautiful designs:
- Choose the right tip: The tip you use with your cake decorating bag will greatly impact the design you create. Different tips produce different shapes and textures, so experiment with various tips to see which ones work best for the design you have in mind.
- Practice consistency: Consistency is key when it comes to creating uniform designs. Make sure your frosting is the right consistency – not too runny or too stiff – so that it flows smoothly from the bag.
- Use proper pressure: Squeezing the cake decorating bag with the right amount of pressure is crucial for achieving clean lines and defined shapes. Practice squeezing the bag on a piece of parchment paper before decorating your baked goods.
Troubleshooting Tips
Sometimes, things may not go as planned when using a cake decorating bag. Here are some common issues that may arise and how to troubleshoot them:
- If your frosting is too runny, add more powdered sugar to thicken it up.
- If your frosting is too stiff, add a small amount of milk to loosen it up.
- If your design starts to look uneven or messy, take a break and start fresh on a clean surface.
By following these tips and tricks, you can elevate your cake decorating skills and create stunning designs that will impress everyone at your next celebration. Remember to practice regularly and have fun experimenting with different techniques.
Troubleshooting Common Issues When Setting Up a Cake Decorating Bag
When setting up a cake decorating bag, there are common issues that may arise, but with the right troubleshooting techniques, you can easily overcome them. One common issue is air bubbles in the frosting when you start piping. This can result in uneven pressure and affect the consistency of your design. To avoid this problem, make sure to properly fill the decorating bag and eliminate any air pockets by gently squeezing out excess air before starting to decorate your cake.
Another issue that decorators often face is frosting leaking from the tip of the bag unexpectedly. This can be frustrating and messy, but it can be easily remedied by checking if the decorating tip is securely screwed on to the bag. Make sure it is tightened properly to prevent any leakage during piping. Additionally, using a coupler with your decorating tip can also help keep everything in place and avoid any mishaps while decorating.
Sometimes, decorators may struggle with frosting that is too stiff or too runny for proper piping. If your frosting is too thick, try adding a small amount of milk or water to thin it out gradually until you reach the desired consistency. On the other hand, if your frosting is too runny, add more powdered sugar until it thickens up. It’s important to achieve the right balance of ingredients to ensure smooth piping and clean designs on your cakes.
| Troubleshooting Tip | Resolution |
|---|---|
| Air bubbles in frosting | Eliminate air pockets before piping |
| Frosting leaking from tip | Check tightness of decorating tip and use a coupler |
| Frosting consistency issues | Add liquid or powdered sugar to adjust texture |
Cleaning and Storage of Cake Decorating Bags to Ensure Longevity and Reusability
Cake decorating bags are essential tools for any baker looking to create beautiful and intricate designs on their cakes, cupcakes, and other baked goods. To ensure the longevity and reusability of your cake decorating bags, proper cleaning and storage practices are crucial. By taking good care of your cake decorating bags, you can continue to use them for many projects to come.
To effectively clean your cake decorating bag after each use, follow these steps:
- 1. Start by emptying any remaining frosting or icing from the bag.
- 2. Fill a bowl with warm soapy water and submerge the bag in it.
- 3. Gently squeeze and knead the bag to remove any leftover residue.
- 4. Rinse the bag thoroughly with clean water until all soap is removed.
Once your cake decorating bag is clean, proper storage is key to preserving its quality. Here are some tips for storing your cake decorating bags:
- 1. Ensure the bag is completely dry before storing to prevent mold or mildew growth.
- 2. Roll up the bag tightly and secure it with a rubber band or clip to maintain its shape.
- 3. Store the bag in a cool, dry place away from direct sunlight or heat sources.
By following these cleaning and storage tips, you can prolong the lifespan of your cake decorating bags and continue creating stunning designs on your baked creations without any issues. Mastering the art of using cake decorating bags involves not only skillful techniques but also proper care and maintenance of your tools.
Conclusion and Final Thoughts on Mastering the Art of Using Cake Decorating Bags
In conclusion, mastering the art of using cake decorating bags requires practice, patience, and a keen eye for detail. By understanding the different types of cake decorating bags available and knowing how to properly set them up with frosting, you can create stunning designs on your cakes and pastries. Remember to invest in high-quality tools and materials to ensure a smooth decorating process.
Proper techniques for holding and squeezing the cake decorating bag play a crucial role in achieving beautiful designs. Experiment with different tips and piping techniques to discover what works best for you. Don’t be afraid to get creative and try out new designs – the possibilities are endless when it comes to cake decorating.
Lastly, make sure to clean and store your cake decorating bags properly to ensure their longevity and reusability. By taking good care of your tools, you can continue honing your skills in cake decorating for years to come. With dedication and practice, you can become a true master in the art of using cake decorating bags.
Frequently Asked Questions
How Do You Load a Cake Decorating Bag?
Loading a cake decorating bag is a simple process that involves folding down the top of the bag, creating a cuff to hold onto. Then, spoon or pour the icing into the bag and gently push it down towards the tip. Once filled, unfold the cuff and twist the top of the bag to secure the icing inside.
How Do You Set Up a Disposable Piping Bag?
Setting up a disposable piping bag starts with cutting off the tip of the bag to fit your desired piping tip. Place your chosen tip in the cut end of the bag, making sure it fits snugly. Next, fold down some of the bag over your hand and use a spatula to fill it with icing, removing any air pockets.
How Do You Put Icing in a Piping Bag?
Putting icing in a piping bag begins by choosing which piping tip you want to use for decoration. After attaching the tip securely to the bag, scoop or spoon your icing into it, making sure not to overfill.
Gently push all of the icing towards the tip, being careful not to create air bubbles that could disrupt your decorating process. When full, twist and secure the open end of the bag to prevent any leaks while piping out decorations on your cakes or cupcakes.

Welcome to our cake decorating blog! My name is Destiny Flores, and I am the proud owner of a cake decorating business named Cake Karma. Our mission is to provide delicious, beautiful cakes for all occasions. We specialize in creating custom cakes that are tailored specifically to each customer’s individual needs and tastes.


