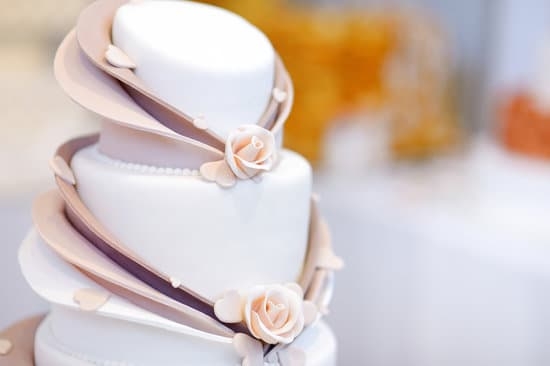
Are you looking to elevate your cake decorating skills? Learn how to make royal icing for decorating cakes, a versatile and essential tool in the world of baking. Royal icing is a classic decoration used by bakers and cake decorators alike for its smooth finish and ability to hold intricate designs. Made from simple ingredients like egg whites, powdered sugar, and lemon juice, royal icing is easy to whip up and perfect for creating stunning decorations on cakes.
Royal icing is ideal for decorating cakes because of its quick-drying nature, making it perfect for intricate details like borders, flowers, or lettering. Its smooth texture allows for clean lines and sharp edges, giving your cakes a professional touch. Whether you’re a beginner or an experienced baker, mastering the art of royal icing can take your cake decorating skills to the next level.
In this article, we will guide you through the essential ingredients needed to make royal icing from scratch. We will provide step-by-step instructions on how to achieve the perfect consistency for your icing and tips on coloring your royal icing effectively. From piping techniques to troubleshooting common issues, we will cover everything you need to know about working with royal icing to create stunning cake decorations.
Essential Ingredients for Making Royal Icing
Royal icing is a versatile and popular choice for decorating cakes due to its smooth finish and elegant appearance. In order to create the perfect royal icing for your cake decorating needs, it is essential to have the right ingredients at hand. These ingredients not only determine the texture and consistency of the icing but also play a crucial role in achieving the desired results.
Sugar
The main ingredient in royal icing is confectioners’ sugar, also known as powdered sugar or icing sugar. This finely ground sugar dissolves easily when mixed with liquid, creating a smooth and glossy finish on your decorated cakes.
Egg Whites
Another key component of royal icing is egg whites. Egg whites help give royal icing its signature hard and glossy finish when dried. It is important to use fresh egg whites that are free from any traces of yolk to prevent the icing from becoming yellowish in color.
Lemon Juice or Cream of Tartar
To stabilize the royal icing and prevent it from becoming too runny, a small amount of acid such as lemon juice or cream of tartar is often added. This helps the icing set and dry faster once piped onto the cake.
Including these essential ingredients in your recipe is crucial for creating a successful batch of royal icing for decorating cakes. By understanding their role and importance, you can ensure that your royal icing turns out just right every time, providing you with a beautiful canvas for your cake decorating creations.
Step-by-Step Instructions on How to Make Royal Icing From Scratch
Royal icing is a versatile and classic frosting that is commonly used for decorating cakes, cookies, and other baked goods. It dries to a smooth, hard finish, making it ideal for intricate designs and piped decorations. Learning how to make royal icing from scratch is essential for any aspiring baker or cake decorator. Here’s a step-by-step guide on creating this fundamental icing:
Gather Your Ingredients
To make royal icing from scratch, you will need some basic ingredients including confectioners’ sugar (also known as powdered sugar), pasteurized egg whites or meringue powder, and vanilla extract for flavor. You may also need some water to adjust the consistency of the icing as needed.
Mixing the Ingredients
Start by sifting your confectioners’ sugar to remove any lumps. In a clean mixing bowl, combine the sifted sugar with your chosen egg whites or meringue powder until well combined. Add a splash of vanilla extract for flavor. Gradually add water, a little at a time, while mixing until you reach your desired consistency.
Consistency Check
The key to successful royal icing is achieving the right consistency. For outlining and piping designs, you’ll want a thicker consistency that holds its shape when piped. To flood or fill in areas of your design, you’ll need a slightly thinner consistency that spreads smoothly without running off the edges.
Adjust the amount of water added to achieve these different consistencies. With these step-by-step instructions, you’ll be able to master the art of making royal icing for decorating cakes with ease.
Achieving the Perfect Consistency
Royal icing is a versatile and popular choice for decorating cakes due to its smooth texture and ability to harden quickly. Achieving the perfect consistency is crucial when working with royal icing, as it can greatly impact the outcome of your cake decorations.
To make royal icing for decorating cakes, you will need just a few key ingredients: egg whites or meringue powder, powdered sugar, and water. The proportions of these ingredients are essential in creating the right consistency for piping and decorating on your cakes.
When making royal icing from scratch, it is important to follow a precise recipe to ensure the desired texture and consistency. Begin by whisking the egg whites or meringue powder until frothy, then gradually add in the powdered sugar until stiff peaks form. If the icing is too thick, you can add small amounts of water to thin it out.
On the other hand, if the icing is too thin, you can incorporate additional powdered sugar to thicken it up. The key is to achieve a smooth and flowy consistency that holds its shape when piped onto the cake.
To test if your royal icing has reached the perfect consistency for decorating cakes, try running a knife through the icing in a bowl. If the line disappears within 15 seconds, your icing is likely too thin. Conversely, if the line remains visible after 15 seconds, your icing may be too thick. Making small adjustments by adding more powdered sugar or water can help you achieve that ideal balance for piping intricate designs on your cakes.
| Tips for Achieving Perfect Consistency | How to Make Royal Icing for Decorating Cakes |
|---|---|
| Follow a precise recipe when making royal icing | The proportions of ingredients are crucial in creating the right consistency |
| Test the consistency by running a knife through the icing | This simple test can help determine if adjustments are needed |
Coloring Your Royal Icing
When it comes to decorating cakes with royal icing, adding color is an essential step to creating visually stunning designs. There are various techniques you can use to color your royal icing, each with its own unique effects. Here are some popular methods for achieving vibrant and beautiful colored royal icing:
- Gel Food Coloring: Gel food coloring is the preferred choice for coloring royal icing as it doesn’t add extra liquid that can affect the consistency of the icing. Start by adding a small amount of gel coloring to your icing and mix well until you achieve the desired shade.
- Airbrushing: For a smooth and even color application, consider using an airbrush to paint your royal icing designs. Airbrushing allows for more intricate detailing and blending of colors, creating a professional finish on your cakes.
- Marbling: To create a marbled effect in your royal icing, simply drop different colored dots onto the surface of the icing and use a toothpick or skewer to swirl the colors together. This technique adds a beautiful marbled pattern that enhances the look of your cake decorations.
Experimenting with different coloring techniques can take your cake decorating skills to the next level and allow you to create unique and eye-catching designs. Whether you prefer bold and vibrant colors or subtle pastel shades, finding the right coloring method for your royal icing can elevate the overall look of your cake creations.
Remember, practice makes perfect when it comes to coloring royal icing. Don’t be afraid to try out new techniques and combinations to discover what works best for your decorating style. With patience and creativity, you’ll soon master the art of coloring royal icing for spectacular cake decorations that will impress everyone at any event or celebration.
Piping and Decorating With Royal Icing
One of the key tools for piping with royal icing is a piping bag. Disposable plastic or reusable cloth piping bags are both popular options. You’ll also need a variety of piping tips to achieve different effects – small round tips for fine lines, star tips for borders and rosettes, and petal tips for flower designs. Additionally, having a coupler can make it easier to switch between tips without changing the entire bag of icing.
When it comes to techniques for creating beautiful designs with royal icing, practice makes perfect. Start by practicing basic lines and shapes on parchment paper before moving on to decorating your baked goods. Consistent pressure is crucial when piping with royal icing – too much pressure could cause the icing to come out too quickly, while too little pressure may result in uneven lines. Experiment with different tip sizes and styles to see what works best for your desired design.
Remember that patience is key when working with royal icing. Allow each layer of icing to dry completely before adding additional decorations on top. This will help prevent smudging or blending of colors. With practice and the right tools, you can master the art of piping and decorating with royal icing to create stunning edible creations for any occasion.
Troubleshooting Common Royal Icing Issues
Royal icing is a versatile and popular choice for decorating cakes due to its smooth finish and ability to harden, making it ideal for intricate designs. However, like any baking endeavor, there are common issues that may arise when working with royal icing. Here are some tips for troubleshooting these problems and how to fix them:
- Issue: Royal icing is too runny
- Issue: Royal icing is too stiff
- Issue: Royal icing won’t dry or harden
If your royal icing is too runny, it may not hold its shape when piped onto your cake or cookies. To fix this issue, try adding more powdered sugar gradually until the icing reaches the desired consistency. Be careful not to add too much sugar at once, as this can make the icing too thick.
If your royal icing is too stiff, it can be difficult to pipe and may result in uneven designs. To remedy this problem, slowly incorporate small amounts of water or liquid food coloring into the icing until it loosens up. Be cautious not to add too much liquid too quickly as it can make the icing too thin.
If your royal icing seems to take forever to dry or remains tacky even after several hours, humidity may be a factor. To help speed up the drying process, place your decorated cakes or cookies in a cool, dry area with good airflow. Additionally, you can add meringue powder or cream of tartar to help stabilize the royal icing and promote faster drying.
Remember that practice makes perfect when working with royal icing for decorating cakes. By following these troubleshooting tips and adjusting your technique accordingly, you’ll be able to achieve stunning results with your royal icing creations.
Storing and Caring for Your Royal Icing
Royal icing is a versatile and essential component in cake decorating, known for its smooth texture and ability to harden into firm designs. However, storing and caring for royal icing properly is crucial to maintain its quality for future use. Whether you have leftover icing from a decorating project or want to prepare a batch in advance, understanding the best practices for storing royal icing can help you save time and resources.
To store royal icing effectively, it is important to transfer it to an airtight container as soon as possible after preparing it. Make sure to cover the surface of the icing with plastic wrap directly touching the surface to prevent air exposure, which can cause the icing to dry out and become unusable. Additionally, consider adding a few drops of lemon juice or glycerin to help preserve the consistency of the icing while stored.
When storing royal icing, keep it in a cool, dry place away from direct sunlight and heat sources. Avoid refrigerating royal icing as it can cause condensation when brought back to room temperature, affecting its texture and consistency. If stored properly, royal icing can last for up to 2 weeks at room temperature or even longer if kept in the freezer. Remember to thaw frozen royal icing gradually in the refrigerator before bringing it back to room temperature for use.
Properly storing and caring for your royal icing not only ensures its longevity but also saves you time and effort when you need it for future decorating projects. By following these guidelines on how to store your icing effectively, you can preserve the quality of your royal icing and continue creating stunning decorations for your cakes with ease.
Creative Uses for Royal Icing Beyond Cake Decorating
Royal icing isn’t just limited to decorating cakes; it can be a versatile tool in your kitchen for creating edible decorations and other sweet treats. Once you’ve mastered the art of making royal icing for cake decorating, you can explore its creative potential for various culinary projects.
One creative use for leftover royal icing is making intricate sugar cookies. With the help of different piping tips and techniques, you can pipe beautiful designs on sugar cookies before baking them. The royal icing acts as both decoration and adhesive, making it perfect for creating detailed and colorful cookie designs that are sure to impress.
Another fun idea is using royal icing to make edible 3D decorations like flowers, butterflies, or even small sculptures. By piping layers of royal icing onto wax paper or parchment in desired shapes and letting them dry completely, you can create delicate and intricate edible embellishments to adorn your cakes, cupcakes, or desserts.
The possibilities are endless when it comes to using royal icing beyond traditional cake decorating. Experimenting with different colors, textures, and designs can lead to stunning edible creations that will elevate any dessert spread.
In conclusion, mastering the art of making royal icing opens up a world of creative possibilities beyond simply decorating cakes. Whether you’re making elaborate sugar cookies, crafting edible embellishments, or experimenting with new techniques, royal icing is a versatile tool that allows you to express your creativity in the kitchen.
So next time you have leftover royal icing from a cake decorating project, don’t let it go to waste – get creative and explore all the exciting ways you can use this delightful confection in your culinary adventures.
Frequently Asked Questions
What Three Ingredients Is Royal Icing Made Of?
Royal icing is typically made of just three ingredients: powdered sugar, egg whites (or meringue powder), and water. The powdered sugar provides the sweetness and structure, while the egg whites or meringue powder help create a smooth consistency. Water is added as needed to achieve the desired thickness for decorating.
Can You Use Royal Icing to Decorate a Cake?
Yes, royal icing can definitely be used to decorate a cake. It is a popular choice for creating intricate designs, piping borders, and adding texture to cakes. The smooth finish of royal icing once it sets makes it ideal for creating detailed decorations on cakes like flowers, letters, or even lace patterns.
What Is the Difference Between Royal Icing and Decorating Icing?
The main difference between royal icing and decorating icing lies in their ingredients and uses. Royal icing is typically made with just powdered sugar, egg whites (or meringue powder), and water, resulting in a firm consistency when dried.
On the other hand, decorating icing usually involves butter or shortening mixed with powdered sugar and flavorings, resulting in a creamier consistency better suited for spreading on cakes or cookies before they are served. Royal icing is often used more for intricate designs and decorations that need to hold their shape without softening over time.

Welcome to our cake decorating blog! My name is Destiny Flores, and I am the proud owner of a cake decorating business named Cake Karma. Our mission is to provide delicious, beautiful cakes for all occasions. We specialize in creating custom cakes that are tailored specifically to each customer’s individual needs and tastes.


