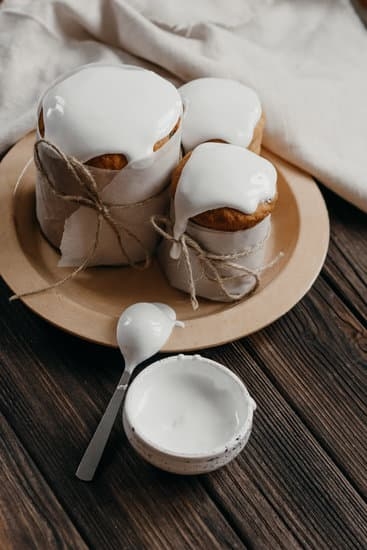
When it comes to creating a visually stunning cake, decorations play a vital role in elevating the overall look and wow factor. One of the most beautiful and versatile ways to adorn cakes is by using ice decorations. In this article, we will delve into the intricacies of how to make ice decorations for cakes, transforming your baked creations into edible works of art.
Ice decorations are not only aesthetically pleasing but also add a touch of elegance and creativity to any cake. These delicate adornments can range from simple swirls and shapes to intricate flowers and letters, enhancing the beauty of your dessert masterpiece. Whether you’re decorating a birthday cake, wedding cake, or any special occasion cake, ice decorations are sure to impress your guests and leave them marveling at your culinary skills.
To embark on this creative journey of ice decorating, you will need essential supplies such as piping bags, tips, food coloring, and parchment paper. These tools will enable you to craft unique designs and patterns that will take your cake decoration game to the next level. So gather your supplies and get ready to explore the endless possibilities of ice decorations for cakes in our detailed guide ahead.
Supplies Needed
When it comes to creating beautiful and eye-catching decorations for cakes, having the right supplies is essential. To make stunning ice decorations for cakes, you will need a few key tools and materials. First and foremost, you will need piping bags to hold the icing for decorating. Piping bags come in different sizes and can be disposable or reusable, so choose the ones that best suit your needs.
In addition to piping bags, you will also need various piping tips to create different designs and shapes. From small round tips for intricate details to larger star tips for rosettes and shells, having a variety of tips on hand will allow you to explore endless decorating possibilities. Don’t forget about food coloring – whether using gel coloring for vibrant hues or natural food coloring options for a more subtle palette, color is crucial when creating visually appealing ice decorations.
Lastly, parchment paper is a must-have item when making ice decorations for cakes. Parchment paper can be used to practice piping designs before transferring them onto the cake, as well as providing a non-stick surface for drying the decorations. With these essential supplies at your disposal, you’ll be well on your way to making stunning ice decorations that will take your cakes to the next level.
Types of Decorations
Ice decorations for cakes can truly take your cake decorating skills to the next level by adding intricate and visually appealing designs. When it comes to creating ice decorations, the possibilities are endless. One popular type of decoration is making beautiful flowers out of icing. Whether you opt for simple rosettes or more elaborate petals, floral decorations can add a touch of elegance to any cake.
In addition to flowers, leaves are another common ice decoration that can enhance the overall look of a cake. Leaves can be piped in various shades of green to mimic different types of foliage, providing a natural and refreshing element to your cake design. The versatility of leaf decorations allows you to get creative with placement and patterns on your cakes.
For those looking for more whimsical and playful designs, swirls and letters made out of icing can add a fun and personalized touch to cakes. Swirls can be used to create abstract patterns or borders around the edges of a cake, while letters allow you to spell out messages or names for special occasions. Mastering these different types of decorations requires practice and patience, but the end result is well worth the effort.
| Types of Decorations | Description |
|---|---|
| Flowers | Beautiful floral designs ranging from simple rosettes to intricate petals. |
| Leaves | Natural-looking foliage created with varying shades of green icing. |
| Swirls & Letters | Whimsical designs like swirls for abstract patterns and letters for personalization. |
Preparation
When it comes to creating beautiful ice decorations for cakes, proper preparation of the icing is key. Without the right consistency, your decorations may not hold their shape or achieve the desired look. Here is a step-by-step guide on how to prepare the icing for decoration and some tips on achieving the perfect consistency:
- Start by gathering all your supplies, including piping bags, tips, food coloring, and parchment paper.
- Choose the type of icing you want to use – buttercream, royal icing, or fondant – based on your design preferences.
- If using buttercream or royal icing, make sure to sift powdered sugar before starting to avoid any lumps in the mixture.
- Follow the recipe instructions carefully when mixing your icing ingredients together. Add liquid (like milk or water) gradually until you reach the desired thickness.
One essential tip for achieving the right consistency is testing it out before decorating your cake. The icing should be smooth and not too runny or too thick. When lifting a spoonful of icing, it should create a soft peak that holds its shape but still slightly falls back into itself. Adjust by adding more liquid if too thick or more powdered sugar if too thin.
To ensure that your ice decorations turn out beautifully, take your time in preparing the icing with the right consistency as this will greatly impact the final result on your cake. In the next section, we will delve into various piping techniques that can help you bring your cake decorations to life with precision and finesse.
Piping Techniques
To make ice decorations for cakes using piping techniques, you will need a few key tools, including piping bags, tips, and couplers. Piping bags can be filled with icing in various colors to create multi-toned designs, while different tips can be used to achieve specific shapes and effects.
For example, a star tip is perfect for creating rosettes and swirls, while a round tip works well for writing letters or outlining shapes. By experimenting with different tips and techniques, you can customize your cake decorations to suit any occasion or theme.
When using piping techniques to create ice decorations for cakes, consistency is key. The icing should be smooth and pliable enough to flow easily through the piping bag without being too runny or too stiff. To achieve the right consistency, adjust the amount of liquid in your icing recipe accordingly. Practice makes perfect when it comes to mastering piping techniques, so don’t be afraid to experiment and have fun creating unique designs on your cakes using piped icing.
Coloring Ice
Coloring the icing for your cake decorations is a crucial step in creating visually appealing and vibrant designs. Gel food coloring is a popular choice among bakers due to its concentrated formula, which allows for achieving vibrant shades without altering the consistency of the icing.
It comes in a wide range of colors, providing endless possibilities for creative decorations. For those looking for natural alternatives, there are various options available such as fruit and vegetable powders, matcha powder, spirulina, beet powder, and turmeric.
When using gel food coloring for your ice decorations, start by adding a small amount at a time until you reach the desired hue. Remember that you can always add more color but cannot take it away once it’s mixed in.
To prevent the icing from thinning out too much with added liquid colorings, opt for gel or paste forms that are more concentrated. Natural food coloring options are an excellent choice for those looking to avoid artificial additives in their decorations while still achieving beautiful hues.
Experiment with different color combinations and techniques to create unique and eye-catching ice decorations for your cakes. Whether you prefer bold and bright colors or subtle pastel tones, mastering the art of coloring icing will allow you to customize your designs according to various themes or occasions. By incorporating these tips into your cake decorating process, you can elevate your creations and impress your friends and family with stunning desserts.
| Gel Food Coloring | Natural Food Coloring Options |
|---|---|
| Concentrated formula | Fruit and vegetable powders |
| Wide range of colors | Matcha powder |
| No alteration of consistency | Spirulina |
Storing Ice Decorations
Proper Storage Techniques
Once you have created your beautiful ice decorations for cakes, it is essential to store them properly to maintain their shape, color, and texture until you are ready to use them. One of the key factors in storing ice decorations is ensuring they are kept in a dry and cool environment. Moisture can cause the decorations to lose their firmness and vibrant colors, so it is crucial to prevent any exposure to humidity.
Container Options
When storing ice decorations, consider using airtight containers or zip-top bags to protect them from air and moisture. Ensure that the container is clean and dry before placing the decorations inside. You can also layer parchment paper between each decoration to prevent them from sticking together or getting damaged during storage. For larger decorations, consider using a shallow container with enough space to accommodate them without overcrowding.
Freezing Decorations
If you need to store your ice decorations for an extended period or want to prepare them in advance, freezing is a great option. Place the decorations on a baking sheet lined with parchment paper and freeze them until solid.
Once frozen, transfer them into an airtight container or zip-top bag before putting them back in the freezer. When you are ready to use the decorations, allow them to thaw in the refrigerator before applying them onto your cake for best results.
Application
Applying ice decorations onto cakes is the final step in creating a visually stunning and delicious masterpiece. It is important to approach this step with care and precision to ensure that the decorations enhance the overall look of the cake.
To begin, make sure that your cake is fully prepared and ready for decoration. Whether you’re working on a freshly baked cake or one that has been chilled, ensure that the surface is clean and flat to provide a smooth canvas for your ice decorations.
When to Add Ice Decorations
One crucial tip when applying ice decorations onto cakes is knowing when to add them during the decorating process. For larger and more intricate designs, it’s best to apply the ice decorations after frosting the entire cake.
This allows you to control the placement of each decoration without disrupting the frosting underneath. On the other hand, if you’re using simple decorations like piped rosettes or leaves, you can add them as you go while frosting the cake layer by layer.
Techniques for Applying Ice Decorations
There are several techniques that can be used to apply ice decorations onto cakes effectively. For flat decorations like flowers or leaves, gently press them onto the frosted surface of the cake using a light touch.
If you’re working with three-dimensional decorations or intricate designs, consider using a pair of tweezers or toothpicks to carefully place them in position. Remember to take your time and handle the decorations delicately to avoid any damage or smudges on your beautiful creations.
Conclusion
In conclusion, ice decorations can truly take a cake from ordinary to extraordinary, adding a touch of elegance and creativity that will impress any guest or recipient. The key points discussed in this blog post emphasize the importance of visually appealing decorations on cakes and how ice decorations play a vital role in enhancing the overall look of a cake. By following the outlined steps, anyone can learn how to make ice decorations for cakes and elevate their baking game.
Remember, when it comes to creating ice decorations for cakes, having the right supplies and knowing the different types of decorations you can make is crucial. From flowers to leaves, swirls to letters, the possibilities are endless. Experiment with various piping techniques like rosettes, shells, and zigzags to create intricate designs that will stand out on any cake. Don’t be afraid to play with color using gel food coloring or natural options to achieve vibrant and attractive decorations.
Lastly, storing your ice decorations properly and knowing how to apply them onto cakes at the right time are essential tips for achieving stunning results. So don’t hesitate to get creative with your ice decorations and let your imagination run wild.
Whether it’s for a birthday celebration, wedding event, or just a special treat for yourself, mastering the art of making ice decorations for cakes will surely add a beautiful finishing touch to your baked creations. So go ahead, unleash your inner pastry artist and start decorating.
Frequently Asked Questions
How Do You Make Fake Ice at Home?
Making fake ice at home can be a fun and creative project. One way to do this is by using silicone molds and clear resin to create realistic-looking fake ice cubes. Simply mix the resin according to the instructions, pour into the molds, and allow them to set before popping them out.
What Can I Use for Ice Cubes on a Cake?
When it comes to decorating cakes, there are several options for creating ice cubes without using real ice. One common method is to use fondant or gum paste to mold small cubes that resemble real ice. These can be tinted with food coloring for a more realistic look or left white for a classic touch.
How Do You Make Decorative Ice Cubes?
Creating decorative ice cubes can add an extra special touch to your drinks or cocktails. One way to make them is by freezing edible flowers, herbs, or fruit slices inside the ice cubes.
Simply fill an ice cube tray halfway with water, add the decorative element, freeze partially, then top off with more water before freezing completely. This will give you beautiful and unique decorative ice cubes for any occasion.

Welcome to our cake decorating blog! My name is Destiny Flores, and I am the proud owner of a cake decorating business named Cake Karma. Our mission is to provide delicious, beautiful cakes for all occasions. We specialize in creating custom cakes that are tailored specifically to each customer’s individual needs and tastes.


