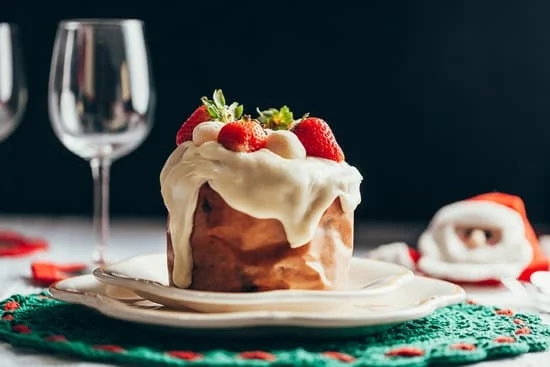
Decorative carrots on a cake can add a playful and whimsical touch to any dessert, making it visually appealing and impressive. In this article, we will delve into the art of creating these eye-catching elements that can take your cake decorating skills to the next level.
Whether you are a seasoned baker looking to try something new or a beginner wanting to experiment with fondant, this step-by-step guide will help you master the technique of making decorative carrots.
To create these charming decorations, you will need a few essential tools and ingredients such as fondant, food coloring, piping bags, and more. The detailed list provided in the following sections will ensure that you have everything necessary to bring your carrot-shaped creations to life. From shaping the fondant into carrot bases to adding intricate details like shading and lines, each step is crucial in achieving realistic-looking decorative carrots on your cake.
Not only will this tutorial walk you through the process of crafting these delightful edible decorations, but it will also offer creative alternatives for incorporating decorative carrots into various cake designs. Whether using marzipan or modeling chocolate, there are different methods to explore when adding a touch of whimsy to your desserts. Stay tuned as we unlock the secrets to making stunning decorative carrots that will leave everyone impressed at your next gathering.
Tools and Ingredients
To create decorative carrots on a cake, you will need a variety of tools and ingredients to bring your vision to life. Here is a detailed list of everything you’ll need:
- Fondant: Use orange fondant to shape the carrot base and green fondant for the carrot tops.
- Food coloring: Orange, green, and any additional colors you may want for detailing.
- Piping bags: These will come in handy when shaping the fondant into carrot shapes and adding intricate details.
- Leaf-shaped cutter: To create realistic-looking greens for the decorative carrots.
- Small brushes: For painting details like shading and lines onto the carrots.
- Rolling pin: Essential for rolling out the fondant to the right thickness for shaping.
Once you have gathered all your tools and ingredients, follow these step-by-step instructions on how to make decorative carrots on a cake. Start by creating the carrot base, then move on to making the green carrot tops. Remember to pay attention to texture, color, and details as you bring these mini masterpieces to life.
Next, it’s time to paint details onto your decorative carrots using food coloring and small brushes. This step will add depth and realism to your creation, making them look almost good enough to eat. Lastly, assemble all the pieces together on top of your cake for a show-stopping finish that will impress anyone who lays eyes on it.
Experiment with different techniques and designs to make your decorative carrots truly unique and eye-catching. With this guide, you’ll be well on your way to mastering the art of creating stunning edible decorations for cakes that are sure to wow any crowd.
Making the Carrot Base
Making decorative carrots on a cake can seem like a daunting task, but with the right techniques and a bit of practice, you can create stunning edible decorations that will wow your guests. To start, you will need some key tools and ingredients.
Gather fondant in orange for the carrot base, green fondant for the leaves, food coloring in various shades, piping bags, small brushes, and a leaf-shaped cutter. These items will help you achieve the lifelike look of decorative carrots on your cake.
To begin shaping the carrot base, roll out the orange fondant into small balls. Then, using your fingers or a rolling pin, shape each ball into a conical shape resembling a carrot. Make sure to taper one end to create that classic carrot shape.
The texture of the fondant is crucial here – it should be pliable enough to mold but not too sticky or soft that it loses its form. Adding a touch of tylose powder to your fondant can help give it more elasticity for shaping.
When it comes to color, achieving the perfect shade of orange is essential for realistic-looking carrots. You can mix red and yellow food coloring until you reach the desired hue.
Remember that less is often more when adding food coloring, so do so gradually until you achieve the right color. Once you have shaped and colored all your carrot bases, set them aside to dry and firm up before moving on to creating the green tops in the next step of how to make decorative carrots on a cake.
| Tools and Ingredients | Details |
|---|---|
| Fondant | Orange for carrot base, green for leaves |
| Food Coloring | Red and yellow for orange fondant; Green for leaves |
| Piping Bags | To pipe details on carrots |
| Small Brushes | To paint detailed lines and shading on carrots |
Creating the Carrot Greens
When it comes to creating the green carrot tops for your decorative carrots on a cake, using green fondant and a leaf-shaped cutter is key. Start by rolling out your green fondant to a thin, even layer. This will ensure that your carrot tops look realistic and delicate. Once you have rolled out the fondant, use a leaf-shaped cutter to create small leaves that will mimic the look of carrot greens.
After using the cutter to shape the leaves, gently press down on one end of each leaf with your finger to create a more natural curvature. This simple step will add dimension and elegance to your carrot tops. To further enhance the realism, you can also use a veining tool to create subtle lines on each leaf, mimicking the texture of real carrot greens.
Once you have created all of your green fondant leaves, allow them to dry slightly before attaching them to the carrots. This will make it easier to handle them without losing their shape. When attaching the carrot tops to the base of each carrot, use a small dab of edible glue or water as adhesive.
Carefully press the greens onto the top of each carrot and gently adjust them until they are securely in place. The end result will be beautiful and lifelike decorative carrots that are sure to impress anyone who sees them on your cake.
Painting Details
Decorative carrots are a whimsical addition to any cake, adding a fun and colorful touch that can truly elevate the overall presentation. One of the key aspects of creating realistic-looking decorative carrots is in the painting details. By adding shading and lines using food coloring and small brushes, you can make your carrots look truly lifelike.
To start off, here is a list of tools and ingredients you will need for this step:
- Food coloring in orange, brown, and green hues
- Small paint brushes in varying sizes
- Clean, small containers for mixing colors
- A steady hand and attention to detail
Once you have gathered your supplies, it’s time to add those final touches to your decorative carrots. Start by mixing a small amount of brown food coloring with orange to create a slightly darker shade for the tip of the carrot. Using a fine-tipped brush, carefully add the shading to the pointed end of each carrot. Next, use a lighter orange shade to create lines along the body of the carrot to mimic its natural texture.
Be sure to work slowly and deliberately to achieve a realistic look. Finally, mix green food coloring with a touch of yellow to create a vibrant hue for painting the carrot greens at the top of each fondant piece. With careful strokes, add detail and dimension to these leafy tops to complete your decorative carrots.
By paying attention to these painting details, you can take your decorative carrots from simple fondant shapes to realistic-looking elements that will impress all who see them on top of your beautifully decorated cake. With practice and patience, mastering this technique will allow you to enhance your cake decorating skills and bring your creations to life in ways you never thought possible.
Assembly
To assemble the decorative carrots on top of a cake, follow these simple steps to create a visually striking and delicious masterpiece.
Gather Your Decorative Carrots
After successfully crafting your fondant carrots and green carrot tops, it’s time to gather them all together for assembly. Place each carrot strategically around the perimeter of the cake, ensuring they are evenly spaced out for a cohesive look. Consider varying the heights of the carrots for added visual interest.
Placing the Green Carrot Tops
Carefully place the green fondant carrot tops on each carrot base, gently pressing them into position to secure them in place. This step adds a realistic touch to your decorative carrots and enhances the overall appearance of your cake design. Feel free to angle some of the greens slightly to create a more dynamic effect.
Final Arrangements and Finishing Touches
Once all the decorative carrots are in place on top of the cake, take a step back and assess the overall presentation. Make any final adjustments as needed to ensure a balanced and harmonious display. Consider adding additional decorations such as edible flowers or small fondant bugs to complement the theme. Finally, stand back and admire your beautiful creation – you now have a stunning display of decorative carrots adorning your cake.
By following these simple steps for assembly, you can easily create a show-stopping dessert that will leave everyone amazed at your artistic skills and attention to detail. Remember, practice makes perfect, so don’t be afraid to experiment with different designs and techniques to find what works best for you when creating decorative carrots on a cake.
Alternatives
Creating decorative carrots on a cake can add a fun and unique touch to your desserts. While fondant is a popular choice for making these edible decorations, there are alternative options that can be explored. One such option is using marzipan, which is a sweet almond paste commonly used in baking and confectionery.
Marzipan can be easily shaped into carrot forms and tinted with food coloring to achieve the desired orange hue. It offers a slightly different taste and texture compared to fondant, adding variety to your cake decorating repertoire.
Another alternative to fondant for creating decorative carrots on a cake is modeling chocolate. This type of chocolate is made by combining melted chocolate with corn syrup, resulting in a pliable and moldable mixture that can be shaped into various designs.
To make modeling chocolate carrots, simply color the chocolate with orange food dye, then mold it into carrot shapes with a pointed tip and textured surface. The advantage of using modeling chocolate is that it has a delicious taste and smooth texture that complements the cake layers well.
When exploring alternatives for creating decorative carrots on cakes, it’s important to consider your personal preferences as well as the overall aesthetic you want to achieve. Both marzipan and modeling chocolate offer unique characteristics that can enhance the visual appeal of your dessert creations. Experimenting with different materials will not only expand your skills in cake decorating but also provide you with options to cater to different tastes and preferences when serving your beautifully decorated carrot cakes.
| Decorative Carrot Alternatives | Description |
|---|---|
| Marzipan | Sweet almond paste that can be shaped and tinted |
| Modeling Chocolate | Melted chocolate mixed with corn syrup for easy shaping |
Final Touches
In conclusion, adding decorative carrots to a cake can truly take your baking skills to the next level. With the right tools, ingredients, and techniques, you can create a stunning display of realistic-looking carrots that will wow your guests. Whether you’re a beginner or an experienced baker, this creative and fun project is sure to elevate any dessert.
By following the step-by-step instructions outlined in this article, you can learn how to make decorative carrots on a cake with ease. From shaping the fondant into carrot shapes to adding intricate details with food coloring, each stage of the process plays a crucial role in achieving a professional and impressive final result.
So next time you’re looking to add a special touch to your cakes, consider incorporating these decorative carrots. Not only are they visually appealing, but they also showcase your attention to detail and creativity in the kitchen. With practice and patience, you’ll soon master the art of decorating cakes with beautiful and lifelike carrot decorations.
Frequently Asked Questions
How to Make Carrot Decorations for a Cake?
One way to make carrot decorations for a cake is by using fondant or modeling chocolate. You can shape and mold these materials into realistic-looking carrots, which can then be placed on top of the cake as a decorative element.
How to Make Carrots on Top of Cake?
Making carrots on top of a cake can be done using various methods. One common approach is to use buttercream frosting in orange color to pipe out elongated shapes resembling carrots. Green buttercream can be used for the carrot tops. Another option is to create marzipan or fondant carrots and place them strategically on the cake.
How Do You Grate Carrots for a Cake?
Grating carrots for a cake requires clean and peeled carrots and a grater with medium-sized holes. Simply hold the carrot firmly and run it along the grater in a downward motion. Be cautious towards the end of the carrot to avoid grating your fingers. The grated carrots can then be used in your cake recipe, adding moisture and sweetness.

Welcome to our cake decorating blog! My name is Destiny Flores, and I am the proud owner of a cake decorating business named Cake Karma. Our mission is to provide delicious, beautiful cakes for all occasions. We specialize in creating custom cakes that are tailored specifically to each customer’s individual needs and tastes.


