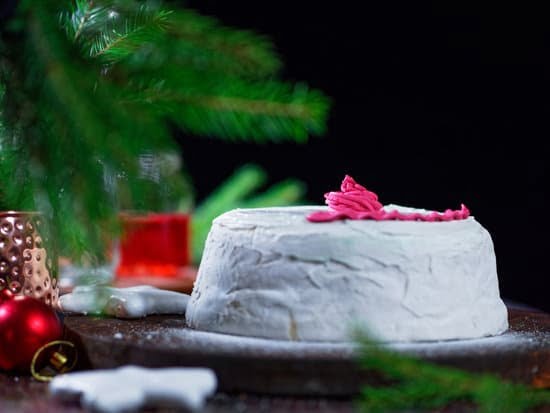
Are you looking to take your cake decorating skills to the next level? In this article, we’ll show you how to make cake decorations with royal icing, a versatile and popular choice for creating stunning designs on baked goods. Royal icing is a type of icing that dries hard and is perfect for intricate details and delicate decorations on cakes, cookies, and other desserts.
Royal icing is not only used for decorative purposes but also as an adhesive for assembling gingerbread houses and securing cake tiers. This makes it an essential component in the world of baking and confectionery. Understanding how to work with royal icing can open up a whole new realm of possibilities when it comes to customizing your baked creations.
In this comprehensive guide, we will cover everything from understanding the basics of royal icing and its essential tools and ingredients needed, to step-by-step instructions on making the perfect royal icing for cake decorations. We’ll also explore different piping techniques, coloring and flavoring tips, creating different decorations such as flowers, leaves, borders, and other decorative elements with royal icing.
Finally, we will address proper methods for drying and storing royal icing decorations as well as common issues and troubleshooting when working with this versatile medium. Whether you’re a novice or experienced baker, this article will provide you with all the information you need to master the art of making cake decorations with royal icing.
Understanding the Basics
When it comes to making cake decorations with royal icing, having the right tools and ingredients is essential for success. Here are the basic essentials you’ll need to have on hand before starting your royal icing decorating journey:
Essential Tools
To get started, you will need piping bags, piping tips (such as round tips, star tips, leaf tips), a frosting spatula or offset spatula for spreading and smoothing royal icing, a flower nail for creating intricate floral decorations, and parchment paper or silicone mats for drying your creations.
Ingredients
The key ingredients for making royal icing include egg whites or meringue powder, confectioners’ sugar (also known as powdered sugar), and water. These simple ingredients create the smooth and versatile royal icing that is perfect for decorating cakes and cookies.
Tips for Success
When working with royal icing, it’s important to ensure that all of your tools and equipment are clean and free from any grease or residue. This will help the royal icing to adhere properly and maintain its structure as it dries. Additionally, using gel food coloring instead of liquid food coloring can prevent the royal icing from becoming too thin or watery.
By having these essential tools and ingredients on hand and following these simple tips, you’ll be well-prepared to start creating beautiful cake decorations using royal icing. In the next section, we’ll dive into the step-by-step process of actually making the royal icing itself.
Making Royal Icing
Royal icing is a versatile and popular decorating medium for cakes, cookies, and other confections. It’s made from just three simple ingredients: powdered sugar, egg whites, and cream of tartar. The result is a smooth, glossy icing that hardens to a beautiful finish, making it perfect for intricate designs and decorations.
Step 1: Gather Your Ingredients
To make royal icing, you’ll need powdered sugar (also known as confectioner’s sugar), egg whites or meringue powder, and cream of tartar. Make sure your tools and mixing bowls are clean and free of any grease, as this can affect the consistency of your royal icing.
Step 2: Mix It Up
Start by whisking the egg whites or meringue powder with a little bit of water until frothy. Then add the cream of tartar to stabilize the mixture. Gradually add the powdered sugar while continually mixing until stiff peaks form. If the icing is too thick, you can add a few drops of water to thin it out. Be careful not to overmix, as this can create air bubbles in the icing.
Step 3: Consistency Is Key
Depending on what you’re using the royal icing for, you’ll need to adjust its consistency. For piping decorations like flowers or intricate designs, you’ll want a thicker consistency. If you’re flooding cookies or creating a smooth surface, a slightly thinner consistency is ideal. Add small amounts of water to thin out the icing as needed.
Once you’ve mastered making royal icing, you’ll have a world of cake decorating possibilities at your fingertips. From delicate flowers to intricate borders and personalized designs, royal icing is a fantastic way to elevate your baked creations with professional-looking decorations that are sure to impress.
Piping Techniques
When it comes to cake decorating with royal icing, mastering different piping techniques is essential for creating intricate designs and patterns. Whether you’re a beginner or a seasoned baker, learning how to use different piping tips can take your cake decorations to the next level. Here are some popular piping techniques to try:
- Round Piping Tip: This tip is perfect for creating outlines, writing messages, or filling in large areas on your cake decorations. It’s versatile and can be used for both fine lines and broader strokes.
- Star Piping Tip: The star tip creates beautiful rosettes, stars, swirls, and shells. It adds texture and dimension to your decorations and is great for borders and adding accents to your cakes.
- Leaf Piping Tip: As the name suggests, this tip is ideal for creating realistic-looking leaves for floral decorations. By varying pressure while piping, you can create natural-looking veining on the leaves.
Mastering these piping techniques may take practice, but once you get the hang of it, you’ll be able to create countless designs and patterns on your cakes using royal icing.
In addition to mastering different piping tips and techniques, it’s important to understand how to hold the pastry bag correctly for smooth and consistent piping. Holding the bag at a 45-degree angle ensures better control over the flow of icing, while applying even pressure with steady hand movements helps maintain uniformity in your designs.
Lastly, practicing on parchment paper or wax paper before decorating your actual cake allows you to experiment with different designs without the fear of making mistakes. This also gives you a chance to perfect your technique before committing to decorating your final cake. With patience and practice, you’ll soon be able to create stunning royal icing cake decorations using various piping techniques.
Coloring and Flavoring
In terms of flavoring, pure extracts such as vanilla, almond, or citrus are popular choices for enhancing the taste of royal icing. Add just a small amount at a time while mixing the icing until you reach your preferred flavor intensity. It’s important to note that too much liquid can change the consistency of the icing, so use flavorings sparingly. Another option for adding flavor is incorporating fruit zest or flavored powders into the icing for a unique twist.
For special occasions or themed cakes, matching the color and flavor of the royal icing decorations to the overall theme can elevate the visual impact and overall experience of the dessert. With these tips on coloring and flavoring royal icing, you can take your cake decorating skills to the next level and create stunning edible works of art that not only look beautiful but taste delicious too.
Whether you’re making simple designs or intricate patterns with royal icing, experimenting with different colors and flavors can enhance your creations and impress your friends and family with your baking prowess. With some practice and creativity, you’ll be able to master how to make cake decorations with royal icing that not only look amazing but also delight the taste buds.
Creating Different Decorations
Royal icing is the perfect medium for creating intricate and beautiful decorations for cakes. With just a few simple techniques, you can make stunning flowers, leaves, borders, and other decorative elements that will impress your friends and family. In this section, we will provide detailed tutorials on how to create these different decorations using royal icing.
One of the most popular decorations made with royal icing is flowers. To make royal icing flowers, you will need a flower nail, parchment paper squares, a piping bag fitted with a small round tip, and of course, colored royal icing.
Start by piping a small dot in the center of the flower nail, then pipe petals around the dot in a circular motion. Once you have piped all the petals, carefully transfer the parchment paper square with the piped flower onto a baking sheet and allow it to dry completely.
In addition to flowers, royal icing can also be used to create delicate leaves and intricate borders for cakes. To make leaves, use a leaf tip in your piping bag to create realistic-looking foliage. For borders, experiment with different piping tips and techniques to add an elegant touch to your cake. By mastering these basic techniques for creating different decorations with royal icing, you can elevate your cake decorating skills and impress everyone with your creations.
| Decorations | Tools Needed |
|---|---|
| Flowers | Flower nail, parchment paper squares, piping bag fitted with a small round tip |
| Leaves | Piping bag fitted with a leaf tip |
| Borders | Variety of piping tips for different border designs |
Drying and Storage
Royal icing decorations can add a touch of elegance and artistry to any cake, but proper drying and storage is essential to ensure their longevity. After all the hard work put into creating these delicate decorations, it would be disappointing for them to become soft or lose their shape. Here’s how you can ensure that your royal icing decorations stay intact and beautiful.
Firstly, it is important to allow the royal icing decorations to dry fully before using them to decorate a cake. This typically takes around 24 hours, depending on the size and thickness of the decorations. Place the decorations on a flat surface in a cool, dry place with good air circulation. Avoid placing them in the refrigerator or freezer as the moisture can cause the royal icing to become sticky or discolored.
Once the royal icing decorations are completely dry, they should be stored properly to maintain their quality. It is best to store them in an airtight container at room temperature, away from direct sunlight. Placing a sheet of parchment paper between layers of decorations will prevent them from sticking together and getting damaged.
Additionally, storing royal icing decorations in a cool environment will help preserve their shape and prevent them from melting or becoming too fragile. Taking these precautions will ensure that your royal icing decorations are ready to use whenever you need them and will retain their beauty for an extended period of time.
| Drying Time | 24 Hours |
|---|---|
| Storage Method | Airtight container at room temperature |
| Storage Location | Away from direct sunlight |
| Precaution | Cool environment for storage |
Troubleshooting
When working with royal icing for cake decorations, it’s important to be prepared for potential issues that may arise during the decorating process. Here are some common problems you may encounter and how to fix them:
1. Runny icing: If your royal icing is too runny, it may not hold its shape when piped onto the cake. This can be caused by adding too much liquid when making the icing. To fix this issue, you can gradually add more powdered sugar to thicken the icing to the desired consistency.
2. Clogged piping tips: Sometimes, small pieces of dried icing can clog up the piping tips, making it difficult to create clean lines and designs. To prevent this, always cover your royal icing bowls with a damp cloth when not in use, and use a piping bag tie or twist tie at the end of your piping bag to keep the icing from drying out and clogging the tip.
3. Cracks in decorations: If you notice cracks forming in your royal icing decorations as they dry, it could be due to over-mixing the icing or not adding enough liquid to the mix. To prevent cracks from forming, be sure to mix your royal icing until smooth and shiny without overdoing it and adding a small amount of liquid at a time until you reach your desired consistency.
By being aware of these common issues and how to fix them, you’ll be better equipped to troubleshoot any problems that may arise when working with royal icing for cake decorations. With patience and practice, you’ll soon become confident in creating beautiful and intricate designs for all your baked treats using royal icing.
Conclusion
In conclusion, royal icing is a versatile and essential component of cake decorating, allowing for intricate designs and personalized touches that can elevate any baked creation. By understanding the basics of royal icing, including the tools and ingredients needed, as well as mastering the art of making, coloring, and flavoring it, anyone can create stunning cake decorations at home.
With the proper knowledge of piping techniques and tutorials on creating different decorations such as flowers, leaves, borders, and more, the possibilities are endless.
It is understandable that working with royal icing may present some challenges, but with the troubleshooting tips provided in this article, any issues can be easily resolved. Proper drying and storage methods are also crucial to ensure the longevity of royal icing decorations. Whether it’s for a special occasion or simply to enhance a homemade treat, making cake decorations with royal icing can be a rewarding and enjoyable experience for bakers of all skill levels.
In essence, learning how to make cake decorations with royal icing opens up a whole new world of creativity in the kitchen. So why not give it a try? With patience and practice, anyone can master the art of using royal icing to adorn their cakes with beautiful and professional-looking designs.
The satisfaction of creating something truly unique from scratch will surely make the effort worthwhile. Follow the steps outlined in this article and unleash your creativity by experimenting with different colors, flavors, and designs to create stunning edible works of art.
Frequently Asked Questions
Can You Make Cake Decorations From Royal Icing?
Yes, you can make cake decorations from royal icing. Royal icing is perfect for creating intricate designs and decorations on cakes, cookies, and other baked goods. It hardens once dry, making it great for added texture.
Can I Make Royal Icing Decorations in Advance?
Yes, you can make royal icing decorations in advance. In fact, it’s recommended to allow the decorations to dry and harden completely before placing them on your cake or other desserts. This will ensure they hold their shape and look their best.
Can I Put Royal Icing Straight on a Cake?
Yes, you can put royal icing straight on a cake. However, it’s important to work quickly as royal icing dries fast. You can use it to pipe borders, create intricate designs, or even cover the entire surface of a cake for a smooth finish. Just be mindful of the time it takes to set.

Welcome to our cake decorating blog! My name is Destiny Flores, and I am the proud owner of a cake decorating business named Cake Karma. Our mission is to provide delicious, beautiful cakes for all occasions. We specialize in creating custom cakes that are tailored specifically to each customer’s individual needs and tastes.

