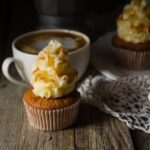
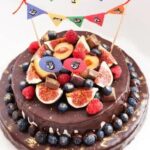
Butter icing cake decorations have become a popular and charming trend in the world of baking. Learning how to make butter icing is not only essential for creating stunning cake designs, but it also opens up a world of creativity and endless possibilities. In this article, we will delve into the art of butter icing cake decoration, exploring techniques, tips, and inspiration to help you create your own masterpieces.
Imagine being able to adorn your cakes with intricate designs, delicate piping details, and beautiful patterns-all made possible through the magic of butter icing. Whether you’re an experienced baker looking to enhance your skills or a beginner eager to embark on your first cake decorating journey, this article will guide you through every step.
Understanding the basics of what butter icing is and its different variations is crucial for achieving that perfect finish on your cakes. We will dive into the various types of buttercream frosting and explain how to achieve the right consistency and texture. Additionally, we’ll provide insights into gathering the essential tools and ingredients needed for successful butter icing cake decorations.
So join us on this fun and creative journey as we explore the art of making butter icing and discover how to transform simple cakes into edible works of art. Get ready to unleash your inner artist as we take you through step-by-step instructions, creative piping techniques, decoration ideas, and finishing touches that will elevate your cake decorating skills to new heights. Let’s dive in.
Understanding the Basics
Butter icing, also known as buttercream frosting, is a versatile and popular choice for cake decoration. It is a creamy and smooth mixture that can be easily piped, spread, or molded into various designs on cakes. There are different variations of butter icing, including American Buttercream and Swiss Meringue Buttercream.
American Buttercream is made by beating together butter and powdered sugar until light and fluffy. It has a rich buttery flavor and is often sweetened with vanilla extract or other flavorings. This type of butter icing is easy to make and perfect for beginners due to its simplicity.
Swiss Meringue Buttercream, on the other hand, involves heating egg whites and sugar over a double boiler until the sugar dissolves. The mixture is then whipped until stiff peaks form before adding in softened butter gradually. This results in a silky smooth texture that is less sweet than American Buttercream. Swiss Meringue Buttercream requires a bit more technique but yields amazing flavor and stability.
The key ingredients for making butter icing include butter (unsalted or salted), powdered sugar (also known as confectioners’ sugar), vanilla extract, and sometimes milk or heavy cream for adjusting the consistency. Each ingredient plays an important role in achieving the desired texture and taste of the butter icing.
Using butter icing for cake decoration offers several advantages. Firstly, it provides a smooth surface for fondant or gum paste decorations to adhere to. Secondly, it can be easily colored with food coloring gels to match any desired color scheme. Additionally, it can be flavored with various extracts such as lemon, almond, or coffee for added depth of taste.
Whether you are creating simple swirls or intricate designs on your cakes, understanding the basics of what butter icing is will lay the foundation for successful cake decorating ventures. Now that we have covered the fundamentals of butter icing let us delve deeper into the tools and ingredients needed to create stunning cake decorations.
Gathering the Essential Tools and Ingredients
To embark on your butter icing cake decoration journey, it is essential to gather all the necessary tools and ingredients. Having the right equipment and ingredients will make the cake decorating process smoother and more enjoyable. Here is a comprehensive list of tools and equipment required for making butter icing cake decorations:
Table
| Tools | Equipment |
|---|---|
| Stand Mixer or Handheld Mixer | Bowl Scraper or Spatula |
| Frosting Tips | Piping Bags |
In addition to these basic tools, there are also specialty tools that can enhance your cake decorations. These include flower nails for creating intricate floral designs, offset spatulas for smooth application of butter icing, and turntables for rotating cakes while decorating.
Next, let’s talk about the different types of frosting tips and their purposes. Round tips, such as the #2 or #3, are perfect for creating outlines and lettering. Star tips, like the #16 or #18, produce beautiful rosettes and shell borders.
Petal tips, such as the #104 or #125, are excellent for creating lifelike flowers. Leaf tips, like the #352 or #366, allow you to add foliage to your cake decorations. Lastly, basketweave tips, such as the #47 or#48, create intricate woven patterns.
When it comes to ingredients for making butter icing, you will need unsalted butter (at room temperature), powdered sugar (also known as confectioners’ sugar), vanilla extract (for flavoring), and a pinch of salt. These simple ingredients work together to create a creamy and delicious base for your cake decorations.
Now that you have a comprehensive list of tools and ingredients needed for butter icing cake decoration, you can gather everything before diving into the exciting world of cake decorating. Having all the necessary equipment and ingredients at hand will make your creative process much more enjoyable and streamline your baking experience.
Mastering the Art of Making Butter Icing
When it comes to cake decoration with butter icing, mastering the art of making this versatile frosting is essential. Whether you’re a beginner or an experienced baker, learning how to prepare butter icing from scratch opens up a world of possibilities for creating stunning cake designs. In this section, we will provide you with step-by-step instructions on how to create basic butter icing, along with tips and tricks for achieving the perfect consistency and texture.
To make butter icing, you will need just a few key ingredients: butter, powdered sugar (also known as confectioners’ sugar), vanilla extract (or other flavorings), and sometimes milk or cream. The process involves beating softened butter until it becomes fluffy and then gradually adding in the powdered sugar until well combined. Vanilla extract is added for flavor, and if desired, milk or cream can be incorporated to adjust the consistency.
When preparing your butter icing, it is crucial to achieve the right consistency and texture. If the icing is too thick, it will be difficult to pipe and spread smoothly on the cake surface. On the other hand, if it’s too thin, it may not hold its shape or form intricate designs. The ideal consistency is smooth and creamy, but still holds its shape when piped.
Here are some additional tips and tricks for making butter icing:
- For a softer and more spreadable consistency, increase the amount of softened butter or add small amounts of milk or cream.
- To enhance flavor variations, substitute vanilla extract with other extracts such as almond or lemon.
- Color customization can be achieved by incorporating gel food coloring into the icing. Start with a small amount and gradually add more until desired hue is reached.
- If you prefer a less sweet frosting, reduce the amount of powdered sugar used in your recipe.
By mastering the art of making butter icing from scratch, you have full control over the taste, texture, and appearance of your cake decorations. Don’t be afraid to experiment with different flavors and colors to create unique designs that reflect your creativity. With practice and patience, you’ll soon be able to create butter icing masterpieces that will impress both your loved ones and guests.
Preparing the Cake Canvas
When it comes to creating stunning butter icing cake decorations, having a perfect base is crucial. The cake itself acts as the canvas for your artistic creations, so it’s important to prepare it properly before starting the icing process. In this section, we will explore some essential tips and techniques for achieving a flawless cake surface that serves as the foundation for your beautiful butter icing designs.
The Importance of Properly Preparing the Cake
Before you begin applying the butter icing, it’s essential to make sure that your cake is properly leveled and free from crumbs. This not only improves the overall appearance of the finished cake but also helps in achieving a smooth and professional-looking finish. Uneven cakes can make it challenging to achieve clean lines and even piping patterns.
To level your cake, you can use a serrated knife or a cake leveler to remove any domed or uneven portions. It’s recommended to work with cooled cakes as they are easier to handle and less prone to crumbling. Once leveled, you can also trim off any burnt or dark edges for a neater presentation.
The Crumb Coat Technique
One technique that can significantly improve your butter icing cake decoration is applying a crumb coat. A crumb coat is a thin layer of frosting that seals in any loose crumbs on the surface of the cake and provides a smooth base for adding additional layers of butter icing.
To apply a crumb coat, start by spreading a thin layer of butter icing all over the surface of the cake using an offset spatula or a bench scraper. This initial layer doesn’t need to be perfect or completely smooth; its main purpose is to catch any loose crumbs. Allow the crumb coat to set for about 15 minutes before proceeding with adding more layers of butter icing.
By using these techniques, you’ll ensure that you have a clean and even cake surface to work with, allowing your butter icing decorations to truly shine. Taking the time to properly prepare and crumb coat your cake is a worthwhile investment in creating a visually appealing masterpiece.
Tips for Achieving a Professional-Looking Finish
To achieve a professional-looking finish on your butter icing cake, there are a few additional tips to keep in mind:
- Use a turntable: Placing your cake on a turntable can make it easier to rotate and reach all angles while applying the butter icing. This helps in achieving smooth and consistent coverage.
- Chill the cake: After applying the crumb coat, it can be beneficial to chill the cake in the refrigerator for about 15-30 minutes. This will firm up the crumb coat and make it easier to add subsequent layers of butter icing without disturbing the crumbs.
- Level each layer: If you’re working with a multi-layered cake, take the time to ensure that each layer is leveled individually before stacking them. This will help maintain an even height throughout and create an aesthetically pleasing final result.
By following these tips and techniques, you’ll be well on your way to creating a perfect base for your butter icing cake decorations. With a leveled, crumb-free surface and a solid foundation, you’re now ready to unleash your creativity in the next section as we explore different piping techniques.
Getting Creative
Piping techniques are essential for creating stunning and intricate butter icing cake decorations. Whether you’re a beginner or an experienced decorator, learning different piping techniques can elevate your cake designs to the next level. In this section, we will explore a range of piping techniques that you can try out and master.
One popular piping technique is creating rosettes. These delicate flower-like designs add a touch of elegance to any cake. To create rosettes, start by holding the piping bag at a 90-degree angle to the cake surface. Squeeze gently and move in a circular motion while applying even pressure. Build up layers of butter icing to form a beautiful rosette shape.
Borders are another versatile piping technique that can be used to frame the edges of your cake or create decorative patterns. There are various types of border designs, including scallops, braids, and zigzags. To create borders, choose a frosting tip that matches your desired design and hold the piping bag at a slight angle against the cake surface. Apply steady pressure while moving along the edge to achieve clean and precise borders.
If you’re looking for some texture in your butter icing cake decoration, ruffles are a great option. Ruffles add a soft and romantic touch to any design. To create ruffles, hold the piping bag with the tip positioned perpendicular to the surface of the cake. Apply pressure as you move back and forth in gentle lines, forming soft waves or frills on the cake.
Shell borders are another classic piping technique that can be used as either decorative accents or as standalone designs. These shell-shaped patterns add elegance and dimension to cakes. To achieve shell borders, hold the piping bag at an angle with the tip touching the surface of the cake. Squeeze gently while making half-circle shapes, slightly overlapping each shell for a continuous border.
Remember, practice makes perfect when it comes to mastering different piping techniques. Start with simple designs and gradually move on to more complex ones. Experiment with different frosting tips, piping bag angles, and pressure levels to achieve the desired look. Don’t be afraid to get creative and add your own personal touch to each design.
By incorporating these various piping techniques into your butter icing cake decorations, you can create unique and visually stunning designs that will leave a lasting impression on anyone who sees and tastes your creations. So put your skills to the test and let your creativity shine.
Decorating Ideas and Inspiration
When it comes to butter icing cake decorations, the possibilities are endless. From simple and elegant designs to intricate and eye-catching creations, there is no shortage of ideas and inspiration to explore. Whether you’re a beginner or an experienced baker, this section will provide you with various cake decoration ideas that will take your creations to the next level.
One popular idea for butter icing cake decorations is to incorporate different themes into your designs. For example, if you’re decorating a cake for a child’s birthday party, you can create a colorful and playful design with vibrant butter icing colors and fun shapes like balloons or cartoon characters.
On the other hand, for a more sophisticated occasion like a wedding or anniversary, you can opt for elegant designs with delicate flower patterns or intricate lace details using piped butter icing.
Colors also play an important role in cake decoration. You can experiment with different color combinations to suit the occasion or theme of your cake. Pastel shades are often used for baby showers or spring-themed cakes, while bold and vibrant colors work well for celebratory occasions. Don’t be afraid to mix and match colors to create unique effects or gradients in your butter icing decorations.
Patterns are another way to add visual interest to your butter icing cake decorations. You can use stencils or piping techniques to create patterns like polka dots, stripes, chevron, or even intricate lace designs. These patterns can be applied all over the cake or selectively on specific tiers or sections.
If you’re looking for additional inspiration beyond traditional design elements, consider exploring current trends in cake decoration styles. Look at social media platforms like Instagram or Pinterest where many talented bakers share their incredible creations. You may find ideas ranging from modern geometric designs to whimsical fairy tale-inspired cakes.
Remember that practice is key when it comes to perfecting your butter icing cake decorations. Start with simpler designs and gradually challenge yourself with more complex techniques. Don’t be afraid to experiment and personalize your creations. Each cake you decorate is an opportunity to unleash your creativity and share something beautiful and delicious with your loved ones.
Finishing Touches
Once you have mastered the art of butter icing and learned various piping techniques, it’s time to take your cake decorations to the next level by adding unique details and accents. These finishing touches can elevate the overall appearance of your cake and make it truly stand out. Here are some ideas and techniques to consider:
Edible Pearls
Edible pearls are a fantastic way to add elegance and sophistication to your butter icing cake decorations. You can either buy pre-made edible pearls or make them yourself using fondant or gum paste. Simply roll small amounts of fondant or gum paste into tiny balls, allow them to dry, and then attach them to your cake using a dab of butter icing as an adhesive.
Fondant Accents
Fondant is a versatile medium that allows you to create intricate shapes, textures, and designs for your cake decorations. From delicate flowers and leaves to bows and ribbons, there are countless options when it comes to fondant accents. Use cookie cutters, molds, or simply shape the fondant by hand to create your desired design.
Chocolate Drizzles
Chocolate drizzles not only add a beautiful visual element but also enhance the taste of your butter icing cake. You can use melted chocolate or candy melts in different colors depending on your design preferences. Drizzle the chocolate over the cake using a spoon or a piping bag with a small round tip for precision.
Remember, the key to adding these finishing touches is patience and attention to detail. Take your time when attaching edible pearls or fondant accents, ensuring they are secured properly without damaging the underlying butter icing design. Similarly, practice control when drizzling chocolate over the cake surface for clean lines.
By incorporating these details and accents into your butter icing cake decorations, you can create a show-stopping dessert that will impress your friends and family. Don’t be afraid to experiment with different combinations and designs to find your own unique style. So let your creativity flow and have fun adding those final touches to your butter icing creations.
Maintenance and Storing Tips
Proper maintenance and storage of butter icing cake decorations are essential to ensure their longevity and preserve their appearance. By following these tips, you can keep your creations looking fresh and beautiful for longer periods.
Firstly, when it comes to storing butter icing cake decorations, it is crucial to protect them from heat, humidity, and direct sunlight. These elements can cause the butter icing to melt or warp, resulting in a loss of shape and design. To prevent this, store your decorated cakes in a cool, dry place away from any heat sources.
If you plan on keeping the cake decoration for an extended period or wish to transport it safely, consider refrigerating or freezing it. However, note that this step may affect the texture slightly. Before placing your cake decoration in the refrigerator or freezer, make sure it is completely covered with plastic wrap or stored in an airtight container to prevent any condensation from forming on the surface.
Additionally, if your butter icing cake decoration has delicate details such as fondant accents or chocolate drizzles, be mindful of any moisture that may come into contact with them during storage. Moisture can cause these decorations to dissolve or become mushy. To avoid this issue, you can add a layer of protective coating by brushing edible glaze over the delicate areas before storing.
When it comes to maintaining the freshness and taste of decorated cakes with butter icing, proper handling is essential. Avoid touching the decorations with bare hands as body heat can cause them to soften or even melt. If you need to adjust or fix any part of the decoration after it has set, do so with clean tools like spatulas or toothpicks.
By taking care in both storage and maintenance practices for your butter icing cake decorations, you can ensure that they maintain their beauty and taste for as long as possible. Remember that practicing these techniques will help you develop the skills needed not only in creating stunning designs but also in preserving them and delighting your friends and family with delicious works of art.
Conclusion
In conclusion, learning how to make butter icing for cake decoration can be an incredibly rewarding and creative journey. The art of butter icing cake decorations has gained immense popularity due to its charm and versatility. By understanding the basics of butter icing, gathering the essential tools and ingredients, mastering the art of making butter icing, and learning various piping techniques, you can create stunning cake decorations that will impress your friends and family.
Throughout this article, we have covered the importance of properly preparing the cake canvas before starting the icing process and provided tips for achieving a professional-looking finish. We have explored different piping techniques such as rosettes, borders, ruffles, and shell borders, along with troubleshooting common piping issues. Additionally, we have offered various decorating ideas and inspiration to help you incorporate themes, colors, and patterns into your designs.
To add those final finishing touches to your butter icing cake decorations, we shared techniques for adding details and accents such as edible pearls, fondant accents, and chocolate drizzles. We also discussed creating textures, shapes, and intricate patterns using butter icing. Remember that experimentation is key in personalizing your cake decorations and unleashing your creativity.
Frequently Asked Questions
How to decorate a cake with butter icing?
Decorating a cake with butter icing involves several steps to achieve a beautiful and professional finish. Start by ensuring your cake is completely cooled before applying any icing. To begin, prepare a batch of butter icing by creaming together softened butter and powdered sugar until light and fluffy. Add in any desired flavorings or food coloring at this stage. Next, apply a thin layer of icing called the crumb coat to seal in any loose crumbs on the cake surface.
Allow it to set for a few minutes before adding another layer of icing using a spatula or piping bag. Use smooth, even strokes to create an even surface on the sides while working towards the center from the edges. A rotating turntable can be helpful in achieving a uniform look. Once the cake is evenly covered, additional decorations such as piped rosettes or borders can be added using different frosting nozzles and techniques.
How to make decorations with buttercream?
Buttercream is a versatile frosting that allows for various decorative elements on cakes or other baked goods. Making decorations with buttercream involves a few key steps to ensure successful results. First, prepare your preferred batch of buttercream by beating together softened butter and powdered sugar until well incorporated and fluffy in texture.
Divide the frosting into separate bowls if you plan on using different colors for your decorations. To make flowers or other shaped designs, fill piping bags with different colored frostings fitted with tips suitable for creating those shapes — such as petal nozzles for flowers or star nozzles for rosettes. Practice piping shapes onto parchment paper first to get comfortable with controlling the flow of frosting before moving onto decorating your final creation.
What type of buttercream is best for decorating?
Buttercream comes in various types, but Swiss meringue buttercream is often considered one of the best options for cake decorating due to its stability and silky texture. Swiss meringue buttercream is made by whisking egg whites and sugar over simmering water until heated through and then gradually adding softened butter until fully incorporated. This type of buttercream results in a light and smooth frosting that holds its shape well, making it ideal for intricate piping work or creating sharp edges on cakes.
Another popular choice is Italian meringue buttercream, which has a similar process but involves pouring hot sugar syrup into whipped egg whites before incorporating the softened butter. Both types of buttercream yield delicious and visually appealing results, but Swiss meringue buttercream is often favored by decorators for its versatility and ease of use.

Welcome to our cake decorating blog! My name is Destiny Flores, and I am the proud owner of a cake decorating business named Cake Karma. Our mission is to provide delicious, beautiful cakes for all occasions. We specialize in creating custom cakes that are tailored specifically to each customer’s individual needs and tastes.

