Are you looking to learn how to decorate sides of a cake like a pro? Decorating the sides of a cake is just as important as decorating the top, as it adds an extra touch of elegance and creativity to your baked creation.
Whether you’re a baking enthusiast or a professional pastry chef, mastering the art of cake side decoration will take your cakes to the next level. In this article, we will explore different techniques, tools, and creative ideas for decorating cake sides, as well as provide step-by-step guides and tips for achieving professional-looking results.
When it comes to decorating cake sides, one of the key aspects is choosing the right frosting or icing. Different types of frosting and icing can be used to achieve various textures and designs on the sides of a cake. From buttercream to fondant, each type has its own unique properties that can be utilized for different decorating techniques.
To successfully decorate the sides of a cake, you’ll need specific tools and materials. These can include offset spatulas, bench scrapers, piping bags and tips, fondant smoothers, pastry brushes, and more. Having the right tools at your disposal will make the process much smoother and help you achieve professional-looking results. In the following sections, we will delve into each aspect in detail and provide a comprehensive guide on how to crumb coat and frost cake sides.
Types of Frosting and Icing for Cake Decorating
When it comes to decorating the sides of a cake, choosing the right frosting or icing is crucial in achieving the desired look and taste. There are several types of frosting and icing that can be used, each with its own unique attributes and application methods.
One popular option for decorating cake sides is buttercream frosting, which is versatile, easy to work with, and can be piped or spread onto the cake. Another option is fondant, which provides a smooth and polished finish and allows for intricate designs and decorations. Additionally, ganache is a rich and glossy frosting that can add a decadent touch to any cake.
To make an informed decision on which type of frosting or icing to use for decorating the sides of your cake, consider the flavor profile you want to achieve, as well as the specific design or decorations you plan to incorporate. Experimenting with different types of frostings and icings will also allow you to discover which ones work best for your decorating style and skill level.
In order to create a visually appealing cake with beautifully decorated sides, it’s important to understand how different types of frostings and icings behave and interact with various decorating techniques. Regardless of which type you choose, mastering the art of applying them neatly will elevate your cakes from ordinary to extraordinary.
| Type of Frosting/Icing | Attributes |
|---|---|
| Buttercream | Versatile, easy to work with, can be piped or spread onto the cake. |
| Fondant | Provides a smooth finish, allows for intricate designs. |
| Ganache | Rich and glossy, adds a decadent touch. |
Tools and Materials Needed for Decorating Cake Sides
When it comes to decorating the sides of a cake, having the right tools and materials is essential to achieving a professional and polished look. Here are some of the must-have items you’ll need to decorate cake sides:
- Offset spatula – This tool is essential for spreading frosting and smoothing it along the sides of the cake.
- Piping bags and tips – If you plan on using piping techniques, having a variety of piping tips and disposable piping bags can help you achieve different designs and textures on the cake sides.
- Bench scraper – A bench scraper is useful for creating smooth and even frosting on the sides of the cake.
- Fondant smoother – If you plan on using fondant to decorate the sides of your cake, a fondant smoother will help you achieve a clean and polished look.
- Decorating comb or scraper – This tool can create textured patterns or smooth edges on the frosted cake sides.
In addition to these tools, you’ll also need a few key materials to successfully decorate the sides of your cakes. These include:
- Frosting or icing – Depending on your preferred method of decorating, you’ll need either buttercream frosting, royal icing, or fondant to cover and decorate the sides of your cake.
- Edible decorations – Whether it’s edible flowers, chocolate shavings, sprinkles, or fresh fruit, having edible decorations on hand can add an extra touch of creativity to your cake sides.
- Cake turntable – A revolving cake stand makes it easier to evenly spread frosting along the sides of your cake and allows for more precise decorating.
- Cake leveler – To ensure that your cake layers are even before stacking and frosting them, a cake leveler is crucial in achieving professional-looking results.
By being well-equipped with these tools and materials, you’ll be ready to tackle different decorating techniques and bring out your creativity in beautifying the sides of your cakes.
Step-by-Step Guide on How to Crumb Coat and Frost Cake Sides
Decorating the sides of a cake can take your baking skills to the next level, creating a professional and impressive finish. One key step in this process is crumb coating and frosting the cake sides. The crumb coat acts as a base layer, locking in any loose crumbs before adding the final coat of frosting. Here’s a step-by-step guide on how to crumb coat and frost cake sides for that perfect finish.
First, ensure that you have baked and cooled your cake completely before starting the decorating process. Once your cake is ready, place it on a turntable for easier handling. To crumb coat the sides of the cake, apply a thin layer of frosting or buttercream using an offset spatula. This initial layer will trap any loose crumbs, preventing them from ruining the final look of your cake.
After applying the crumb coat, chill your cake in the refrigerator for about 15-20 minutes to allow the frosting to set. Once chilled, you can proceed with adding a thicker layer of frosting or buttercream to achieve a smooth finish on the sides of your cake. Use an offset spatula to spread the frosting evenly around the entire circumference, ensuring that it is level and free from any bumps or air bubbles.
To create an extra smooth finish, consider using a bench scraper or icing smoother to go over the sides of your cake once more. This will help achieve clean and straight edges before moving on to further decorations such as piping or fondant accents. With these simple steps, you can now successfully crumb coat and frost the sides of your cake like a pro.
| Step | Description |
|---|---|
| 1 | Bake and cool the cake |
| 2 | Apply thin layer of frosting for crumb coat |
| 3 | Chill in refrigerator for 15-20 minutes |
Techniques for Decorating Cake Sides
Decorating the sides of a cake is just as important as decorating the top. It adds an extra touch of elegance and professionalism to your baked creation. There are various techniques for achieving beautifully decorated cake sides, including piping, fondant, and buttercream.
When it comes to piping, you can use different piping tips to create intricate designs on the sides of your cake. From simple lines and dots to intricate swirls and rosettes, the possibilities are endless. You will need:
- Piping bags
- Piping tips
- Couplers
Fondant is another popular choice for decorating cake sides. Roll out the fondant into thin sheets and then gently press it against the sides of the cake to create a smooth finish or add textures using embossing mats or decorative molds.
For those who prefer a more traditional approach, buttercream is a classic option for decorating cake sides. Use an offset spatula to spread a thin layer of buttercream around the cake before adding another layer for a smooth finish or creating textured designs.
Knowing how to decorate sides of cake using these techniques will elevate your baking skills and impress your friends and family with professional-looking desserts. Mastering these methods will give you the confidence to experiment with various designs and decorations for any occasion.
Remember that practice makes perfect, so don’t be discouraged if your first attempts aren’t flawless. Experiment with different designs and have fun with it.
Tips and Tricks for Achieving Professional-Looking Cake Sides
When it comes to achieving professional-looking cake sides, there are a few tips and tricks that can make a big difference in the final appearance of your cake. One of the most important tips is to ensure that your crumb coat is smooth and even before applying your final layer of frosting or icing. This will help to create a clean canvas for decorating and prevent any crumbs from showing through.
Another important tip for achieving professional-looking cake sides is to invest in quality tools and materials. A good offset spatula, bench scraper, and piping bags can make all the difference in creating smooth and seamless finishes on your cakes. Additionally, using high-quality ingredients for your frosting or icing can also contribute to a more professional appearance.
In addition to using the right tools and materials, it’s also important to take your time when decorating the sides of your cake. Rushing through the process can result in uneven or messy finishes. Take the time to carefully apply your frosting or icing, smooth it out with an offset spatula or bench scraper, and use piping techniques for more intricate designs.
Overall, achieving professional-looking cake sides comes down to attention to detail and practice. By following these tips and taking the time to perfect your techniques, you can create beautifully decorated cakes that rival those from professional bakeries.
By incorporating these tips into your cake decorating process, you can elevate the appearance of your cakes and impress friends and family with your newfound skills in turning ordinary homemade cakes into stunning works of art.
Creative Ideas for Decorating Cake Sides
When it comes to decorating the sides of a cake, the options are endless. Adding edible flowers, chocolate shavings, and fresh fruit to the sides of your cake can take your dessert to the next level and impress your guests. These creative ideas not only add a pop of color and texture but also provide a delicious and visually appealing touch to your sweet creation.
Edible Flowers
Decorating the sides of your cake with edible flowers is a beautiful way to add a natural and elegant touch to your dessert. Edible flowers such as roses, violets, pansies, or lavender can be gently pressed against the sides of frosted cakes for a stunning effect. Before using any flowers on your cake, make sure they are indeed edible and free from chemicals or pesticides. It’s essential to use clean, food-safe flowers that are safe for consumption.
Chocolate Shavings
Chocolate shavings are a classic and indulgent way to decorate the sides of a cake. Use a vegetable peeler or a grater to create delicate chocolate curls from a block of high-quality chocolate. Gently press these shavings onto the frosted sides of your cake for an elegant finishing touch. You can also experiment with different types of chocolate, such as dark, milk, or white chocolate, to complement the flavor of your cake.
Fresh Fruit
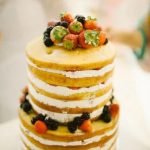
Fresh fruit is not only delicious but also adds brightness and freshness to your cake. Sliced strawberries, kiwi, blueberries, raspberries, or thinly sliced citrus fruits can be arranged creatively along the sides of your frosted cake. The vibrant colors and natural sweetness of the fruit will not only enhance the visual appeal but also provide a delightful contrast against the creamy frosting.
Incorporating these creative ideas into decorating the sides of your cake will elevate its overall presentation and leave a lasting impression on anyone who enjoys it. Whether you choose edible flowers, chocolate shavings, or fresh fruit (or all three.), experimenting with different decorations will allow you to create unique and visually stunning desserts that are as delightful to look at as they are delicious to eat.
Troubleshooting Common Cake Side Decorating Issues
Frosting or Icing Not Sticking to Sides
One common issue when decorating cake sides is the frosting or icing not sticking properly. This can often be caused by the cake being too moist, preventing the frosting from adhering. To troubleshoot this issue, try chilling the cake in the refrigerator for a short time before applying the frosting. This will firm up the outer layer of the cake and make it easier for the frosting to stick.
Uneven or Lumpy Frosting
Another common problem is achieving a smooth and even finish when frosting the sides of a cake. If you find that your frosting is turning out lumpy or uneven, try using a bench scraper or offset spatula to smooth it out. A turntable can also be a helpful tool for achieving an even finish, as it allows you to rotate the cake while smoothing out the frosting.
Ruining Decorations During Application
When decorating cake sides with intricate designs or fondant decorations, it’s easy to accidentally ruin them during application. To avoid this issue, make sure that your cake is well-chilled before applying any delicate decorations. Additionally, using gentle and steady pressure when handling and applying decorations can help prevent any mishaps. If using piped designs, practicing on a separate surface first can also help improve your technique before working directly on the cake.
By troubleshooting these common cake side decorating issues, you’ll be better equipped to achieve professional-looking results and create stunning cakes for any occasion. Remember that practice makes perfect when it comes to cake decorating, so don’t be afraid to experiment with different techniques and tools until you find what works best for you.
Conclusion and Final Tips for Perfecting the Art of Decorating Cake Sides
In conclusion, decorating the sides of a cake is an art that requires patience, practice, and creativity. By using the right tools, materials, and techniques, anyone can achieve professional-looking results. Whether you prefer piping, fondant, or buttercream, there are endless possibilities for creating beautiful designs on the sides of your cakes.
One important tip for perfecting the art of decorating cake sides is to always start with a smooth and even crumb coat before applying the final layer of frosting or icing. This will ensure that your decorations adhere properly and give your cake a polished finish. Additionally, don’t be afraid to experiment with different textures and flavors by incorporating edible flowers, chocolate shavings, or fresh fruit into your designs.
Lastly, if you encounter any issues along the way, such as air bubbles in your icing or uneven frosting application, don’t get discouraged. Troubleshooting common cake side decorating issues is all part of the learning process.
With determination and these final tips in mind, you’ll be able to master the art of decorating cake sides and impress your friends and family with your beautiful creations. So go ahead and let your imagination run wild as you explore new ways to decorate the sides of your cakes.
Frequently Asked Questions
How Do You Decorate Sides of a Cake?
Decorating the sides of a cake can be done in various ways, such as piping buttercream frosting using a pastry bag or using a spatula to create textured designs. Edible decorations like chocolate shavings or sprinkles can also be pressed onto the frosting.
How Do You Sprinkle the Sides of a Cake?
Sprinkling the sides of a cake can add some extra flair to its presentation. To achieve this, gently press the sprinkles onto the sides of the cake while ensuring that they stick to the frosting. You can rotate the cake on a rotating stand for easier application.
How Do You Stick Things to the Side of a Cake?
If you want to stick things like fondant shapes or edible flowers to the side of a cake, you can use a small amount of fresh royal icing to adhere them.
Simply apply a small dot of icing onto the back of the decoration and gently press it onto the side of the cake, holding it in place for a few seconds until it sets.

Welcome to our cake decorating blog! My name is Destiny Flores, and I am the proud owner of a cake decorating business named Cake Karma. Our mission is to provide delicious, beautiful cakes for all occasions. We specialize in creating custom cakes that are tailored specifically to each customer’s individual needs and tastes.


