If you’ve ever wanted to create a show-stopping dessert that is as beautiful as it is delicious, learning how to decorate a rainbow cake is the perfect place to start. Rainbow cakes, with their vibrant layers and whimsical appearance, are a delightful addition to any celebration or special occasion. From birthdays to baby showers, these colorful confections never fail to impress both visually and palatably.
Understanding the techniques and tools needed for creating a stunning rainbow cake can open up a world of creative possibilities in the kitchen. Whether you’re an experienced baker or just starting out, mastering the art of decorating a rainbow cake will elevate your baking skills and leave your guests in awe.
In this article, we will guide you through everything you need to know about creating and decorating a rainbow cake step by step. From understanding the essential ingredients and tools required for baking a perfect rainbow cake to exploring creative frosting techniques and troubleshooting common issues, our comprehensive guide will help you achieve bakery-quality results from the comfort of your own kitchen.
So let’s dive in and discover how you can bring the magic of a rainbow into your next baking adventure.
Understanding the Ingredients and Tools Needed for a Rainbow Cake
When it comes to baking a stunning and delicious rainbow cake, it’s important to understand the key ingredients and tools needed to achieve the perfect result. In this section, we will take a closer look at what you need to have in your kitchen before embarking on the colorful journey of creating a rainbow cake masterpiece.
First and foremost, let’s talk about the essential ingredients for making a rainbow cake. You will need the usual suspects such as flour, sugar, eggs, butter, vanilla extract, baking powder, and salt. However, to achieve vibrant colors in your rainbow cake layers, you will also need gel food coloring in primary colors – red, blue, green, yellow. Make sure to use gel instead of liquid food coloring as it won’t water down your cake batter.
In terms of tools, you will need multiple mixing bowls (depending on how many colors you want to incorporate), measuring cups and spoons for accurate measurements, round cake pans for baking the layers, an offset spatula for frosting and decorating the cake layers, and a stand mixer or handheld electric mixer for preparing the cake batter.
Now that you have a good grasp of the ingredients and tools needed for creating a rainbow cake, you are one step closer to mastering the art of baking this delightful treat. In the next section “Step-by-Step Guide to Baking a Rainbow Cake”, we will delve into the process of actually baking the colorful layers. Stay tuned.
Step-by-Step Guide to Baking a Rainbow Cake
To bake a stunning and delicious rainbow cake, you will need to follow a step-by-step guide to ensure that each layer is colorful, moist, and fluffy. Follow these simple instructions to make your very own show-stopping rainbow cake:
- Preheat your oven to 350°F (175°C) and grease and flour three 8-inch round cake pans.
- In a large bowl, cream together the butter and sugar until light and fluffy.
- Beat in the eggs one at a time, then stir in the vanilla extract.
- Combine the flour, baking powder, and salt; gradually stir into the creamed mixture.
- Divide the batter evenly into separate bowls for however many colors of cake you want to make. Add food coloring to each bowl of batter until you achieve your desired colors. For example, red, orange, yellow, green, blue, and purple for a classic rainbow cake.
- Pour the colored batter into the prepared cake pans and smooth it out with a spatula. Tap the pans on the counter to remove any air bubbles.
- Bake in the preheated oven for about 20-25 minutes or until a toothpick inserted into the center of each layer comes out clean. Allow the layers to cool in their pans for about 10 minutes before transferring them to wire racks to cool completely.
Following these steps will give you vibrant and well-baked layers for your rainbow cake.
Now that you have successfully baked your rainbow cake layers following this step-by-step guide, you can move on to leveling and stacking them before moving on to frosting and decorating.
Tips for Achieving Vibrant Colors in a Rainbow Cake
When it comes to making a stunning rainbow cake, one of the key elements to consider is achieving vibrant and eye-catching colors in your cake layers. The vibrant colors are what make a rainbow cake truly stand out, so it’s important to use the right techniques and ingredients to achieve the desired result.
Quality Ingredients for Vibrant Colors
The first step in achieving vibrant colors in your rainbow cake is using high-quality food coloring. Gel or paste food coloring works best for achieving intense and vibrant colors, as they are more concentrated than liquid food coloring. This will help prevent the colors from diluting the batter and resulting in a pastel-colored cake.
Layering Techniques for Maximum Impact
Another tip for achieving vibrant colors in a rainbow cake is to carefully layer the colored batter in the cake pans. When adding each color of batter to the pan, gently spread it out evenly so that each layer is distinct and evenly distributed. This will ensure that when the cake is sliced, each layer will be clearly visible, creating a stunning visual effect.
Baking at the Right Temperature
Finally, it’s important to bake your rainbow cake at the correct temperature to preserve the vibrancy of the colors. Be sure to follow the baking instructions closely and avoid overbaking your cake, as this can cause the colors to darken or fade. By paying close attention to baking time and temperature, you can ensure that your rainbow cake turns out with beautifully vibrant colors that will impress everyone who sees it.
By following these tips and techniques for achieving vibrant colors in your rainbow cake, you can create a stunning and visually-appealing dessert that will be sure to delight both kids and adults alike.
How to Level and Stack the Rainbow Cake Layers
Once you have successfully baked your vibrant and delicious rainbow cake layers, the next step is to level and stack them to create a beautiful multi-colored masterpiece. This process may seem daunting, but with the right techniques and tools, you can achieve a perfectly stacked rainbow cake that will impress all of your friends and family.
Leveling the Cake Layers
Before stacking your rainbow cake layers, it’s important to ensure that they are level to create a stable and even base for your cake. To level the layers, use a long serrated knife or a cake leveler to carefully trim off any uneven domes or peaks from each layer. Take your time with this step to achieve evenly leveled cake layers for a professional-looking result.
Stacking the Cake Layers
Once your cake layers are leveled, it’s time to start stacking them. Begin by placing one layer on a cake board or serving plate, then add a generous amount of frosting on top. Gently spread the frosting evenly across the layer using an offset spatula.
Place the next layer on top and repeat the process until all of the layers are stacked. Make sure to align the colors of each layer to create a stunning rainbow effect when you cut into the cake.
Creating Support for Taller Cakes
If you’re working with more than three or four layers in your rainbow cake, it’s essential to provide support to prevent any shifting or collapsing. Insert dowel rods or large plastic straws into the center of the stacked layers to provide stability for taller cakes. This will ensure that your rainbow cake stays intact and looks flawless when it’s time for serving.
By following these techniques for leveling and stacking rainbow cake layers, you’ll be well on your way to creating a show-stopping dessert that not only tastes amazing but looks incredible too.
Creative Frosting Techniques for Decorating a Rainbow Cake
Once you have baked and stacked your rainbow cake layers, it’s time to focus on the fun and creative part: decorating with frosting. There are several techniques you can use to make your rainbow cake look stunning and appetizing.
One popular technique is the ombré frosting effect, where you gradually blend different shades of frosting from one color to another. To achieve this, start by dividing your frosting into separate bowls and add a small amount of food coloring to each bowl, creating various shades of the same color. Then, using a spatula or piping bag, apply the darkest shade at the bottom of the cake and gradually transition to the lightest shade at the top.
Another eye-catching technique is the rosette design, which involves piping small swirls of frosting in a circular motion around the top and sides of the cake. This creates a beautiful floral pattern that adds visual appeal to your rainbow cake.
For those who want to add a bit of whimsy to their rainbow cakes, consider using different shaped piping tips to create unique designs. From stars and hearts to zigzags and scalloped edges, there are endless possibilities for adding personality to your cake through frosting.
Overall, when it comes to decorating your rainbow cake with frosting, don’t be afraid to get creative and experiment with different techniques. The key is to have fun and let your imagination run wild.
| Frosting Technique | Description |
|---|---|
| Ombré Effect | Blend different shades of frosting from dark to light for a gradient effect |
| Rosette Design | Create small swirls in a circular motion for a floral pattern |
| Unique Piping Tips | Use different shaped piping tips for personalized designs such as stars, hearts, zigzags, etc. |
Adding Edible Decorations and Toppers to Enhance the Rainbow Cake
Once you have successfully baked and frosted your rainbow cake, it’s time to add some extra flair with edible decorations and toppers. There are countless options for adding a finishing touch to your rainbow cake, from simple sprinkles to intricate fondant designs.
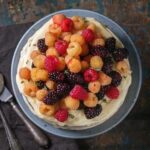
When it comes to edible decorations, consider using colorful sprinkles, edible glitter, or even small candies to complement the vibrant layers of the cake. You can sprinkle these decorations on top of the frosting or create a border around the edges of the cake for a fun and festive look. Another popular option is to use fresh fruits such as berries or citrus slices to add a pop of color and flavor to your rainbow cake.
In addition to edible decorations, you can also use fondant or gum paste to create custom toppers for your rainbow cake. Whether it’s a fondant rainbow, flowers, or themed shapes like unicorns or rainbows, these handmade decorations can take your cake to the next level. Just be sure to plan ahead when creating fondant decorations, as they may need time to dry and harden before placing them on the cake.
| Edible Decorations | Toppers |
|---|---|
| Sprinkles | Fondant Rainbow |
| Edible Glitter | Flowers |
| Fresh Fruits | Themed Shapes (unicorns) |
Troubleshooting Common Issues When Decorating a Rainbow Cake
Baking and decorating a rainbow cake can be a fun and creative experience, but it is not without its challenges. Sometimes, despite our best efforts, things don’t go exactly as planned. In this section, we will discuss some common issues that may arise when decorating a rainbow cake and provide helpful troubleshooting tips to overcome them.
One common problem when decorating a rainbow cake is the frosting not adhering properly to the cake layers. This can result in a messy and uneven appearance. To solve this issue, make sure that the cake layers are completely cooled before applying the frosting. It’s also helpful to lightly brush each layer with a simple syrup mixture to help the frosting stick better.
Another issue that may occur is the colors of the frosting not turning out as vibrant as expected. Achieving bright and bold colors can be trickier than it seems, but using gel food coloring instead of liquid food coloring can make a big difference. Gel food coloring is more concentrated, so you’ll need less of it to achieve intense hues.
Lastly, some decorators may find that their edible decorations or toppers are not staying in place on the frosting. To prevent this from happening, gently press the decorations into the frosting at an angle and avoid overloading one area with too many decorations. If necessary, use additional small dollops of frosting as “glue” to secure any loose decorations.
With these troubleshooting tips in mind, you’ll be better equipped to handle any potential issues that may arise when decorating your rainbow cake and create a stunning masterpiece worth showcasing for any occasion.
Conclusion
In conclusion, decorating a rainbow cake can be a fun and creative process that allows you to showcase your baking skills and artistic flair. By understanding the ingredients and tools needed for a rainbow cake, following a step-by-step guide to baking, and learning tips for achieving vibrant colors, you can create a visually stunning dessert that is sure to impress.
Once you have baked and stacked your rainbow cake layers, it’s time to get creative with frosting techniques. Whether you choose to go for a smooth and sleek finish or opt for a more textured design, the frosting is where you can really let your imagination run wild. From ombre effects to piped rosettes, there are endless possibilities for decorating your rainbow cake.
To enhance the visual appeal of your rainbow cake even further, consider adding edible decorations and toppers. Whether it’s fresh fruit, edible flowers, or colorful sprinkles, these additional touches can take your masterpiece to the next level. Remember that troubleshooting common issues such as uneven layers or air bubbles in the frosting can help ensure that your final product looks as good as it tastes.
In the end, decorating a rainbow cake is about more than just creating something delicious; it’s an opportunity to express yourself through color and design. So don’t be afraid to think outside the box and let your creativity shine when decorating your next rainbow cake masterpiece.
Frequently Asked Questions
How to Decorate a Cake Rainbow?
Decorating a cake with a rainbow design involves using colorful buttercream or fondant to create the layers of the rainbow. Start by frosting the cake in white or sky blue and then carefully add the rainbow colors in curved stripes.
What Food Coloring Is Best for Rainbow Cake?
When making a rainbow cake, gel food coloring is best for vibrant and intense colors. Gel food coloring is more concentrated than liquid food coloring, so it won’t change the consistency of the cake batter or frosting.
How Do You Pipe Rainbows on a Cake?
Piping rainbows on a cake can be achieved by using different colored buttercream in piping bags fitted with star tips. Start by piping an arch shape with one color and then continue with the rest of the colors, overlapping them slightly to create a seamless rainbow design.

Welcome to our cake decorating blog! My name is Destiny Flores, and I am the proud owner of a cake decorating business named Cake Karma. Our mission is to provide delicious, beautiful cakes for all occasions. We specialize in creating custom cakes that are tailored specifically to each customer’s individual needs and tastes.

