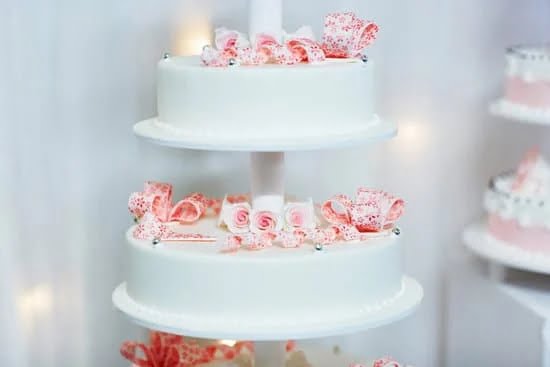
Do you have a special event coming up and want to create a show-stopping cake? If you’re looking for a unique and beautiful design, then learning how to decorate a horse cake might be just what you need.
Whether it’s for a birthday, wedding, or any other celebration, horse-inspired cakes are not only visually stunning but also a fun and creative way to showcase your baking skills. In this article, we will guide you through the process of creating a beautiful horse cake that will surely impress your friends and family.
When it comes to decorating cakes, it’s important to start with the right foundation. Choosing the perfect cake recipe that is not only delicious but also easy to work with when it comes to decorating is crucial. Additionally, having the essential tools for cake decorating will make the process much smoother. From sculpting tools to fondant smoothers, having the right equipment can make all the difference in bringing your horse cake to life.
Baking and decorating a horse-inspired cake may seem like a daunting task at first, but with the right techniques and tips, it can be an enjoyable and rewarding experience. From sculpting the horse shape to adding intricate details and using fondant for a professional finish, we will walk you through each step of the process in detail. So get ready to unleash your creativity and learn how to make an unforgettable horse cake that will leave everyone impressed.
Choosing the Right Cake Recipe
When it comes to decorating a horse cake, the first step is getting the right cake recipe. It’s important to choose a cake that not only tastes delicious but also holds its shape and can be easily sculpted and decorated. Here are some popular cake recipes that are perfect for creating a horse-shaped masterpiece:
- Vanilla Butter Cake: A classic vanilla butter cake is a great option for decorating a horse cake. Its dense yet moist texture makes it easy to carve and shape, while its neutral flavor pairs well with various frosting and fondant options.
- Chocolate Fudge Cake: For chocolate lovers, a rich and decadent fudge cake provides a sturdy base for sculpting a horse figure. Its firm texture can withstand the weight of fondant or buttercream decorations, making it ideal for intricate designs.
- Carrot Cake: If you’re looking for a healthier option, carrot cake is an excellent choice for creating a horse-themed dessert. The natural sweetness of the carrots adds moisture and flavor to the cake, while its firm crumb structure allows for smooth carving and shaping.
Aside from the flavor, consider choosing a recipe that is durable enough to support any additional layers or decorations. It’s also important to take into account any dietary restrictions or preferences of your guests when selecting the right cake recipe.
Once you’ve chosen the perfect recipe, be sure to bake the cakes in advance so they have time to cool completely before you begin carving and decorating. This will ensure that your horse cake turns out both beautiful and delicious.
Essential Tools for Cake Decorating
When it comes to decorating a horse cake, having the right tools is essential to bring your creation to life. Here are some of the essential tools you will need to decorate your horse cake:
- Cake Turntable: A rotating cake stand will make it much easier to frost and decorate your cake, giving you a smooth and even finish.
- Offset Spatula: This tool will help you spread frosting and create smooth surfaces on your cake, making it easier to sculpt and add details.
- Piping Bags and Tips: These are essential for adding fine details, creating textures, and piping on frosting or fondant for intricate designs.
- Modeling Tools: These can include items such as fondant rollers, shaping tools, and sculpting tools, which are crucial for creating the shape of the horse and adding realistic features.
- Edible Gel Colors: To bring your horse cake to life with color, you’ll need a variety of edible gel colors in shades like brown, black, white, and any additional colors needed for mane and tail details.
Having these essential tools on hand will make the process of decorating your horse cake much smoother and more enjoyable. With the right tools at your disposal, you’ll be well-equipped to bring out all the intricate details that will make your horse cake truly impressive. Now that we’ve covered the must-have tools for decorating your horse cake let’s move on to preparing the actual cake itself.
Preparing the Cake
The preparation of the cake is a crucial step in creating a beautiful and delicious horse-inspired cake. The right recipe, proper baking, leveling, and frosting are essential to ensuring that your cake is the perfect canvas for decorating. Here’s how you can prepare your cake for the decoration process.
First and foremost, selecting the right cake recipe is key. A moist and flavorful cake will not only be enjoyable to eat but will also hold its shape well during the decorating process. A popular choice for horse cakes is a rich and dense chocolate or vanilla sponge cake that can withstand sculpting and shaping.
Once you have baked your cake according to the chosen recipe, it’s important to level it before moving on to the decorating stage. This ensures that your cake has an even surface for decorating and prevents any lopsidedness in the final design. Use a sharp serrated knife or a cake leveler to carefully trim off any domed or uneven areas.
After leveling your cake, it’s time to apply a layer of frosting. Whether you choose buttercream, cream cheese frosting, or ganache, make sure to spread an even layer over the top and sides of the cake. This crumb coat will seal in any loose crumbs and provide a smooth base for further decoration.
In summary, preparing your cake with the right recipe, leveling it evenly, and applying a crumb coat of frosting are important steps in creating a perfect canvas for decorating your horse-themed masterpiece.
| Key Preparation Steps | Details |
|---|---|
| Choosing the Right Cake Recipe | A moist and flavorful chocolate or vanilla sponge cake is recommended for horse cakes. |
| Leveling the Cake | Use a sharp serrated knife or cake leveler to ensure an even surface for decorating. |
| Applying Crumb Coat Frosting | This seals in crumbs and provides a smooth base for further decoration. |
Sculpting the Horse Shape
When it comes to decorating a horse cake, one of the most important steps is sculpting the horse shape. This is where you can really bring your cake to life and make it look as realistic as possible. There are several tips and techniques that can help you create a stunning horse figure that will impress all of your guests.
First, it’s important to have a clear image in mind of the type of horse you want to create. Whether it’s a majestic stallion, a cute pony, or a whimsical unicorn, having a reference image or drawing can be very helpful in guiding your sculpting process. You can also use a horse-shaped cake pan as a base to help create the initial shape.
When sculpting the horse shape, it’s essential to work with chilled or slightly frozen cake layers. This will make the carving process much easier and will result in cleaner lines and shapes. Use a sharp knife to carefully carve away excess cake and create the desired contours of the body, neck, and head. Don’t be afraid to take your time and make small adjustments as needed to achieve the perfect horse shape.
To add more dimension and realism to your horse figure, consider using modeling chocolate or fondant to add details such as muscles, bones, and facial features. These additional elements can really make your horse cake stand out and appear more lifelike.
Take your time with this step and refer back to your reference image or drawing for guidance on where to place these features for maximum impact. Overall, taking care with crafting this key aspect will greatly contribute towards achieving an impressive end result on your creation “how to decorate a horse cake“.
Adding Details
After sculpting the basic shape of the horse cake, it’s time to add those intricate details that will bring your creation to life. One of the most important aspects of decorating a horse cake is to pay attention to the mane, tail, and facial features, as these elements can really make or break the overall look of your masterpiece.
Mane and Tail
When it comes to creating the mane and tail for your horse cake, you have various options depending on your skill level and desired look. You can use buttercream icing piped through a grass or star tip to create a textured mane and tail, or you can opt for fondant strips or even edible luster dust for a shimmery effect.
Take your time and think about how you want these elements to flow and move in order to realistically capture the spirit of a real horse.
Facial Features
The expression on your horse cake’s face can truly set the tone for your design. Using fondant or gum paste, carefully craft the eyes, nostrils, mouth and any other distinct facial features that will give your horse cake its unique personality. Paying close attention to proportions and symmetry is key when it comes to portraying an accurate equine expression.
Adding Embellishments
For an extra touch of realism and personalization, consider adding edible flowers, ribbons, or even a custom-made saddle or bridle to complete the look. These additional details can really elevate your creation from simply being a cake into a work of art that tells a story. Remember that creativity is key when it comes to embellishing your horse cake – let your imagination run wild.
Using Fondant
Once you have sculpted the basic shape of your horse cake and added the essential details, it’s time to give it that smooth and professional finish using fondant. Fondant is a versatile, pliable icing that can be rolled out into a thin, smooth layer to cover the cake and create a flawless look. Here’s how to use fondant to achieve a polished appearance for your horse cake.
First, make sure your cake is properly leveled and frosted with a thin layer of buttercream or ganache before applying the fondant. This will provide a smooth surface for the fondant to adhere to. Roll out the fondant on a clean, dry work surface using powdered sugar to prevent sticking. Lift the rolled fondant over the cake using a rolling pin and gently drape it over the top of the cake, smoothing it down the sides.
To avoid air bubbles or wrinkles in the fondant, work quickly but carefully to smooth it down with your hands or a fondant smoother tool. Use gentle, downward motions to press out any air pockets while gradually working your way around the cake. Trim away any excess fondant with a sharp knife or pizza cutter for a clean finish.
Once your horse cake is covered in fondant, you can add additional decorative elements such as flowers, patterns, or textures using different colors of fondant or edible food colorings. This is where you can truly personalize your horse cake and make it uniquely yours.
| Fondant Tools | Description |
|---|---|
| Fondant Smoother | Used to smooth out imperfections in rolled fondant on cakes. |
| Powdered Sugar Shaker | Helps prevent sticking when rolling out fondants. |
| Fondant Rolling Pin | Designed specifically for rolling out thin layers of fondants for covering cakes., |
Finishing Touches
When it comes to decorating a horse cake, the finishing touches are what truly bring the cake to life. Adding color, texture, and personalization can take your creation from an ordinary cake to a show-stopping masterpiece.
Coloring Techniques
One of the most important aspects of decorating a horse cake is choosing the right colors to bring your design to life. Whether you’re creating a realistic brown and white horse or a whimsical rainbow-colored pony, using food coloring or edible paint is essential for adding vibrant hues to your cake.
Texture and Detailing
Adding texture to your horse cake can make it look more lifelike and visually interesting. Consider using different piping techniques to create fur-like textures for the horse’s mane and tail, or embossing tools to add intricate details to the horse’s coat. Don’t forget about edible embellishments like sprinkles, edible glitter, or even edible flowers for an extra touch of elegance.
Personalization and Customization
While following a traditional horse design is always a classic choice, don’t be afraid to personalize your horse cake to reflect the recipient’s personality or interests. Adding custom details such as a saddle with the recipient’s initials, their favorite colors, or even replicating their own beloved steed can truly make the cake one-of-a-kind.
By focusing on these finishing touches, you can transform your horse cake into a stunning work of art that will surely impress both adults and children alike at any special occasion.
Conclusion
In conclusion, decorating a horse cake can be a fun and rewarding experience, allowing you to showcase your creativity and baking skills. By following the tips and techniques outlined in this article, you can create a stunning masterpiece that will surely impress any horse lover or party guest. From choosing the right cake recipe to adding the finishing touches with color and personalization, every step is crucial in bringing your horse cake to life.
Once your horse cake is complete, it’s important to consider how to store and present it. To ensure that your masterpiece stays fresh and beautiful, be sure to store it in a cool, dry place away from direct sunlight.
If using fondant, avoid placing the cake in the refrigerator as this can cause condensation and ruin the smooth finish. When it comes time to showcase your creation, consider using a decorative cake stand or platter that complements the theme of your horse cake.
In essence, learning how to decorate a horse cake not only allows you to create a beautiful dessert centerpiece for special occasions but also provides an opportunity for artistic expression. Whether it’s for a birthday party, equestrian event, or just for fun, the process of sculpting a realistic horse shape and adding intricate details can be both challenging and immensely satisfying.
So don’t hesitate to give it a try – with practice and patience, you’ll soon be creating stunning horse cakes that are sure to delight everyone who sees them.

Welcome to our cake decorating blog! My name is Destiny Flores, and I am the proud owner of a cake decorating business named Cake Karma. Our mission is to provide delicious, beautiful cakes for all occasions. We specialize in creating custom cakes that are tailored specifically to each customer’s individual needs and tastes.


