Are you looking to learn how to decorate a ganache cake? Ganache cakes are a delicious and decadent dessert that is perfect for any occasion. In this article, we will explore the art of decorating a ganache cake, from essential tools and ingredients to tips and techniques for creating a beautifully finished product.
A ganache cake is a type of dessert that features layers of rich chocolate cake filled and frosted with an indulgent mixture of chocolate and cream known as ganache. The result is a moist, tender cake with a smooth, velvety coating that is simply irresistible. Decorating a ganache cake requires some skill and patience, but the stunning final result is well worth the effort.
Throughout this article, we will guide you through the process of decorating a ganache cake, starting with the essential tools and ingredients needed for the task. From there, we will cover everything from preparing the ganache and cake layers to applying the coating smoothly, adding decorative elements, and putting on finishing touches to make your ganache cake stand out.
Whether you are new to baking or an experienced pastry chef, mastering the art of decorating a ganache cake will surely impress your friends and family at your next gathering.
Essential Tools and Ingredients for Decorating a Ganache Cake
When it comes to decorating a ganache cake, having the right tools and ingredients is crucial to achieving a professional and visually appealing result. The essential tools for decorating a ganache cake include a cake turntable, offset spatula, bench scraper, piping bags, and various piping tips. These tools will help you create smooth and evenly coated ganache layers, as well as add decorative elements to your cake.
In addition to the tools, the ingredients for both the ganache and the cake itself are equally important in achieving a beautifully decorated ganache cake. For the ganache coating, you will need high-quality chocolate and heavy cream.
It’s important to use chocolate with a high cocoa content for the best flavor and texture. As for the cake layers, make sure to have all-purpose flour, baking powder, unsweetened cocoa powder, sugar, eggs, whole milk, and vanilla extract on hand.
One key ingredient that is often overlooked when decorating a ganache cake is a simple syrup. This is used to keep the cake layers moist before applying the ganache coating. Simple syrup can be made using equal parts of sugar and water heated together until dissolved.
Once cooled, it can be brushed onto each layer of the cake before adding the ganache. Having these essential tools and ingredients on hand will set you up for success when decorating your ganache cake.
| Tools | Ingredients |
|---|---|
| Cake turntable | Chocolate |
| Offset spatula | Heavy cream |
| Bench scraper | All-purpose flour |
| Piping bags | Baking powder |
Preparing the Ganache and Cake Layers
Before you begin decorating your ganache cake, it is essential to prepare the ganache and cake layers. Here are the steps to follow in order to ensure that your ganache cake turns out perfectly:
1. Make the Ganache: To make the ganache, you will need high-quality chocolate and heavy cream. The ratio of chocolate to cream will depend on whether you want a thinner or thicker ganache. For a thinner ganache, use more cream, and for a thicker ganache, use more chocolate.
2. Prepare the Cake Layers: Whether you’re making a classic chocolate cake or any other type of cake, it’s important to bake your cake layers in advance. Once the layers have cooled completely, you can start assembling your cake.
3. Assemble the Cake Layers: Once your cake layers are baked and cooled, it’s time to assemble them. Place one layer on a serving platter or cake board and spread a layer of ganache over the top. Place another cake layer on top and continue until all layers are stacked.
Now that you have prepared the ganache and cake layers for your ganache cake, it’s time to move on to applying the ganache coating onto the cake before decorating it with decorative elements. With these steps completed successfully, you are well on your way to creating a deliciously decorated masterpiece.
Applying the Ganache Coating to the Cake
Once you have prepared your ganache and baked your cake layers, it’s time to apply the ganache coating to the cake. This step is crucial in creating a smooth and decadent finish to your ganache cake. To start, place one of the cake layers on a flat surface and spread a generous layer of ganache on top using a spatula. Make sure the ganache is spread evenly and all the way to the edges.
Next, carefully place the second cake layer on top of the ganache-coated layer. Gently press down to secure it in place. Now, it’s time to cover the entire cake with a thin layer of ganache. Start by spreading a small amount of ganache on the top of the cake and use a spatula to evenly coat the entire top surface. Then, work your way down to cover the sides of the cake with another layer of ganache.
To achieve a professional-looking finish, use a bench scraper or offset spatula to smooth out the ganache coating on the sides and top of the cake. This will help create clean lines and ensure that the ganache is evenly distributed. Remember to work quickly as ganache sets fast, but also be careful not to rush through this step.
After applying and smoothing out the ganache coating on your cake, allow it to set at room temperature for about 30 minutes before adding any additional decorative elements or toppings.
| Ganache Cake Decorating Tools | Ganache Cake Decorating Ingredients |
|---|---|
| Spatula | Heavy cream |
| Bench scraper | Good quality chocolate |
| Offset spatula | Butter |
Tips and Techniques for Smoothly Decorating the Ganache Cake
Using a Turntable and Bench Scraper
One of the key techniques for smoothly decorating a ganache cake is to use a turntable and bench scraper. Place your cake on a turntable to easily spin it as you apply the ganache, ensuring even coverage. A bench scraper can then be used to smooth out the ganache, creating a flawless finish on the cake’s surface.
Applying Gentle Pressure
When applying the ganache to the cake, it’s important to use gentle pressure. Too much force can cause the cake layers to shift or break, resulting in an uneven coating of ganache. Use a light touch and make small adjustments as needed to maintain the integrity of the cake while achieving a smooth finish.
Chilling Between Layers
To achieve a truly smooth and professional-looking ganache cake, consider chilling the cake between applying layers of ganache. Chilling helps set each layer, allowing you to build up a clean and level surface. After chilling, you can use a warm offset spatula to gently melt and smooth out any imperfections in the ganache.
By mastering these techniques for smoothly decorating a ganache cake, you can create a stunning dessert that not only tastes delicious but also looks professionally finished. With practice and attention to detail, your ganache cakes will become works of art that impress any crowd.
Adding Decorative Elements to the Ganache Cake
Once you have successfully applied the ganache coating to your cake and achieved a smooth finish, it’s time to add some decorative elements to make your creation stand out. Here are some ideas for adding flair to your ganache cake:
- Fresh Fruit: Adding fresh berries or sliced fruits like strawberries, raspberries, or kiwi can add a pop of color and a refreshing flavor to your ganache cake. Arrange the fruit in a visually pleasing pattern on top of the cake or around the edges.
- Chocolate Shavings: Use a vegetable peeler to create delicate chocolate shavings from a block of chocolate. Sprinkle the shavings over the top of the ganache cake for an elegant and sophisticated look.
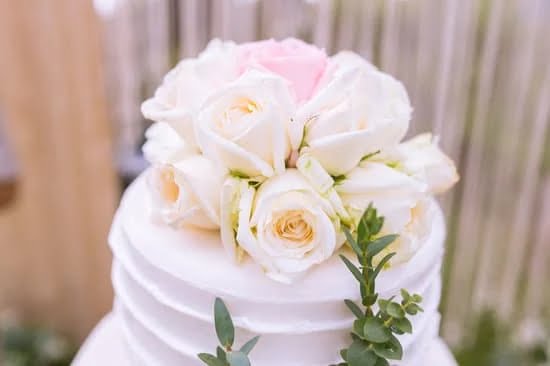
- Edible Flowers: Delicate edible flowers such as pansies, violets, or roses can be used to adorn your ganache cake. Make sure that the flowers are organic and safe for consumption before using them as decoration.
- Nuts and Seeds: Chopped nuts like almonds, pistachios, or hazelnuts can add texture and crunch to your ganache cake. Sprinkle them on top of the ganache coating for an added layer of flavor.
By adding these decorative elements, you can elevate the visual appeal and taste of your ganache cake while also showcasing your creativity and attention to detail.
Remember that when adding decorative elements to a ganache cake, it’s important to consider both aesthetics and flavor. The goal is not only to make the cake visually appealing but also to enhance its overall taste experience. Experiment with different combinations of decorations and have fun with it.
Whether you choose one or several decorative elements, they should complement the rich, creamy texture of the ganache and add an extra dimension of flavor and texture to your masterpiece. Take some time to carefully arrange and place each element thoughtfully for a stunning final presentation when serving your decorated ganache cake.
Now that you have added some beautiful finishing touches, continue reading for tips on how to properly store and serve your decorated ganache cake.
Finishing Touches
Once the ganache cake is coated and decorated, adding some finishing touches can take it to the next level and make it stand out even more. Here are some ideas for how to put those final touches on your beautifully decorated ganache cake.
Use Fresh Berries or Fruits
One way to make your ganache cake stand out is by adding fresh berries or fruits on top. This not only adds a pop of color but also a refreshing contrast to the rich ganache. You can arrange sliced strawberries, raspberries, blueberries, or even edible flowers for an elegant touch.
Sprinkle Some Edible Decorations
Another way to enhance the appearance of your ganache cake is by sprinkling edible decorations on top. This could include edible gold or silver flakes, colored sugar crystals, or even chocolate shavings for some added texture. Be creative and experiment with different decorations to find the perfect look for your ganache cake.
Personalize With a Message or Design
To truly make your ganache cake unique, consider personalizing it with a special message or design. You can use piping bags filled with melted chocolate or royal icing to write a message, draw patterns, or create intricate designs on the surface of the cake. Whether it’s a birthday message or an intricate design for a special occasion, this personal touch will make your ganache cake even more special.
By incorporating these finishing touches, you can elevate the appearance of your decorated ganache cake and make it stand out as a centerpiece at any gathering. The combination of fresh fruits, edible decorations, and personalized designs will add that extra wow factor to your beautiful creation.
Storage and Serving Tips for a Decorated Ganache Cake
Once you have successfully decorated your ganache cake, it’s important to know how to store and serve it properly to maintain its flavor and appearance. Here are some tips for storing and serving your beautifully decorated ganache cake.
First and foremost, it is crucial to store your decorated ganache cake in a cool, dry place. The ideal storage temperature for a ganache cake is between 65-70°F (18-21°C). If the weather is warm or humid, it’s best to store the cake in the refrigerator. However, be sure to bring the cake back to room temperature before serving to ensure the ganache maintains its smooth texture.
When serving a decorated ganache cake, use a sharp knife dipped in hot water to make clean cuts through the ganache coating. This will prevent the ganache from cracking or crumbling as you slice the cake. Additionally, allow the cake slices to sit at room temperature for a few minutes before serving to enhance the flavor and texture of the ganache.
To add an extra special touch when serving your decorated ganache cake, consider pairing each slice with fresh berries, a dollop of whipped cream, or a drizzle of chocolate sauce. These additional elements will not only elevate the presentation of the cake but also complement the rich flavor of the ganache.
By following these storage and serving tips, you can ensure that your beautifully decorated ganache cake remains visually stunning and delicious until the very last slice. With proper care and presentation, your masterpiece will be enjoyed by all who have the pleasure of indulging in it.
Conclusion
In conclusion, mastering the art of decorating a ganache cake requires patience, practice, and the right tools and ingredients. When decorating a ganache cake, it’s important to have the essential tools such as a turntable, offset spatula, and piping bags, as well as quality ingredients like good chocolate and heavy cream.
Once you have prepared the ganache and cake layers, applying the ganache coating to the cake is a crucial step. The key is to achieve a smooth and even coating for a professional finish. Tips and techniques such as letting the ganache set before smoothing can make all the difference in achieving this.
Adding decorative elements to the ganache cake allows for creativity and personalization. Whether it’s using fresh fruits, edible flowers, or chocolate shavings, these enhancements can elevate the appearance of the cake.
Finally, paying attention to finishing touches and taking proper storage and serving measures will ensure that your beautifully decorated ganache cake stands out not only in appearance but also in taste. Mastering how to decorate a ganache cake truly allows for creative expression while providing a delicious dessert for any occasion.
Frequently Asked Questions
Can You Put Frosting on Top of Ganache?
Yes, you can put frosting on top of ganache. It’s a popular technique to layer different types of frostings and toppings on a cake to create unique flavors and textures.
How Do You Coat a Cake With Ganache?
To coat a cake with ganache, start by heating heavy cream until it simmers, then pour it over chopped chocolate. Let it sit for a few minutes before stirring until smooth. Once the ganache is ready, pour it over the cake and use a spatula to spread it evenly.
Can You Put Ganache on a Cake the Day Before?
Yes, you can put ganache on a cake the day before serving it. Ganache actually sets as it cools, creating a smooth, firm layer that helps seal in moisture and flavor. This can be convenient for busy bakers who want to prepare desserts ahead of time.

Welcome to our cake decorating blog! My name is Destiny Flores, and I am the proud owner of a cake decorating business named Cake Karma. Our mission is to provide delicious, beautiful cakes for all occasions. We specialize in creating custom cakes that are tailored specifically to each customer’s individual needs and tastes.


