Are you looking to add a show-stopping element to your next celebration? Learn how to decorate a dripping cake and impress your guests with this stunning and popular cake decorating technique. Dripping cakes have taken the world of cake decorating by storm, adding a touch of elegance and sophistication to any occasion. In this article, we will explore the origins of dripping cakes, what they are, and why they have become so popular in the world of cake decorating.
Dripping cakes have a fascinating history and origin, dating back to the emergence of modern cake artistry. This trendy cake decoration technique involves creating beautiful, flowing drips of icing or ganache that cascade down the sides of a cake. The result is a visually striking effect that adds both drama and deliciousness to any dessert table. With its growing popularity, many bakers and home cooks have been eager to learn the art of decorating a dripping cake.
Before you dive into decorating your own dripping cake, it’s essential to familiarize yourself with the necessary tools and ingredients needed for this decorative method. From specialized drip colors to precise consistency measurements, we will outline everything you need to achieve the perfect drip effect.
Additionally, we will share valuable tips on where to find these tools and ingredients so that you can start your decorating journey with confidence. So let’s get started on creating a stunning masterpiece that will leave everyone in awe at your next event.
Essential Tools and Ingredients
Decorating a dripping cake requires specific tools and ingredients to achieve the desired effect. Some of the essential tools needed include a cake turntable, offset spatula, and a piping bag with a small round tip.
These tools will help you create a smooth and even surface for the drip to adhere to, as well as apply the drip in a controlled manner. In addition, you will need ingredients such as white chocolate or candy melts for creating the drip, food coloring to achieve the desired color, and heavy cream to adjust the consistency of the drip.
When it comes to finding these tools and ingredients, they can easily be purchased at specialty baking stores or online. Many craft stores also carry these items in their baking section. White chocolate and candy melts are readily available in different colors, making it easy to choose the perfect shade for your dripping cake. Additionally, food coloring and heavy cream can be found at any grocery store in the baking aisle.
Once you have gathered all the necessary tools and ingredients, it’s important to familiarize yourself with their use before attempting to decorate a dripping cake. Understanding how each tool works and how each ingredient behaves will help ensure that your cake decorating process runs smoothly.
| Tools | Ingredients |
|---|---|
| Cake turntable | White chocolate or candy melts |
| Offset spatula | Food coloring |
| Piping bag with small round tip | Heavy cream |
Choosing the Perfect Drip Color and Consistency
Selecting the Right Color
When choosing the color for your cake drips, it’s essential to consider the overall theme or aesthetic you want to achieve. You can either match the drip color to the frosting or icing on the cake for a cohesive look, or you can opt for a contrasting color to make the drips stand out.
It’s also important to take into account any decorative elements or toppings that will be added to the cake, as you want the drip color to complement these additions.
Ensuring Proper Consistency
The consistency of your drip is equally important as the color. A drip that is too thin may run off the sides of the cake too quickly, while a drip that is too thick might not flow smoothly down the sides.
It’s essential to find a balance in consistency that allows for a controlled and deliberate drip effect. One way to achieve this is by adjusting the ratio of liquid ingredients in your drip mixture until you reach a consistency that flows easily but doesn’t slide off too quickly.
Ultimately, achieving perfection with your drip color and consistency requires practice and experimentation. Don’t be afraid to test different colors and consistencies on a small scale before applying them to your actual cake. With time and patience, you’ll learn how to decorate a dripping cake with stunning and delicious results.
Preparing the Cake Base
When it comes to decorating a dripping cake, the base of the cake plays a crucial role in achieving the perfect look. Preparing the cake base may seem like a basic step, but it can greatly impact the overall appearance of the drip and the final result of your cake. Here are some important tips and step-by-step instructions on how to properly prepare the cake for decorating.
Leveling and Crumb Coating
Before you can even think about adding drips to your cake, it’s essential to ensure that your cake is level and has a smooth surface. Use a long serrated knife or a cake leveler to trim off any domed or uneven tops. Once leveled, apply a thin layer of frosting all over the cake to create a crumb coat. This will help seal in any crumbs and provide a smooth base for adding your final layer of frosting.
Chilling the Cake
After applying the crumb coat, it’s recommended to chill the cake in the refrigerator for at least 30 minutes. Chilling helps set the crumb coat and makes it easier to add your final layer of frosting without disturbing the crumbs. It also helps create a more stable surface for when you add your drips.
Creating a Smooth Surface
When ready to add your drips, make sure that your final layer of frosting is smooth and free from any lumps or air bubbles. Use an offset spatula or bench scraper to evenly spread the frosting across the entire surface of the chilled cake. The smoother and more even your frosting is, the better your drips will adhere and flow down the sides of the cake.
By following these steps for preparing your cake base, you’ll be on your way to creating a flawless canvas for adding beautiful drips that will enhance the overall look of your dripping cake.
Applying the Drip
When decorating a dripping cake, one of the most crucial steps is applying the drip to achieve that elegant and eye-catching effect. To do this, you will need a ganache or frosting that is slightly runny in consistency to create those beautiful drips down the sides of your cake. Here are some techniques on how to decorate a dripping cake and achieve the perfect drip effect.
First, ensure that your ganache or frosting is at the right temperature for dripping. If it’s too warm, it will slide right off the cake without creating that desired drip effect. If it’s too cold, it won’t flow down smoothly. The ideal temperature for ganache is around 90°F (32°C) and for frosting, slightly thinner than its usual spreadable consistency.
Once you have your ganache or frosting at the right temperature, start by placing a generous amount on the edge of the cake and gently nudging it over so that it starts to drip down naturally. You can control the length of the drips by adjusting how much ganache or frosting you place on the edge and how far over you nudge it.
It may take some practice to get this just right, but don’t be afraid to experiment and see what works best for your design.
Lastly, remember that practice makes perfect when it comes to decorating a dripping cake. Don’t worry if your first attempt doesn’t turn out exactly as planned – every mistake is an opportunity to learn and improve. Keep experimenting with different colors, consistencies, and techniques until you find what works best for you.
Applying the Drip
| Technique | Description |
|---|---|
| Temperature Check | Ensure ganache/frosting is at ideal temperature for dripping |
| Nudging Technique | Gently nudge ganache/frosting over edge of the cake to create drips |
| Practice Makes Perfect | Don’t be afraid to experiment and learn from mistakes |
Additional Decorations
Decorating a dripping cake is a fun and creative way to add an eye-catching element to your baked creation. Once you have achieved the perfect drip effect, you can take your cake to the next level by adding additional decorations. Here are a few ideas for enhancing the overall look of your dripping cake:
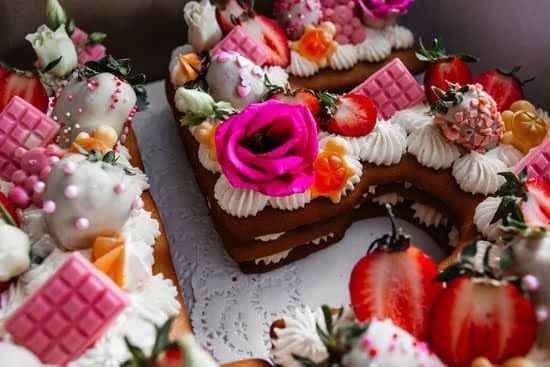
- Fresh fruit: Adding fresh berries or sliced fruit on top of a dripping cake not only adds color and texture but also provides a burst of freshness to each slice.
- Candies and chocolates: Whether it’s mini chocolate bars, candy-coated chocolates, or chocolate shavings, adding these sweet treats to your dripping cake can create a visually appealing and indulgent dessert.
- Edible flowers: Delicate blooms such as edible pansies, violets, or rose petals can bring a touch of elegance and sophistication to your cake design.
When choosing additional decorations for your dripping cake, consider the flavor profile and theme of the cake. For example, if you have a chocolate-flavored cake, complementing it with chocolate-based decorations would be ideal. Similarly, if you’re going for a tropical theme, using vibrant fruits like pineapple or passion fruit as toppings will tie in with the overall aesthetic.
In addition to toppings, incorporating fillings between the cake layers can contribute to the overall appeal of the dessert. Fillings like flavored buttercream, fruit preserves, or even caramel sauce can create delicious surprises with every slice. Remember to balance flavors and textures when choosing additional decorations so that they harmonize with the drip effect and elevate the visual and gustatory experience of your dripping cake.
Lastly, don’t be afraid to experiment with different combinations of toppings and fillings. The beauty of decorating a dripping cake is that there are no hard rules-let your creativity run wild and have fun exploring various options to create a show-stopping dessert.
Troubleshooting Drip Issues
When it comes to decorating a dripping cake, there are times when things don’t go as planned. However, with the right knowledge and a few tips, you can easily troubleshoot any drip issues that may arise during the decorating process. Here are some common problems and solutions related to decorating a dripping cake:
1. Uneven Drips: If you notice that your cake drips are not evenly spaced or sized, there are a few things you can do to fix this issue.
One solution is to adjust the consistency of your ganache or icing to ensure that it flows smoothly and evenly down the sides of the cake. Another trick is to carefully control the amount of drip on your spatula or spoon as you apply it to the cake, ensuring each drip is consistent.
2. Thin or Thick Drips: Achieving the perfect consistency for your cake drips is crucial in creating a visually appealing design. If your drips are too thin and runny, try allowing your ganache or icing to cool slightly before applying it to the cake. On the other hand, if your drips are too thick and not flowing properly, consider adding a small amount of cream or milk to thin out the mixture.
3. Dripping That Doesn’t Set: Sometimes, you may encounter an issue where your cake drips refuse to set and remain sticky or tacky even after some time has passed. In this case, try chilling your cake in the refrigerator for a short period to help the drips set properly. Additionally, ensuring that your cake is at room temperature before applying the drip can also aid in achieving the desired consistency.
By keeping these troubleshooting tips in mind, you can easily address any drip issues that may arise while decorating a dripping cake. With patience and practice, you’ll be able to create stunning drip designs that will impress both yourself and your guests.
Presentation and Serving
When it comes to presenting and serving a dripping cake, there are a few key tips to keep in mind in order to maximize the visual impact of your creation. One popular way to showcase the drip effect when serving a dripping cake is to place the cake on a raised pedestal or cake stand.
This allows guests to fully appreciate the dramatic drips cascading down the sides of the cake. Additionally, using a pedestal or stand can elevate the cake, drawing even more attention to its unique and eye-catching design.
Another option for serving a dripping cake is to place it on a decorative platter or plate that complements the colors and theme of the cake. This can enhance the overall presentation and make the cake even more visually appealing. Additionally, consider adding some complementary decorations around the base of the cake, such as fresh flowers, edible glitter, or sprinkles, to further enhance its appearance.
When slicing and serving the dripping cake, it’s important to do so carefully in order to maintain the integrity of the design. Use a sharp knife to cleanly cut through each slice, ensuring that the drips remain intact and visually striking. For an added touch of elegance, consider serving each slice on individual dessert plates with a side garnish or drizzle of sauce.
By paying attention to these details and taking care when presenting and serving your dripping cake, you can truly highlight its beauty and impress your guests with your artistic baking skills. With these tips in mind, you can create a memorable experience for everyone enjoying your delicious masterpiece.
Conclusion
In conclusion, learning how to decorate a dripping cake can be a fun and rewarding experience for any baking enthusiast. The popularity of dripping cakes has soared in recent years, and for good reason. With the right tools and ingredients, the perfect drip color and consistency, and a few helpful tips, anyone can create a stunning masterpiece that not only tastes delicious but also looks visually appealing.
After understanding how to properly prepare the cake base and apply the drip, it’s time to take your decoration to the next level by adding additional decorations. Whether it’s fresh fruit, edible flowers, or decorative sprinkles, there are endless possibilities for enhancing the overall look of your dripping cake. Experiment with different flavors and textures to complement your drip and truly make it your own.
As with any new baking skill, practice makes perfect when it comes to decorating a dripping cake. Don’t be discouraged if your first attempt doesn’t turn out exactly as you envisioned – troubleshooting drip issues is all part of the learning process.
With patience and persistence, you’ll soon master the art of decorating a dripping cake and impressing your friends and family with your stunning creations. So go ahead, gather your tools and ingredients, choose your favorite drip color, and let your creativity flow as you embark on this delicious decorating journey.

Welcome to our cake decorating blog! My name is Destiny Flores, and I am the proud owner of a cake decorating business named Cake Karma. Our mission is to provide delicious, beautiful cakes for all occasions. We specialize in creating custom cakes that are tailored specifically to each customer’s individual needs and tastes.


