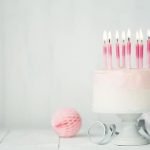
Decorating a cake with frosting is a delightful and creative endeavor that can bring joy to both the decorator and those who are lucky enough to indulge in the final masterpiece. Whether it’s for a birthday, special occasion, or simply to satisfy your sweet tooth, learning how to decorate a cake with frosting at home opens up a world of possibilities for personalized cakes that are as beautiful as they are delicious.
The beauty of homemade frosting lies in its ability to add a personal touch and tailor the flavor according to your preferences. The store-bought alternatives may be convenient, but they often lack that unique homemade taste that can make all the difference. By taking the time to make your own frosting, you have complete control over the ingredients and can experiment with different flavors and colors to suit any occasion or theme.
In this article, we will guide you through the process of decorating a cake with frosting at home. We will start by outlining the essential tools and ingredients you will need, then discuss various frosting techniques suitable for different cake styles. We will provide detailed step-by-step instructions on making the perfect homemade frosting, along with tips on preparing the cake for decoration and mastering piping techniques.
Additionally, we’ll explore creative decorative elements and offer solutions to common troubleshooting issues. Finally, we’ll share tips for adding final touches and presenting your beautifully decorated cake.
So gather your enthusiasm and let’s embark on this journey into the art of decorating cakes with frosting at home – where imagination knows no bounds, creativity thrives, and every slice is an expression of love and joy.
Gathering the Essential Tools and Ingredients
To successfully decorate a cake with frosting at home, it is essential to gather the necessary tools and ingredients. The right equipment and ingredients will make the cake decorating process much smoother and more enjoyable. Here is a list of the essential tools and ingredients needed:
Tools:
- Mixing Bowls: Prepare a few different sizes of mixing bowls to accommodate different amounts of frosting.
- Spatula: A spatula is crucial for spreading frosting smoothly onto the cake’s surface.
- Piping Bags: These are used for more intricate designs and can be filled with various types of frosting.
- Piping Tips: Invest in a variety of tips to create different decorative effects, such as flowers or rosettes.
- Offset Spatula: This tool helps create smooth edges and even layers.
Ingredients:
- Butter: Unsalted butter is usually preferred for homemade frosting as it allows better control over the flavor.
- Confectioners’ Sugar: Also known as powdered sugar, this ingredient sweetens and thickens the frosting.
- Food Coloring: Choose gel-based food coloring for vibrant shades without altering the consistency of the frosting.
By ensuring that you have all these necessary tools and ingredients, you will be well-prepared to embark on your cake decorating journey at home.
In addition to these must-haves, there are other optional tools that can enhance your cake decorating experience, such as an electric mixer for easier blending or an icing smoother for achieving flawless surfaces on your cakes. Experimenting with different tools can result in unique designs and textures.
Remember, having high-quality ingredients will greatly impact the taste and texture of your homemade frosting. Opting for real vanilla extract or choosing premium chocolates can elevate your creations to another level.
Preparing everything before starting the decoration process will give you peace of mind and allow you to fully focus on creating beautiful designs on your cakes. Gather these essential tools and ingredients, and get ready to dive into the art of cake decorating with frosting at home.
Choosing the Right Frosting Technique
When it comes to decorating a cake with frosting, choosing the right technique can make all the difference in achieving a professional-looking result. There are several popular frosting techniques to choose from, each with its own unique qualities and applications. In this section, we will provide an overview of some common frosting techniques and discuss their suitability for different cake styles.
Buttercream Frosting
Buttercream frosting is perhaps the most versatile and widely used frosting technique. Made from butter, confectioners’ sugar, and flavorings, buttercream creates a creamy and smooth finish on cakes. It can be easily colored and flavored to complement any cake design or theme. Buttercream is ideal for creating various textures such as smooth finishes, rosettes, borders, and piped designs.
Royal Icing
Royal icing is a popular choice for intricate designs that require precise details. Made from egg whites or meringue powder mixed with confectioners’ sugar, royal icing dries to a hard consistency that can be piped into intricate shapes or used for delicate lacework. It works well for creating elaborate decorations like flowers, leaves, lace patterns, or intricate piping designs.
Ganache
Ganache is a rich and decadent frosting made from chocolate and heavy cream. It has a shiny finish that adds an elegant touch to cakes. Ganache can be poured over cakes for a glossy glaze effect or whipped to create a velvety texture that can be spread or piped onto cakes. Ganache lends itself well to modern designs and is often used for drip-style cakes or contemporary decorations.
It’s important to consider the type of cake you are working with when choosing a frosting technique. For lighter and airy cakes like sponge or chiffon cakes, buttercream is an excellent choice as it pairs well with these delicate textures. For more intricate designs or elaborate decorations, royal icing provides the precision and control needed. Ganache works best for dense cakes like chocolate cake or mud cake, as its rich flavor complements these indulgent flavors.
By understanding the characteristics and uses of different frosting techniques, you can choose the one that aligns with your desired cake design and personal preferences. Whether you opt for smooth buttercream finishes, intricate royal icing piping, or glossy ganache drips, selecting the right frosting technique will help you create a cake that looks as good as it tastes.
Making the Perfect Frosting
Creating the perfect frosting is essential for achieving a beautifully decorated cake. Whether you prefer classic vanilla, indulgent chocolate, or tangy cream cheese, homemade frosting adds a personalized touch to your creations. Follow these step-by-step instructions to make a delicious and smooth frosting that will take your cake decoration skills to the next level.
To start, gather the necessary ingredients for your chosen frosting flavor. For a basic buttercream frosting, you will need softened unsalted butter, confectioners’ sugar (also known as powdered sugar), vanilla extract, and a pinch of salt. If you want to experiment with different flavors, consider adding cocoa powder for chocolate frosting or cream cheese for a rich and tangy taste.
In a mixing bowl, beat the softened butter until creamy using an electric mixer or stand mixer fitted with a paddle attachment. Gradually add in the confectioners’ sugar, about ½ cup at a time, while continuing to beat on low speed. This helps prevent any lumps in the frosting. Once all the sugar is incorporated, increase the speed to medium and beat until light and fluffy.
Next, add in the vanilla extract and salt for flavor enhancement. Mix on low speed until well combined. At this point, you can also add any additional flavorings or food coloring if desired. Be careful not to overmix as it can lead to an overly stiff or grainy texture.
Finally, taste test your frosting and adjust any flavors if needed. If it’s too sweet, you can add a small amount of lemon juice or milk to balance it out. On the other hand, if it is not sweet enough for your liking, gradually add more confectioners’ sugar until desired taste is achieved.
Remember to scrape down the sides of the bowl throughout the process of making your frosting to ensure everything is evenly incorporated.
With these simple steps and some creativity in flavor choices and colorings, you can easily make a delicious homemade frosting that will serve as the perfect canvas for your cake decoration.
Preparing the Cake for Decoration
Before you can start creating a beautiful cake decoration with frosting, it is essential to ensure that your cake is properly prepared. This section will guide you through the steps of preparing your cake for decoration, emphasizing the importance of properly cooled cakes and providing tips for easy frosting application.
The first step in preparing your cake is to make sure it has completely cooled. Warm or hot cakes can cause the frosting to melt, resulting in a messy and uneven finish. To cool your cake effectively, remove it from the oven and let it sit in the pan for about 10 minutes. Then, gently transfer it to a cooling rack and allow it to cool completely before you begin decorating.
Once your cake has cooled, you may need to level it if necessary. Leveling ensures that your cake has an even surface for the frosting to adhere smoothly. You can use a long serrated knife or a cake leveler to carefully trim off any domed or uneven parts of the cake.
To prevent crumbs from getting mixed into the frosting and creating an unappealing appearance on your decorated cake, consider applying a crumb coat. A crumb coat is a thin layer of frosting that seals in any loose crumbs and provides a solid foundation for further decoration. Simply spread a thin layer of frosting over the entire surface of the cake using an offset spatula or butter knife, then refrigerate it briefly to allow the crumb coat to set.
By following these steps – allowing proper cooling time, leveling if needed, and applying a crumb coat – you will have set yourself up for success when it comes to decorating your cake with frosting. These simple preparations ensure that your finished creation will be visually appealing and delicious from every slice.
| Step | Description |
|---|---|
| Cooling | Allow the cake to cool completely before decorating |
| Leveling | Trim any uneven parts of the cake to create an even surface |
| Crumb Coat | Apply a thin layer of frosting to seal in crumbs and provide a foundation for further decoration |
Mastering Piping Techniques
Piping techniques are an essential skill for anyone looking to decorate a cake with frosting. With the right piping tips and a little practice, you can achieve beautiful designs that will impress your friends and family. In this section, we will explore a range of piping tips and provide tips and tricks for achieving smooth and precise lines, rosettes, and lettering.
Exploring Different Piping Tips
There are countless piping tips available in the market, each offering unique designs and effects. Some of the most commonly used tips include round tips, star tips, petal tips, leaf tips, and writing tips. Round tips are great for creating outlines or filling in large areas with frosting. Star tips create beautiful rosettes or shells.
Petal tips can be used to make realistic flowers or ruffles on your cake. Leaf tips are perfect for adding foliage elements to floral designs. Writing tips help you add personalized messages or names on your cake.
Tips and Tricks for Precision
When it comes to achieving smooth lines or intricate details with piping, there are a few tricks that can help you master the technique. First, make sure your frosting is at the right consistency – not too stiff or runny – for easier control while piping.
Practice proper hand positioning by holding the piping bag using your dominant hand while using your other hand to guide the direction of the piping tip. Applying even pressure on the bag while squeezing out the frosting will help you maintain a consistent flow of frosting.
To create straight lines or borders, hold the piping bag perpendicular to the surface of the cake and apply steady pressure while moving in one fluid motion. For delicate rosettes or shells, start by applying light pressure as you move in a circular motion while gradually increasing pressure to create defined swirls.
When it comes to lettering or writing on cakes, always practice on a separate surface before attempting it on the cake. Start with drawing the outlines of the letters and then fill them in with frosting, using a steady hand and consistent pressure.
By mastering these piping techniques, you can take your cake decoration skills to the next level and create stunning designs that are sure to impress. With a little practice and experimentation, you’ll soon be able to create professional-looking cakes that showcase your creativity and style. So don’t be afraid to get creative and have fun with piping.
Getting Creative with Decorative Elements
Decorating a cake with frosting provides the perfect opportunity to unleash your creativity and add your personal touch to the finished product. This section will explore ideas for decorative elements that can take your cake from ordinary to extraordinary. By utilizing various frosting colors, sprinkle assortments, and additional embellishments, you can create visually stunning cakes that are sure to impress.
One way to get creative with decorative elements is by incorporating flowers into your cake design. Edible flowers made from frosting can be created using piping techniques or molded from fondant. These delicate floral decorations can be arranged in clusters or used as individual accents throughout the cake. Adding colorful flowers not only enhances the visual appeal of the cake but also adds a touch of elegance and sophistication.
In addition to flowers, borders are another popular decorative element that can elevate the look of any cake. Borders can be created using different piping tips and techniques, such as ruffles, shells, or braids. They can be piped along the edges of the cake layers or around each tier for a more intricate design. Borders add a polished and professional finish to the cake, highlighting its shape and structure.
Shapes are another way to get creative with decorative elements on a cake. Using cookie cutters or templates, you can create various shapes out of fondant or gum paste and place them strategically on the cake. Whether it’s hearts for a Valentine’s Day theme or stars for a celestial-themed cake, adding shapes adds visual interest and allows you to tailor the decoration to suit any occasion.
To showcase these decorative elements effectively, it is essential to choose frosting colors that complement each other and enhance the overall design. Experimenting with different color combinations can transform an ordinary-looking cake into a visually striking masterpiece. Moreover, don’t forget about sprinkles. Sprinkle assortments come in various colors, shapes, and sizes, allowing you to add texture and sparkle to your creations.
| Decorative Elements | Description |
|---|---|
| Flowers | Incorporate delicate, edible flowers made from frosting or fondant into the cake design for an elegant and sophisticated touch. |
| Borders | Add polished and professional finishes to the cake by creating borders using different piping tips and techniques along the edges or tiers of the cake. |
| Shapes | Create various shapes out of fondant or gum paste to add visual interest and tailor the decoration to suit a specific theme or occasion. |
| Frosting Colors and Sprinkles | Experiment with different color combinations and sprinkle assortments to enhance the overall design and add texture and sparkle to your creations. |
By incorporating these decorative elements into your cake designs, you can transform a simple dessert into a work of art. The possibilities are endless when it comes to decorating with frosting, allowing you to showcase your skills and impress friends, family, and guests. So let your imagination run wild and have fun exploring different creative ideas for your next cake decorating project. Remember, the most important part is enjoying the process and sharing your delicious creations with loved ones.
Troubleshooting and Common Mistakes
Even the most experienced bakers can run into issues when decorating cakes with frosting. Troubleshooting these common mistakes will help ensure that your cake turns out picture-perfect and delicious.
One common problem that can arise is the presence of air bubbles in the frosting. These pesky bubbles can create an uneven surface and detract from the overall appearance of your cake.
To prevent this, be sure to mix your frosting thoroughly but avoid overmixing, as this can introduce more air into the mixture. If air bubbles do appear in your frosting, you can gently tap the bowl against a hard surface to release them or use a toothpick to pop them.
Another possible mistake is melting frosting, particularly in warm weather or if placed near a heat source. To prevent this, make sure to refrigerate your cake before starting the decoration process if needed. Additionally, avoid applying frosting on a hot cake, as it will cause the frosting to melt and slide off. If you find that your frosting is getting too soft as you work, simply place it in the refrigerator for a few minutes to firm up again.
Uneven decorations can also be a common issue when decorating cakes with frosting. This could be due to uneven layers of cake or an unlevelled surface. To overcome this challenge, it’s important to level your cake layers and apply a thin crumb coat before adding the final layer of frosting. The crumb coat not only helps seal in crumbs but also provides a smooth base for your final decorations.
By being aware of these common mistakes and knowing how to troubleshoot them, you can avoid potential mishaps while decorating cakes with frosting at home. Remember that practice makes perfect, so don’t get discouraged if things don’t go exactly as planned at first – embrace each experience as an opportunity to learn and improve your skills for future baking endeavors.
Final Touches and Presentation
After all the hard work of decorating a cake with frosting, it’s time to add those final touches that will truly elevate the presentation of your creation. These finishing touches are what make a cake visually stunning and show off your creativity as a pastry artist. Here are some ideas for adding that extra wow factor to your masterpiece.
One popular way to enhance the appearance of a frosted cake is by using edible pearls. These tiny, shiny beads can be added strategically to create an elegant and sophisticated look. Place them along the edges of the cake tiers or create patterns or designs with them. Edible glitter is another fun option for adding sparkle and shine to your cake. It comes in various colors and can be dusted over the frosting or used to highlight specific areas.
Fresh fruits and flowers not only add beauty but also freshness and flavor to a decorated cake. Consider using berries, sliced peaches, or edible flowers such as pansies or violets as garnishments on your creation. This not only adds a pop of color but also makes for an impressive display on any dessert table. Just make sure that any blooms you choose are safe for consumption and appropriately washed before use.
In addition to the final touches, it is equally important to capture the beauty of your creation through photography. Take pictures from different angles, emphasizing the intricate details of your frosting work. Natural lighting always works best for capturing true colors and textures. Once you have taken those stunning photos, don’t forget to share them. Post them on social media platforms or share them with friends and family who will appreciate your talent.
By putting these final touches on your decorated cake, you are showcasing your skills as a pastry artist while creating something truly special. Remember that every cake decoration project is an opportunity to unleash your creativity and bring joy to others through your delicious creations.
Conclusion
In conclusion, decorating a cake with frosting at home is a delightful and rewarding experience that allows you to unleash your inner pastry artist. By following the steps outlined in this article, you can create visually impressive and personalized cakes that are sure to impress your loved ones.
The joy of cake decoration lies in the ability to experiment and get creative with different techniques and decorative elements. Whether you choose to use buttercream, royal icing, or ganache, each technique offers its own unique effect that can complement various cake styles. From smooth and precise lines to intricate rosettes and lettering, mastering piping techniques is essential for achieving professional-looking results.
Furthermore, don’t be afraid to get imaginative with decorative elements such as flowers, borders, shapes, and diverse frosting colors. These embellishments can truly make your cakes stand out and add an extra touch of artistry. Remember to troubleshoot any potential issues that may arise during the process and seek practical solutions to ensure picture-perfect results.
Lastly, don’t forget about the final touches and presentation of your beautifully decorated cake. Adorn it with edible pearls, glitter, or fresh fruits for added elegance. Additionally, capture the beauty of your masterpiece by photographing it before sharing it with friends and family.
Decorating cakes with frosting at home allows you to put your own personal touch on your creations while experiencing the satisfaction of baking from scratch. So go ahead – unleash your inner pastry artist and enjoy the process of creating visually stunning homemade cakes that are as delicious as they are beautiful.
Frequently Asked Questions
What is the easiest way to decorate a cake?
The easiest way to decorate a cake is by using pre-made decorations or cake toppers. These can be found at most grocery stores or baking supply shops and are typically made from edible materials such as fondant or sugar. Simply place the decorations on top of the cake in a pattern or design of your choice.
Another easy option is to use edible sprinkles, colored sugar, or edible glitter to add some sparkle and visual interest to the cake. Just sprinkle them over the frosted cake before it sets.
How do you put frosting on a cake?
To put frosting on a cake, start by preparing a smooth and even surface for the frosting. Trim any uneven edges or domes from the top of the cake layers with a serrated knife if necessary. Then, place one layer of the cake on a serving plate or cardboard round cut to fit its size.
Spoon a generous amount of frosting onto the center of the layer and use an offset spatula or butter knife to spread it evenly towards the edges, creating a thin layer that covers the entire surface. Repeat this process with additional layers until all are stacked. Finally, apply another layer of frosting to cover the sides and top of the stacked layers, smoothing it out with an offset spatula for an even finish.
How do you spread frosting without tearing a cake?
To spread frosting without tearing a cake, it’s important to ensure that both your frosting and your cake are at room temperature. Cold frosting can become rigid and difficult to spread smoothly, while cold cake can crumble easily when being coated with frosting. Once they are at room temperature, begin by applying a thin crumb coat—a thin layer of frosting—on the cake using an offset spatula, ensuring that you cover all exposed surfaces with a smooth layer that acts as glue for any crumbs leftover on the surface of the cake.
Once you have applied this initial coat, refrigerate it for around 15-20 minutes until slightly firm before applying your final coat of frosting over it to hide any crumbs and create a smooth finish. This method will help prevent tearing or dragging any cake pieces when spreading frosting.

Welcome to our cake decorating blog! My name is Destiny Flores, and I am the proud owner of a cake decorating business named Cake Karma. Our mission is to provide delicious, beautiful cakes for all occasions. We specialize in creating custom cakes that are tailored specifically to each customer’s individual needs and tastes.

