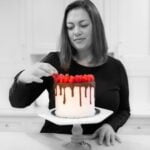
Are you interested in learning how to decorate a cake in fondant? Fondant cake decorating allows for endless creativity and beautiful finished products. Whether you’re a beginner or looking to improve your skills, this article will provide you with all the tips and techniques you need to create stunning fondant cakes.
Fondant cake decorating is not only a fun and enjoyable hobby but also a popular choice for special occasions such as weddings, birthdays, and anniversaries. The smooth, flawless finish that fondant provides makes it a versatile medium for creating intricate designs and decorations, making your cake truly stand out.
In this article, we will take you through the step-by-step process of decorating a cake in fondant, from gathering your essential tools and ingredients to troubleshooting common problems that may arise during the decorating process. Whether you’re looking to learn how to roll out fondant for a smooth finish or add intricate details and colors to your cakes, we’ve got you covered. Let’s dive into the wonderful world of fondant cake decorating.
Gathering Your Supplies
When it comes to decorating a cake in fondant, having the right tools and ingredients is crucial for achieving a professional-looking finish. Here are some essential items that you’ll need to gather before starting your fondant cake decorating project:
- Rolling pin: A large, smooth rolling pin is essential for rolling out the fondant to the right thickness.
- Fondant smoother: This tool helps to smooth the fondant onto the cake and eliminate any air bubbles or wrinkles.
- Powdered sugar or cornstarch: Dusting your work surface with powdered sugar or cornstarch will prevent the fondant from sticking and make it easier to roll out.
- Fondant modeling tools: These specialized tools come in a variety of shapes and sizes and are designed for shaping, sculpting, and adding detail to your fondant decorations.
- Gel food coloring: Unlike liquid food coloring, gel-based colors won’t change the consistency of the fondant. They also provide more vibrant shades.
- Vanilla extract or clear alcohol (such as vodka): These can be used to paint details onto your fondant decorations without causing them to dissolve or smudge.
In addition to these tools, you’ll also need a few key ingredients for making and working with fondant. These include:
- Pre-made or homemade fondant: Whether you choose to use store-bought or homemade fondant, make sure that it is fresh, pliable, and free from lumps.
- Cake layers: Prepare a sturdy cake base for applying the fondant. A firm, non-crumbling cake such as pound cake or mud cake works best.
- Frosting: Use a thin layer of buttercream frosting on your cake before applying the fondant. This creates a smooth surface for the fondant to adhere to.
By gathering these supplies, you’ll set yourself up for success when it comes time to decorate your cake in fondant.
Now that you have all of your essential tools and ingredients gathered, let’s move on to preparing the cake itself as well as creating the perfect canvas for your fondants decorations.
Preparing the Cake
Choosing the Right Cake
When it comes to decorating a cake with fondant, not all types of cakes are created equal. It is important to select a cake that is sturdy enough to support the weight of the fondant and any decorations you plan to add. Popular choices for fondant decorating include dense and moist cakes such as chocolate, red velvet, or vanilla pound cakes.
Shaping and Leveling
Before applying fondant, it is essential to ensure that your cake has a smooth and level surface. To achieve this, carefully trim off any domed tops from the baked layers using a serrated knife or cake leveler. Once leveled, stack and fill the layers with icing while keeping them level. Next, crumb coat the entire cake with a thin layer of frosting to seal in any loose crumbs before applying the final layer of frosting or ganache.
Allowing Time to Set
After shaping and crumb coating your cake, it’s important to allow it time to set before applying the fondant. Place your prepared cake in the refrigerator for at least 30 minutes so that the frosting can harden slightly, which will make it easier to work with when adding the fondant.
By carefully selecting and preparing your cake for fondant decorating, you will create a solid foundation for your artistic vision. With these steps in mind, you can move on to rolling out the perfect sheet of fondant and bringing your design to life.
Rolling Out the Fondant
Once you have gathered all your supplies and prepared your cake, it’s time to roll out the fondant. This step is crucial to achieving a smooth and even finish on your cake. Here are some tips to ensure that you achieve a professional-looking result:
- Start with a clean and lightly powdered work surface to prevent the fondant from sticking.
- Knead the fondant until it is pliable and smooth, then use a rolling pin to roll it out into a circle that is slightly larger than the size of your cake.
- Use gentle, even pressure when rolling out the fondant to prevent any tears or creases.
One common issue when rolling out fondant is air bubbles. To prevent this, gently lift and smooth the fondant as you are rolling it out, making sure that it adheres evenly to the cake.
Next, carefully drape the rolled-out fondant over the cake, smoothing it down with your hands or a fondant smoother to remove any wrinkles or air pockets. Trim off any excess fondant from the bottom of the cake using a sharp knife.
By following these tips, you will be able to achieve a smooth and even finish when rolling out the fondant for your cake decorating project. With practice and patience, you will soon become skilled at this essential step in creating beautifully decorated cakes.
Remember that practicing how to decorate a cake in fondant requires patience and dedication but with time, anyone can become skilled at creating stunning designs.
Decorating Techniques
Once you have rolled out your fondant and covered your cake, it’s time to get creative with decorating techniques. Whether you’re looking to add texture, sculpt intricate designs, or use cut-outs to create unique patterns, there are several ways to make your fondant cake stand out.
Creating Texture
One way to elevate the look of your fondant cake is by adding texture. You can achieve this by using tools such as embossing mats, textured rolling pins, or even simple household items like parchment paper or crumpled aluminum foil. Gently press these items onto the fondant to create a variety of textures, from subtle ripples to more dramatic patterns. This simple technique can add visual interest and depth to your cake design.
Sculpting
For those who are more artistically inclined, sculpting fondant allows for endless possibilities in creating 3D elements for your cake. From delicate flowers and intricate lace patterns to figurines and realistic objects, sculpting with fondant offers a chance to showcase your creativity and attention to detail. Use specialty tools like modeling tools and veining sticks to help shape and define your fondant sculptures.
Using Cut-Outs
Cut-outs are another popular way to decorate a fondant cake. Whether you’re aiming for a sleek geometric pattern or whimsical shapes, using cutters in various sizes can help you achieve precise and uniform designs on your cake. You can also layer different colored cut-outs for a multi-dimensional effect or use edible food coloring markers to add fine details.
By utilizing these decorating techniques, you can take your fondant cake decorating skills to the next level and create visually stunning cakes that will impress any audience.
Adding Color and Details
When it comes to decorating a cake in fondant, adding color and details is the part where your creativity can truly shine. There are several techniques you can use to make your cake visually stunning, including painting, airbrushing, and using edible decorations.
One popular method for adding color to a fondant-covered cake is by hand-painting with edible food colors. This technique allows you to create intricate designs, patterns, and even realistic-looking accents on your cake. To achieve the best results, use gel or powdered food colors mixed with a clear alcohol such as vodka or lemon extract. This will create a paint-like consistency that dries quickly and won’t dissolve the fondant.
Another option for adding vibrant color to your fondant cake is airbrushing. Airbrushing allows you to achieve a smooth, seamless finish with gradients and shading that are difficult to create by hand. When airbrushing a fondant cake, it’s important to work in thin layers and allow each layer to dry before adding more color. This technique requires some practice to master but can result in stunning, professional-looking cakes.
In addition to painting and airbrushing, incorporating edible decorations such as fondant cut-outs, sugar flowers, or edible glitter can take your fondant cake decorating to the next level. These elements add dimension and visual interest to your design while allowing you to customize the look of your cake to suit any theme or occasion.
| Decorating Technique | Description |
|---|---|
| Hand-painting with edible food colors | Create intricate designs and patterns on your cake using gel or powdered food colors mixed with clear alcohol for a paint-like consistency. |
| Airbrushing | Achieve smooth gradients and shading on your fondant cake by using an airbrush tool in thin layers. |
| Edible Decorations | Incorporate sugar flowers, fondant cut-outs, or edible glitter to add dimension and visual interest to your design. |
Troubleshooting
Decorating a cake in fondant can be a beautiful and rewarding experience, but it doesn’t come without its challenges. Luckily, many common issues that arise while working with fondant can be easily fixed with the right techniques. Here are some of the most common problems you might encounter while decorating a cake in fondant, as well as some simple solutions to help you troubleshoot and overcome them.
One of the most frustrating issues when working with fondant is air bubbles forming underneath the surface. These unsightly pockets can ruin the smooth finish of your cake.
To prevent this problem, make sure to roll out your fondant on a clean, smooth surface and use a fondant smoother to gently press out any air bubbles as you work. If air bubbles do appear, you can carefully poke them with a pin and then smooth out the surrounding area to remove the trapped air.
Another common problem is fondant tearing or cracking while it is being applied to the cake. This can happen if the fondant is rolled too thin or if it becomes too dry as you work with it.
To avoid tearing, roll your fondant to an even thickness of about 1/4 inch before applying it to the cake. If tearing does occur, you can try gently smoothing the torn edges back together with moistened fingertips or using a small amount of water as “glue” to mend any cracks.
Lastly, controlling humidity is another challenge when working with fondant. High humidity can cause your decorations to become sticky and lose their shape, while low humidity can cause your fondant to dry out and crack. To combat this issue, consider investing in a dehumidifier for your workspace if humidity levels are consistently high. Conversely, if you live in a dry climate, keep your fondant-covered cakes stored in an airtight container to retain moisture.
Overall, troubleshooting common problems when decorating a cake in fondant requires patience and attention to detail. By addressing these issues proactively and employing simple solutions, you’ll be better equipped to create stunning works of edible art without frustration.
| Common Problem | Solution |
|---|---|
| Air bubbles forming under the surface | Roll out on smooth surface & use smoother; poke bubbles & smooth |
| Fondant tearing or cracking | Roll evenly & apply water as “glue” for mending |
| Controlling humidity | Invest in dehumidifier for high humidity; store cakes in airtight container for low humidity |
Final Touches
Once you have completed the decorating process, it is time to add the final touches to your fondant cake masterpiece. Final touches can include adding any last-minute elements, ensuring the cake is presented beautifully, and taking some time to admire your handiwork.
One important aspect of finishing a fondant cake is making sure that any additional decorations or elements are added carefully and thoughtfully. This could include edible flowers, figurines, or any other decorative pieces that will enhance the overall look of the cake. It’s essential to place these items strategically and with precision to maintain the integrity of your design.
In addition to the physical aspects of finishing a fondant-decorated cake, it’s crucial to consider how you will present your creation. Whether it’s for a special occasion or just for personal enjoyment, presenting your fondant cake in an attractive and appealing manner can elevate the entire experience. This could involve using a decorative cake stand, incorporating themed embellishments, or simply arranging the dessert in a visually pleasing way on the table.
Overall, putting the final touches on a fondant-decorated cake should be approached with care and attention to detail. By treating each step as an integral part of the creative process, you can ensure that your masterpiece looks and tastes as amazing as you intended when you first set out to decorate it.
Conclusion
In conclusion, learning how to decorate a cake in fondant opens up a world of creative possibilities for anyone with a passion for baking and design. From simple elegance to intricate works of art, fondant allows you to bring your cake decorating visions to life with stunning results. By following the tips and techniques outlined in this article, you can elevate your baking skills and create showstopping cakes for any occasion.
Whether you’re a beginner or an experienced baker, honing your fondant cake decorating skills is a rewarding journey that allows you to share your successes and inspire others. As you master the art of working with fondant, don’t be afraid to experiment with new ideas and push the boundaries of traditional cake design.
Share your creations on social media, participate in baking competitions, or even consider teaching others how to decorate a cake in fondant. Your enthusiasm and creativity can spark inspiration in fellow bakers and aspiring decorators.
As with any craft, practice makes perfect when it comes to working with fondant. Embrace the learning process, celebrate your achievements, and don’t be discouraged by challenges along the way.
With dedication and the right tools at your disposal, you have the potential to transform ordinary cakes into extraordinary works of art that delight both the eyes and taste buds. So go ahead – unleash your creativity and start creating stunning fondant-decorated cakes that leave a lasting impression on everyone who sees them.
Frequently Asked Questions
How Do You Put Fondant on a Cake for Beginners?
When putting fondant on a cake as a beginner, it’s important to start with a smooth, frosted cake. Roll out the fondant on a clean surface dusted with powdered sugar or cornstarch, and then carefully drape it over the cake. Smooth out any air bubbles or wrinkles with your hands or a fondant smoother.
How Do You Put Fondant Decorations on a Cake?
Putting fondant decorations on a cake is relatively easy once you have rolled out the fondant and cut it into the desired shapes. Use a small amount of water or edible glue to adhere the decorations to the cake. Be gentle and precise when placing them to avoid damaging the fondant.
Can You Put Fondant Directly on a Cake?
Yes, you can put fondant directly on a cake, but it’s important that the cake is properly prepared beforehand. It should be covered with a layer of buttercream or ganache to help the fondant adhere and create a smooth surface for decorating.
The key is to work quickly but carefully when placing and smoothing out the fondant to avoid any creases or tears in the material.

Welcome to our cake decorating blog! My name is Destiny Flores, and I am the proud owner of a cake decorating business named Cake Karma. Our mission is to provide delicious, beautiful cakes for all occasions. We specialize in creating custom cakes that are tailored specifically to each customer’s individual needs and tastes.


