Decorating a cake is an art form that can truly elevate the overall presentation and create a stunning centerpiece for any occasion. However, when it comes to a 3 layer cake, the decorating process becomes even more significant due to the added height and complexity.
In this article, we will explore the essential steps and techniques on how to decorate a 3 layer cake, from choosing the right cake base to adding the final decorative touches. Whether you’re a beginner or an experienced baker looking to enhance your skills, this guide will provide you with the knowledge and inspiration to create a show-stopping dessert.
When it comes to decorating a 3 layer cake, the first step is selecting the right type of cake. A sturdy base is essential for supporting the multiple layers and decorative elements. Additionally, preparing and assembling the layers correctly can make all the difference in achieving that perfect, professional look.
Once the basic structure is in place, filling and frosting the layers are crucial steps in creating a delicious and visually appealing 3 layer cake. From crumb coating to choosing different frosting techniques, each step plays a role in ensuring that every slice not only tastes amazing but also looks impressive. And finally, adding decorative elements and final touches will truly transform your cake into a work of edible art.
Choosing the Right Cake
When it comes to decorating a 3 layer cake, the type of cake you choose is crucial. A sturdy and stable base is essential to ensure that the layers are able to support the filling and frosting without collapsing. The best types of cakes for a 3 layer cake are typically denser in texture, such as butter cakes, pound cakes, or sponge cakes. These types of cakes have enough structure to withstand the weight of multiple layers and decorations.
It’s important to choose a cake recipe that will hold up well to stacking and decorating. A cake that is too light and fluffy may not be able to support the weight of multiple layers and can collapse under the pressure.
When choosing a cake recipe for a 3 layer cake, look for ones that have a tighter crumb structure and are less prone to crumbling. Additionally, consider using a simple syrup to moisten each layer before adding filling to further stabilize the layers.
In addition to choosing a sturdy base, consider the flavor profile of your cake in relation to the filling and frosting that you plan to use. While chocolate cake pairs well with various fillings and frostings, other flavors such as lemon, vanilla, or red velvet also offer versatile options for decorating. Consider how the different flavors will complement each other when selecting your cake recipe.
Ultimately, choosing the right cake for a 3 layer cake involves considering both stability and flavor. By selecting a dense and stable base, you’ll set yourself up for success when it comes time to fill and decorate your impressive creation.
Preparing the Layers
When it comes to decorating a 3 layer cake, the first step is to prepare the cake layers. The type of cake you choose is crucial for a 3 layer cake, as it needs to be sturdy enough to support the weight of additional layers and frosting.
A dense and moist cake, such as a classic vanilla or chocolate cake, is ideal for this purpose. It’s important to ensure that the cakes are baked evenly and are completely cooled before proceeding with the decorating process.
Once the cakes have been baked and cooled, the next step is to level them for even stacking. This can be achieved by using a long serrated knife or a cake leveler to remove any domed tops and create an even surface. By leveling the cakes, you’ll ensure that they stack neatly on top of each other without leaning or tilting.
To achieve even layers, you can use a ruler to measure the height of each cake before trimming. Once leveled, use a pastry brush or clean kitchen towel to gently brush off any loose crumbs from the cakes before proceeding with filling and frosting.
Here’s a step-by-step guide on how to prepare the layers for a 3 layer cake:
- Bake your chosen cake recipe in three separate round pans
- Allow the cakes to cool completely on wire racks
- Level each cake using a long serrated knife or a cake leveler
- Use a ruler to measure and trim each layer for even height
By following these steps, you’ll ensure that your 3 layer cake has a sturdy base and evenly stacked layers, providing a solid foundation for your decorative elements and frosting techniques.
Filling the Layers
When it comes to filling a 3 layer cake, the options are endless. From creamy custards to fruity jams, the filling can add a burst of flavor and moisture to each bite.
One popular option is a classic buttercream frosting, which can be flavored with vanilla, chocolate, or even citrus zest for a unique twist. Another delicious choice is fruit preserves, such as raspberry or apricot, which can add a fresh and tangy contrast to the richness of the cake layers.
Layering and Spreading the Filling
Once you have chosen your desired filling, it’s important to layer and spread it between each cake layer evenly. Start by placing one cake layer on a serving plate or cake board and spreading an even layer of filling over the top. Then gently place the second cake layer on top and repeat the process until all three layers are stacked. Ensure that each layer has an equal amount of filling to maintain consistency throughout the cake.
To avoid any mishaps when filling the layers of your 3 layer cake, take your time and use an offset spatula for smooth spreading. It’s also helpful to create a dam of frosting around the edge of each layer before adding the filling to prevent it from spilling out. If you want to add some extra flair to your cake, consider incorporating different fillings in each layer for a fun and unexpected surprise when cutting into the finished masterpiece.
Now that you know how to prepare and stack your 3 layer cake with delicious filling options, let’s move on to the next step: crumb coating. This crucial step will ensure that your final frosting is smooth and professional-looking.
Crumb Coating
To achieve a successful crumb coat, start by placing the first cake layer on a serving plate or cake stand. Use a small offset spatula to spread a thin layer of frosting over the top of the cake layer, making sure to cover it completely. Then, add the second layer on top and repeat the process. Finally, add the third layer and proceed with covering the entire cake with another thin layer of frosting.
One important tip for achieving a smooth and even crumb coat is to use an offset spatula to apply the frosting. This type of spatula allows for better control and precision when spreading the frosting, resulting in a more even coating. Additionally, using long, smooth strokes when applying the frosting can help create a seamless finish.
Overall, mastering the art of crumb coating is crucial in achieving a professional-looking 3 layer cake. Taking your time during this step will ensure that your final frosting application goes on without any hiccups or imperfections.
| Step | Description |
|---|---|
| 1 | Spread a thin layer of frosting over each cake layer |
| 2 | Use an offset spatula for better control and precision |
| 3 | Apply long, smooth strokes for an even coating |
Frosting Techniques
When it comes to decorating a 3 layer cake, the frosting technique plays a crucial role in the overall presentation of the cake. Whether you want a smooth and elegant finish, a textured and rustic look, or intricately piped designs, choosing the right frosting technique can elevate the appearance of your cake to the next level. In this section, we will provide detailed instructions on different frosting techniques that you can use to decorate a 3 layer cake.
For those aiming for a smooth and polished finish, using a spatula or offset icing smoother is key. Start by applying a thin layer of frosting to the entire cake to create an even base. Once the crumb coat is set, add another layer of frosting and use the spatula or icing smoother to gently glide over the surface, creating a seamless look.
On the other hand, if you prefer a textured appearance for your cake, consider using techniques such as stippling with an icing comb or creating swirls with a palette knife. These methods add visual interest and dimension to the cake’s exterior, giving it a more artisanal and homemade feel.
If you want to take your decoration skills up a notch, piping designs onto your 3 layer cake is an excellent option. From elegant rosettes and intricate lace patterns to personalized messages and ornate borders, piping allows for endless creativity. Using different shaped piping tips and practicing various techniques like stars, dots, or lines can yield stunning results that are sure to impress any crowd.
In summary, mastering different frosting techniques is essential for decorating a visually stunning 3 layer cake. Whether you opt for smooth and sleek finishes, textured and rustic looks, or artfully piped designs, each technique adds its own unique flair to your creation. Experimenting with these methods will not only enhance your baking skills but also allow you to unleash your creativity in the kitchen.
Adding Decorative Elements
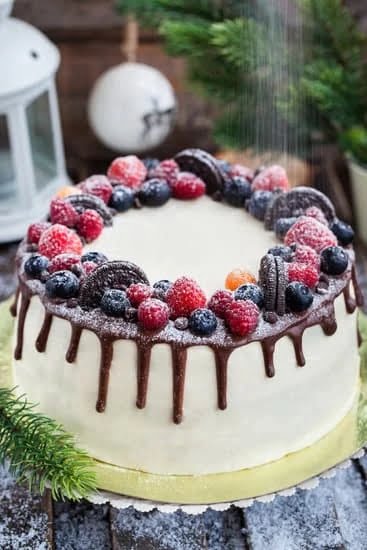
When it comes to decorating a 3 layer cake, adding decorative elements can really take your creation to the next level. Whether you’re looking to create a simple and elegant design or something more elaborate and eye-catching, there are a variety of decorative elements you can use to achieve the look you want. Some popular options include fondant, edible flowers, chocolate shavings, and fresh fruit.
Fondant is a versatile and easy-to-use option for decorating a 3 layer cake. It can be rolled out and draped over the cake for a smooth and seamless finish, or it can be molded into intricate shapes and designs for a more customized look. Edible flowers are another beautiful addition that can add a pop of color and freshness to your cake. They can be placed individually or arranged in patterns for a stunning visual effect.
For those who love chocolate, chocolate shavings are a delicious and visually appealing way to decorate a 3 layer cake. Using a vegetable peeler, you can create delicate curls of chocolate to sprinkle over the top of your frosted cake. Fresh fruit is also an excellent choice for adding color and flavor to your creation. Berries, citrus slices, or kiwi can be strategically placed on top of the cake or around the edges for a vibrant and appetizing display.
Incorporating these decorative elements into your 3 layer cake not only enhances the visual appeal but also adds texture, flavor, and personality. Experimenting with different combinations and arrangements can result in unique and stunning masterpieces that are sure to impress any crowd.
| Decorative Element | Description |
|---|---|
| Fondant | Versatile option that can be used for smooth finishes or intricate designs |
| Edible Flowers | Adds color and freshness; can be placed individually or arranged in patterns |
| Chocolate Shavings | Delicious addition; created using vegetable peeler for delicate curls |
| Fresh Fruit | Adds color, flavor, texture; berries, citrus slices, kiwi are great choices |
Final Touches
Adding the final touches to a 3 layer cake can elevate its presentation and make it truly showstopping. Whether it’s adding a decorative border, writing a personalized message, or dusting with edible glitter, these finishing touches can take your cake from ordinary to extraordinary.
When it comes to adding a border to your 3 layer cake, you have several options to choose from. You can use a piping bag fitted with a decorative tip to create a beautiful buttercream border around the top and bottom edges of the cake.
Alternatively, you can use fondant to create intricate patterns or shapes for a more unique look. Another option is to simply sprinkle some colored sugar crystals around the edges for a simple yet eye-catching touch.
Writing a message on the cake adds a personal and meaningful touch, whether it’s for a birthday, anniversary, or other special occasion. To achieve professional-looking lettering, use a piping bag filled with contrasting colored frosting or royal icing. Alternatively, you can use edible markers or food-safe stencils to create your message with precision.
Dusting the cake with edible glitter or sprinkles is another easy way to add some sparkle and pizzazz to your creation. This can be done using a fine mesh sifter to gently dust the entire surface of the cake for an all-over shimmer effect. You can also get creative by strategically placing edible flowers or fresh fruit on top of the cake for an elegant and natural finishing touch.
Overall, these final touches are what will make your 3 layer cake stand out and leave a lasting impression on your guests. With attention to detail and creativity, you can transform your cake into a work of art that not only tastes delicious but looks stunning as well.
Conclusion
Decorating a 3 layer cake may seem like a daunting task, but with the right techniques and a bit of practice, it can be an incredibly rewarding experience. From choosing the right cake base to adding the final decorative touches, each step plays a crucial role in creating a stunning and delicious dessert.
The satisfaction of successfully decorating a 3 layer cake is not only in the visual appeal but also in the joy of sharing something homemade and delightful with friends and family.
Throughout this article, we have discussed the importance of selecting a sturdy cake base, properly preparing and filling the layers, and mastering various frosting techniques. We have also explored the diverse range of decorative elements that can elevate a simple cake into an impressive centerpiece. By following these guidelines and incorporating your own creativity, you too can create a show-stopping 3 layer cake for any occasion.
So why not give it a try? Take inspiration from our tips and step-by-step instructions to embark on your own cake decorating journey. Whether it’s for a birthday celebration, anniversary, or just for the love of baking, there’s no better way to delight your loved ones than with a beautifully decorated 3 layer cake.
With practice and patience, you’ll soon discover the joy of creating edible works of art that not only look spectacular but taste absolutely delicious. So go ahead, roll up your sleeves, grab those piping bags and spatulas – let’s decorate.
Frequently Asked Questions
How Do You Stack a 3 Layer Cake?
To stack a 3 layer cake, start with a flat cake board or plate. Apply a small amount of icing to the board, then place the first layer of cake on top. Add a generous amount of icing on top of the first layer, then place the second layer on top. Repeat for the third layer.
How Do You Put Icing on a 3 Layer Cake?
Putting icing on a 3 layer cake involves spreading a generous amount of icing on top of each cake layer before adding the next one. Once all layers are stacked, use a spatula to apply a crumb coat of icing around the entire cake, then refrigerate it to set before adding a final smooth coat.
What Should I Put in Between Cake Layers?
Between cake layers, you can add various fillings such as fruit preserves, flavored whipped cream, custard, or frosting. The filling should complement the flavor of the cake and add moisture and texture to each bite. Be sure to spread it evenly between each layer for consistent flavor throughout the cake.

Welcome to our cake decorating blog! My name is Destiny Flores, and I am the proud owner of a cake decorating business named Cake Karma. Our mission is to provide delicious, beautiful cakes for all occasions. We specialize in creating custom cakes that are tailored specifically to each customer’s individual needs and tastes.


