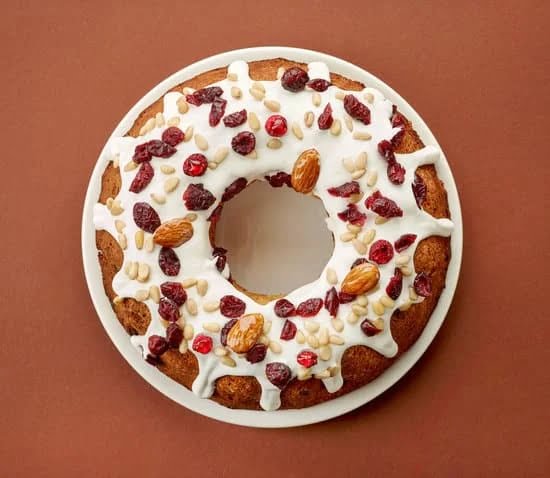
Are you looking to add a touch of elegance and artistry to your cakes? If so, then learning how to make fondant cake decorations is the perfect skill to master. Fondant is a versatile sugar paste that can be shaped, molded, and colored to create stunning decorations for cakes of all kinds. Whether you are a professional baker or an aspiring home baker, fondant cake decorations can take your creations to the next level.
Fondant has become increasingly popular in the world of cake decorating due to its smooth and polished finish. This article will provide you with an in-depth guide on how to create beautiful fondant cake decorations, from the necessary tools and ingredients needed to step-by-step instructions for making basic and advanced shapes. You’ll also learn how to troubleshoot common fondant decorating issues and get tips on assembling and arranging the decorations on your cakes.
Mastering the art of fondant cake decorations is not only about creating visually stunning cakes but also about adding a personal touch and artistic flair to your baked creations. Whether it’s simple flowers or intricate designs, fondant allows for endless possibilities in creating unique and customized cake decorations that will impress guests and clients alike.
Stay tuned as we delve into the world of fondant cake decorations, providing you with the knowledge and skills needed to elevate your cake decorating game.
Necessary Tools and Ingredients
| Tools | Ingredients |
|---|---|
| Rolling pin | Fondant (store-bought or homemade) |
| Fondant smoother | Tylose powder (for added stability) |
| Cutting wheel or knife | Gel food coloring |
| Various shaped cuttersFlavor extracts (optional) |
These tools can often be found at specialty baking stores or online, and some may even be available at your local craft store. If you are unable to find a specific tool, there are often alternative methods for achieving similar results. Additionally, while store-bought fondant is convenient, many bakers also choose to make their own using marshmallows and powdered sugar for a more homemade touch.
Properly preparing the fondant is crucial in ensuring that the cake decorations turn out as intended. Before diving into creating intricate designs and shapes, it’s important to knead the fondant until it becomes smooth and pliable.
This will make it easier to work with and less likely to crack or tear during the decorating process. Remember to also store any unused fondant properly by tightly wrapping it in plastic wrap and placing it in an airtight container to prevent it from drying out.
By having these tools and ingredients on hand, as well as taking the time to prepare the fondant correctly, you’ll be well-equipped to start creating beautiful and unique decorations for your cakes.
Overall this table provide very useful details for readers who want know about how do they have required necessary tools or ingredients which play vital role while making cake decorations with Fondants sake.
Through these information readers will get very impressive detail about all kinds of materials that need during mold up Fondants Cake Decoration Section easily can read thought this data below table Content which reveals minimum three different materials each(Fondant,Cutter) regarding decoration surely helps us achieve our required goal effectively & successfully on Cake.
Preparing the Fondant
When it comes to creating stunning fondant cake decorations, properly preparing the fondant is crucial. Here is a step-by-step guide on how to ensure that your fondant is ready for decorating:
1. Kneading the Fondant: Before you start shaping and molding the fondant into decorations, it’s essential to knead it well. This process helps to make the fondant more pliable and removes any air bubbles that may have formed. To knead the fondant, sprinkle a clean work surface with powdered sugar to prevent sticking, then firmly press and fold the fondant until it becomes smooth and elastic.
2. Rolling Out the Fondant: Once the fondant is properly kneaded, roll it out to your desired thickness using a rolling pin also dusted with powdered sugar. The rolled-out fondant should be large enough to accommodate all of the decorations you plan to make.
3. Cutting Shapes: Use cookie cutters or specialized cutters designed for fondant to create basic shapes such as flowers, leaves, or hearts. Ensure that you have a sharp, clean edge when cutting through the fondant to achieve neat and precise shapes for your decorations.
By following these steps, you can prepare your fondant for decorating with ease and precision.
4. Painting and Airbrushing techniques: If you are looking for advanced techniques in decorating with painting or airbrushing on your cake decoration this can be done easily once your decoration shape has been finalized.
Coloring and Flavoring Fondant
When it comes to fondant cake decorations, adding color and flavor can take your creations to the next level. Whether you’re aiming for a specific theme or trying to match the flavor of the cake itself, knowing how to color and flavor fondant is essential. Here’s a guide on how to personalize your fondant for stunning cake decorations.
Techniques for Adding Color:
1. Gel Food Coloring: Gel food coloring is preferred over liquid food coloring as it doesn’t alter the consistency of the fondant. Add a small amount at a time until you achieve the desired hue.
2. Kneading: To evenly distribute the color, knead the fondant on a surface lightly dusted with powdered sugar or cornstarch.
3. Mixing Colors: You can mix different colors of fondant to create unique shades or use pre-colored fondant for convenience.
Suggestions for Flavoring:
– Extracts: Add a few drops of flavored extracts such as vanilla, almond, or citrus to give your fondant a delightful taste.
– Flavored Syrups: Another option is to use flavored syrups like raspberry or caramel for an extra burst of flavor.
– Cocoa Powder: For chocolate-flavored fondant, incorporate unsweetened cocoa powder into the mixture.
By experimenting with different colors and flavors, you can customize your fondant according to your creative vision and taste preferences. This personal touch adds another dimension to your cake decorations and enhances the overall presentation of your baked goods.
As you gain experience in working with colored and flavored fondant, you’ll develop an understanding of which combinations work best together. There are endless possibilities for creating vibrant colors and delicious flavors that will elevate your fondant cake decorations.
Making Basic Fondant Shapes
Creating basic fondant shapes is a fundamental skill for anyone interested in cake decorating. Whether you are a beginner or an experienced baker, mastering these foundational techniques will elevate the visual appeal of your cakes. In this section, we will provide detailed instructions on creating basic shapes such as flowers, leaves, and ribbons using fondant.
Step-by-Step Instructions
To create basic fondant shapes, start by rolling out the fondant to an even thickness using a rolling pin. Use cornstarch or powdered sugar to prevent sticking. Then, use cookie cutters or specific fondant cutters to cut out the desired shapes. For flower petals, use a small circle cutter to create individual petals and then gently shape them with your fingers or modeling tools.
For leaves, use a leaf-shaped cutter or knife to carefully cut out the shape from the rolled fondant. To make ribbons, roll out thin strips of fondant and use a sharp knife to trim them into neat edges. With these basic techniques, you can create a variety of decorations to adorn your cakes.
Tips for Professional-Looking Decorations
Achieving clean, smooth edges and realistic details is essential for creating professional-looking fondant decorations. When cutting out shapes, make sure to press firmly and evenly to avoid any jagged edges. If working with intricate designs or small details, consider using a pair of tweezers or toothpicks for precision.
Additionally, smoothing the edges of the fondant shapes with your fingertips or a ball tool can give them a polished finish. For floral decorations, adding texture and dimension by gently shaping the petals or leaves with modeling tools will enhance their realism. Practice patience and attention to detail when making these basic shapes for stunning results on your cakes.
Remember that practice makes perfect when it comes to working with fondant. Experiment with different colors and sizes to develop your skills in making basic fondant shapes before moving on to more advanced techniques in cake decorating.
Advanced Fondant Techniques
Molding Fondant
Molding fondant allows for the creation of intricate and detailed decorations that can elevate the overall look of a cake. To start, knead the fondant until it is soft and pliable, then shape it into the desired form using your hands or specialized tools.
For more complex shapes, consider using silicone molds to achieve precise details. Once the desired shape is achieved, carefully remove the fondant from the mold and allow it to set before incorporating it into your cake design.
Embossing Techniques
Embossing fondant involves creating textures and patterns on the surface of the fondant for added visual interest. This can be accomplished by using embossing mats, rolling pins, or even decorative stamps specifically designed for fondant work. Gently roll over the surface of the fondant with an embossing tool to transfer the pattern onto the material. This technique adds depth and dimension to your decorations, making them stand out on a cake.
Painting Fondant
Painting on fondant opens up a world of possibilities for creating unique and customized cake decorations. Using edible food coloring mixed with clear alcohol (such as vodka or lemon extract) creates a paint-like consistency that can be applied directly onto fondant surfaces. This allows for intricate detailing like delicate designs, shading, and highlighting to be added to your decorations. With a steady hand and some creativity, painting on fondant can result in stunning, one-of-a-kind cake embellishments.
With these advanced techniques at your disposal, you can take your fondant cake decorating skills to new heights. Whether you choose to mold, emboss, or paint with fondant, these methods offer endless opportunities for creating show-stopping cake decorations that are sure to impress any audience.
Assembling Fondant Cake Decorations
Assembling fondant cake decorations is the final step in creating a visually stunning and personalized cake. Once you have prepared and shaped your fondant decorations, it’s essential to know how to arrange them on the cake for the best visual impact. The key to successful assembly lies in careful planning and attention to detail.
When assembling fondant decorations, it’s important to consider the overall design of the cake. Start by visualizing where each decoration will be placed and how they will complement each other. This may involve sketching out a rough design or layout to guide you as you assemble the decorations on the cake surface.
The stability of the decorations is also crucial when assembling fondant pieces on a cake. It’s essential to ensure that each element is securely attached to the cake and to one another, especially if you are working with larger or more intricate pieces. Utilizing edible glue, water, or royal icing can help adhere the fondant decorations firmly in place without compromising their appearance.
Another aspect to consider when assembling fondant decorations is the longevity of the design. If you’re making a cake that needs to be transported or stored for an extended period before serving, it’s important to take extra precautions when assembling your decorations to prevent any damage during handling and storage.
| Aspect | Description |
|---|---|
| Visual Impact | Arranging decorations for the best visual impact |
| Stability | Ensuring secure attachment of decorations using edible glue, water, or royal icing |
| Longevity | Taking precautions for transportation and storage of decorated cakes |
Troubleshooting Common Fondant Decorating Issues
When working with fondant for cake decorating, it is essential to be aware of potential issues that may arise during the process. Troubleshooting common fondant decorating issues can help ensure that your cake decorations turn out beautiful and professional-looking. From cracking and tearing to misshapen decorations, there are several challenges that decorators may encounter when working with fondant.
One common issue when working with fondant is cracking. Cracks can occur when the fondant becomes too dry or if it is rolled too thin. To prevent this problem, be sure to knead the fondant well before rolling it out, as this will help make it more pliable. Additionally, carefully roll out the fondant to a consistent thickness, and avoid applying too much pressure which can lead to cracking.
Tearing is another potential problem when decorating with fondant. This can happen if the fondant is stretched too much while being placed on the cake or shaped into decorations. To avoid tearing, handle the fondant gently and use cornstarch or powdered sugar to prevent sticking. If tears do occur, they can often be patched together by smoothing over with a small amount of water until the seam is barely visible.
In addition to cracking and tearing, another issue that decorators may face is misshapen decorations. This can occur if the fondant becomes too warm while being worked with or if it is manipulated too quickly. To prevent this problem, work in a cool environment and take breaks if the fondant becomes too warm from handling. Patience and precision are key in ensuring that your fondant decorations maintain their intended shape throughout the decorating process.
Conclusion and Next Steps
In conclusion, learning how to make fondant cake decorations can open up a world of possibilities for creating visually stunning and personalized cakes. By mastering the techniques outlined in this guide, you can elevate your cake decorating skills and impress friends, family, or clients with your beautifully adorned creations. Fondant offers versatility in both design and flavor, allowing you to unleash your creativity and craft unique decorations that suit any occasion.
As you continue to practice and experiment with fondant cake decorations, remember that patience and perseverance are key. Like any other skill, mastering fondant decorating takes time and practice. Don’t be afraid to try new techniques or push your creative boundaries to see what unique designs you can create.
Additionally, there are many resources available for further learning and inspiration in the world of cake decorating with fondant. Whether it’s online tutorials, books, or classes, continuing to expand your knowledge will only enhance your abilities as a cake decorator.
In the end, making fondant cake decorations is a labor of love that allows you to add a personalized touch to special occasions through edible works of art. So gather your essential tools and ingredients, prepare your fondant with care, experiment with coloring and flavoring, mold intricate shapes or create advanced designs, assemble your decorations on the finished cake with precision – and most importantly – enjoy the process. Happy decorating.
Frequently Asked Questions
How to Make Fondant Decorations for a Cake?
Making fondant decorations for a cake involves kneading the fondant until it’s soft and pliable, then rolling it out to the desired thickness. Use cookie cutters or a sharp knife to cut out shapes, and let them dry before placing on the cake.
How Far in Advance Can I Make Fondant Decorations?
Fondant decorations can be made in advance and stored at room temperature in a cool, dry place for several weeks. It’s best to allow enough time for the decorations to dry completely before using them on a cake.
What Do You Need to Make Fondant Figures?
To make fondant figures, you’ll need fondant in various colors, edible glue or water for adhering parts together, toothpicks or skewers for support, and small tools like a ball tool or modeling stick for shaping details. Patience and attention to detail are also essential for creating realistic fondant figures.

Welcome to our cake decorating blog! My name is Destiny Flores, and I am the proud owner of a cake decorating business named Cake Karma. Our mission is to provide delicious, beautiful cakes for all occasions. We specialize in creating custom cakes that are tailored specifically to each customer’s individual needs and tastes.


