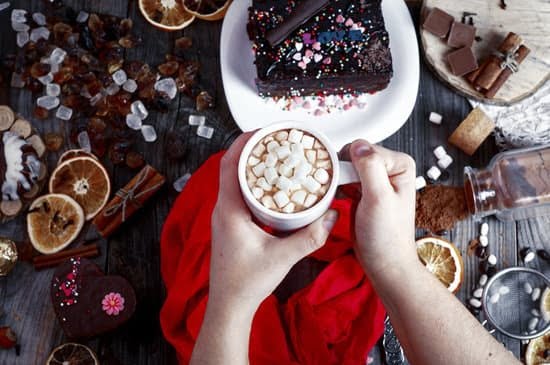
Welcome to our blog post about Easy Christmas Cake Decorating Ideas for Beginners. Are you ready to add a touch of festive magic to your holiday celebrations? In this article, we will share a wide range of simple and delightful ideas for decorating your Christmas cake. Whether you’re just starting out in the world of cake decorating or looking for some easy inspiration, we’ve got you covered.
We understand that not everyone has the time or experience to create elaborate cake designs, so our focus will be on beginner-friendly techniques that anyone can master. From classic Christmas themes to whimsical winter wonderlands, we’ll guide you through step-by-step instructions and provide helpful tips along the way.
Before we jump into the decorating ideas, it’s important to have the right tools and supplies on hand. In the next section, we will outline the essential equipment and ingredients needed to create beautiful Christmas cake decorations. So let’s gather everything we need and get ready to embark on a fun and creative journey.
Whether you’re looking to impress your loved ones or simply want to enjoy the process of cake decorating, these easy Christmas cake decorating ideas for beginners will help you create a stunning centerpiece for your holiday table. Get ready to spread joy and cheer with your beautifully decorated Christmas cake.
Supplies Needed
To create beautiful Christmas cake decorations, it’s important to have the right tools and supplies on hand. Here are some essential equipment and ingredients that you will need:
- Cake Decorating Tools: To begin with, you’ll need a good quality cake turntable to easily rotate and decorate your cake. A set of icing spatulas in different sizes will come in handy for smoothing the frosting. Piping bags and tips are essential for creating intricate designs and adding texture to your decorations. A palette knife is useful for applying buttercream or ganache smoothly to the cake’s surface.
- Frosting: The type of frosting you choose will depend on personal preference. Buttercream is a popular choice, as it is easy to work with and can be colored or flavored as desired. Royal icing is another option, known for its smooth finish and ability to create intricate details.
- Food Coloring: Having a variety of food coloring gels or pastes in different colors will allow you to create vibrant and customized decorations. Look for gel-based colors that do not alter the consistency of your frosting.
- Fondant: If you plan on using fondant for any of your decorations, make sure to have a good quality ready-to-use fondant or make your own using marshmallows and powdered sugar.
- Edible Decorations: You can add festive flair with edible decorations such as sprinkles, edible glitter, sugar pearls, or silver dragees. These small touches can bring sparkle and dimension to your Christmas cake.
- Optional Extras: Depending on the design you have in mind, you may also need additional tools such as cookie cutters in various shapes, impression mats or rolling pins for fondant embossing, molds for creating detailed figures or accents out of chocolate or gum paste.
Having these supplies readily available will make the decorating process smoother and more enjoyable. Don’t be afraid to experiment with different tools and techniques to find what works best for you. Remember, practice makes perfect, and with the right equipment, you can create beautiful Christmas cake decorations that will impress your family and friends.
Basic Techniques
Decorating a Christmas cake can seem daunting, especially for beginners. However, with the right techniques and a little practice, you’ll be able to create beautiful designs that will impress your friends and family. In this section, we will cover some basic cake decorating techniques that are perfect for beginners.
One important technique to learn is piping. Piping involves using a pastry bag and different shaped tips to create decorative patterns on your cake. It’s essential to start with the right consistency of icing or buttercream for piping.
A thick consistency is best for creating shapes like stars or rosettes, while a thinner consistency is better for writing or creating intricate designs. Practice piping simple shapes on parchment paper before moving onto your cake to get a feel for the pressure needed and the control of the bag.
Another fundamental technique is fondant handling. Fondant is a smooth sugar paste that can be rolled out and draped over cakes to create a flawless finish. To work with fondant, make sure you have a clean surface dusted with powdered sugar or cornstarch to prevent sticking.
Knead the fondant until it’s pliable and roll it out using a rolling pin. Carefully transfer it onto your cake and smooth out any wrinkles or air bubbles using your hands or a fondant smoother tool.
One pro tip for working with fondant is to always use an icing base layer on your cake before adding the fondant. This not only helps the fondant adhere better but also provides an extra layer of moisture and flavor.
By mastering these basic techniques of piping and fondant handling, you’ll have a solid foundation for creating various decorations on your Christmas cake. Remember that practice makes perfect, so don’t be discouraged if things don’t turn out perfectly on your first try. With time and patience, you’ll develop your skills and confidence in no time.
Classic Christmas Themes
Classic Christmas Themes:
When it comes to decorating your Christmas cake, classic Christmas themes are a great place to start. These timeless decorations instantly bring the holiday spirit to your cake and can be created using various techniques that cater to your skill level. In this section, we will guide you through creating beautiful snowflakes, candy canes, and holly designs for your Christmas cake.
- Snowflakes: Snowflakes are a staple in Christmas decorations and can easily be incorporated into your cake design. To create delicate snowflake patterns, you can use royal icing or buttercream frosting. If you’re a beginner, start with simple designs such as six-pointed snowflakes made by piping royal icing onto wax paper or parchment paper.
Once they have hardened, gently remove the snowflakes from the paper and place them on your cake. You can also create 3D snowflake designs using fondant or gum paste molds. - Candy Canes: Candy canes are another classic Christmas symbol that adds a festive touch to any cake. To make candy cane decorations, you can use either fondant or marzipan. Roll out red and white fondant into long ropes and twist them together to form the iconic candy cane shape. You can also create miniature candy canes using red and white modeling chocolate or piped royal icing.
- Holly: Holly leaves and berries are often associated with Christmas and make delightful decorations for your cake. To create holly leaves, roll out green fondant or gum paste and cut out leaf shapes using a leaf cutter or a sharp knife.
Use an edible food color marker or petal dust mixed with vodka to add realistic veins to the leaves. For the berries, use small red candies like jelly beans or dragees, or make tiny balls of red fondant.
As you decorate your cake with these classic Christmas themes, remember that practice makes perfect. Start with simple designs and gradually challenge yourself with more intricate patterns. The most important thing is to have fun and let your creativity shine through. With a little bit of patience and the right techniques, you’ll be able to create a stunning Christmas cake that will impress your family and friends.
| Decoration | Technique |
|---|---|
| Snowflakes | Piping royal icing or buttercream frosting |
| Candy Canes | Twisting red and white fondant or marzipan together |
| Holly leaves and berries | Using leaf cutters or sharp knife for leaves, small candies or red fondant for berries |
Whimsical Winter Wonderland
In this section, we will guide you step-by-step on how to create enchanting winter-themed cake decorations that will transport your Christmas cake into a whimsical winter wonderland. Get ready to turn your cake into a magical centerpiece.
- Adorable Snowmen: Start by shaping three small balls of fondant in different sizes – one for the body, one for the head, and one for the hat. Stack them together and secure with some edible glue or water. Use a toothpick to create eyes and buttons on the snowman’s body.
For the nose, roll some orange fondant into a small cone shape and attach it to the face using edible glue. Finish off your snowman by adding arms made from pretzel sticks and a tiny fondant scarf. - Glittery Icicles: Begin by rolling out some white fondant into thin ropes or strips in varying lengths. Carefully lay them over the edges of your cake to create icicle-like drips. If desired, sprinkle some edible glitter or shimmer dust over the fondant before attaching it to add sparkle and shine.
- Winter Animals: Bring woodland creatures to life on your cake with simple fondant decorations. Use cookie cutters in shapes such as deer, rabbits, and birds to cut out silhouettes from colored fondant or gum paste. Attach them to your cake using edible glue or water and add details with an edible food marker or piping gel.
- Sparkling Snowflakes: Roll out some royal icing or gum paste thinly onto a surface lightly dusted with powdered sugar or cornstarch. Use snowflake-shaped cutters to create delicate snowflakes in various sizes. Allow them to dry completely before attaching them around your cake using edible glue.
- Glistening Trees: To create miniature Christmas trees, make cone shapes out of green-colored gum paste or mold them using buttercream frosting tinted green for a more edible option. Use a star-shaped tip to pipe small stars on the trees in various colors to represent ornaments. Dust your trees with edible glitter or shimmer dust for a dazzling effect.
By following these easy instructions, you can transform your Christmas cake into a whimsical winter wonderland that will bring joy and awe to anyone who sees it. Let your imagination run wild as you experiment with different designs and combinations to truly make your cake unique and magical. Don’t forget to take pictures and share your beautiful creations with friends and family – they’ll be amazed at your newfound cake decorating skills.
Festive Fondant Designs
Embossing Techniques
One of the easiest ways to add a touch of elegance to your Christmas cake is with embossing techniques. Embossing involves creating raised or indented patterns on the surface of the fondant. To achieve this, you will need an embossing tool or a small cookie cutter with intricate patterns.
To get started, roll out your fondant to a thickness of about 1/8 inch. Dust your work surface and the fondant lightly with cornstarch to prevent sticking. Place the embossing tool or cookie cutter onto the fondant and press firmly but gently to make an impression. Carefully remove the tool or cutter and repeat with different designs as desired.
Once you have created some beautiful embossed patterns on your fondant, you can further enhance them by painting or dusting them with food coloring or edible luster dust for a shimmering effect. The embossed designs will instantly elevate your Christmas cake and impress your guests.
Creating Textured Effects
Adding texture to your fondant decorations can give them a more realistic look and add depth to your Christmas cake design. There are various tools and techniques you can use to create textured effects on fondant.
One popular method is using texture mats, which come in different patterns such as wood grain, brick, or fabric. Simply press the texture mat onto rolled-out fondant to create an instant textured effect. You can then cut out various shapes from the textured fondant to create accents for your cake.
Another way to add texture is by using modeling tools like a veining tool or ball tool. You can use these tools to create lines, dots, or even ruffles on your fondant decorations. For example, you can use a veining tool to create realistic-looking veins on holly leaves or petals of flowers.
Remember that practice makes perfect when it comes to working with fondant. Don’t be afraid to experiment with different texture techniques and have fun creating unique designs for your Christmas cake.
Edible Christmas Characters
In this section, we will explore the fun and creative world of edible Christmas characters for decorating your cake. These adorable figures will turn your cake into a festive masterpiece that will delight both children and adults.
To bring Santa Claus to life on your Christmas cake, you’ll need some red and white fondant, as well as a small amount of black fondant for his belt and boots. Start by shaping the body of Santa with a ball of red fondant and flatten it slightly to form his body. Then, roll out another piece of red fondant to create his hat and attach it to the head using a little water or edible glue.
Use white fondant for his beard, mustache, and trim on the hat. Add small details like his eyes and nose using black fondant or edible markers.
If you prefer something a little more whimsical, try making cute little snowmen for your cake decoration. You can use white fondant to shape the body of the snowmen, making them into small balls of different sizes to create variation in height. Add tiny black dots for their eyes and mouth using edible markers or black food coloring mixed with water. Use orange fondant to make carrot-shaped noses and roll out small pieces of colored fondants for scarves.
Reindeer are another popular choice when it comes to edible Christmas characters. To make Rudolph and his friends, you’ll need brown fondant for their bodies and antlers, as well as red fondant for their noses.
Shape the body with brown fondant into an oval shape, then attach two antlers on top using toothpicks or floral wire if you’re confident in doing so. Roll out small balls of red fondant for their noses before attaching them to the reindeer’s face with a little water or edible glue.
These are just a few examples of the many possibilities you have when it comes to creating edible Christmas characters for your cake. With some basic tools and readily available ingredients, you can bring your cake to life in a fun and festive way. Let your creativity run wild as you experiment with different shapes, colors, and expressions for your edible characters.
Remember to keep practicing and don’t be afraid to make mistakes. Cake decorating is all about having fun and expressing your creativity. So gather your supplies, get into the Christmas spirit, and start sculpting these adorable edible characters for a cake that will truly come alive this holiday season.
Non-Edible Decorations
In this section, we will explore the fun and creative world of non-edible decorations for your Christmas cake. These decorations are perfect for beginners and require no baking skills. So let’s dive in and discover some quick and easy ideas to add a decorative touch to your cake.
Ribbon
One simple and effective way to decorate your Christmas cake is by using ribbon. Choose a festive ribbon that matches the theme of your cake and carefully wrap it around the sides of the cake. You can secure it with a small dot of icing or use straight pins to hold it in place. Adding a colorful ribbon instantly adds elegance and visual interest to your cake.
Ornaments
To give your Christmas cake a touch of sparkle, consider using ornaments as decorations. Choose small, lightweight ornaments in colors that complement your cake design. Simply attach them to toothpicks or skewers and insert them into the top of your cake. You can arrange them in a pattern or scatter them randomly for a playful look. This is an easy way to add instant charm and festivity to your creation.
Mini Christmas Trees
For an extra festive touch, why not adorn your Christmas cake with mini Christmas trees? These adorable decorations are readily available at craft stores or online retailers during the holiday season. Place these miniature trees on top of your cake or arrange them around the base for an eye-catching display. You can dust them with edible glitter for added shimmer if desired.
Remember, when using non-edible decorations, it’s important to inform your guests which parts are edible and which parts are not. This will prevent any confusion or potential hazards.
By incorporating these non-edible decorations into your Christmas cake design, you can easily elevate its overall appearance without any baking skills required. The options are endless, so let your creativity run wild and have fun decorating.
Finishing Touches
One of the easiest and most effective ways to add a touch of elegance to your Christmas cake is by using shimmering dusts. These edible powders come in various colors and can be brushed or painted onto your cake for a glamorous finish. For example, you can use gold or silver shimmer dust to create a sparkling effect on a winter-themed cake.
Simply dip a soft brush into the shimmer dust and gently apply it to the desired areas of your cake. You can also mix different shades of shimmer dust together to create a unique color that matches your overall theme.
Another finishing touch that can make your Christmas cake stand out is the use of festive sprinkles. Sprinkles are an easy way to add pops of color and texture to your cake design. You can choose from a wide variety of sprinkles, such as colored sugar, nonpareils, or themed shapes like tiny gingerbread men or snowflakes.
To apply sprinkles, simply sprinkle them over the icing or frosting before it sets. For more precise designs, you can also carefully place individual sprinkles using tweezers.
For those who want to take their decorating skills to the next level, consider adding fondant decorations as part of your finishing touches. Fondant cutouts can be used to create intricate designs such as flowers, leaves, or bows. You can either purchase pre-made fondant cutters in various shapes and sizes or create your own templates using cardstock paper.
Roll out the fondant with a rolling pin and press the cutters onto it to create your desired shapes. Then gently place these fondant decorations on top of your cake for an elegant and professional look.
Remember, when adding finishing touches to your Christmas cake, it’s important not to go overboard. Keep in mind that simplicity goes a long way in creating an eye-catching cake design. Choose one or two finishing touches that complement your overall theme and enhance the overall appearance without overwhelming it. With the right finishing touches, your Christmas cake will be sure to impress your family and friends during the holiday season.
Conclusion
In conclusion, the easy Christmas cake decorating ideas for beginners outlined in this article provide a wonderful opportunity to create a stunning centerpiece for your holiday celebrations. Whether you are new to cake decorating or looking to improve your skills, these simple yet impressive designs will surely make your Christmas cake a showstopper.
By following the step-by-step instructions and helpful tips provided, you can bring the holiday spirit to your cake with classic Christmas themes such as snowflakes, candy canes, and holly. Additionally, you can step into a magical winter wonderland with whimsical decorations like adorable snowmen and glittery icicles. These ideas are perfect for beginners as they are easy to follow and produce beautiful results.
Furthermore, this article also guides you through working with fondant and creating festive edible characters using readily available ingredients and basic tools. If you’re looking to add non-edible decorations to your cake, there are ideas for that too. Ribbon, ornaments, and mini Christmas trees can all be used to add a decorative touch without requiring any baking skills.
Lastly, don’t forget those special finishing touches that truly elevate your Christmas cake. Shimmering dusts and festive sprinkles can be used creatively to make your cake shine even more. With these easy Christmas cake decorating ideas at hand, get ready to impress your loved ones and bring joy to your festive table.
Frequently Asked Questions
What is the easiest way to decorate a Christmas cake?
The easiest way to decorate a Christmas cake is by using ready-made decorations and toppings. These can include things like edible sugar ornaments, sprinkles, and nonpareils.
Another option is to use pre-made icing and frosting in various colors to create simple designs on the cake, such as snowflakes or candy cane stripes. Additionally, adding festive candles or a personalized cake topper can instantly elevate the appearance of the Christmas cake without much effort.
How do you decorate a cake in a simple way?
When it comes to decorating a cake in a simple way, there are several techniques that can be used. One option is to use a smooth buttercream frosting and simply pipe some decorative borders or patterns onto the cake using different nozzles.
Another easy way is to dust the top of the cake with powdered sugar or cocoa powder through a stencil to create a pretty design. Adding fresh fruits, such as strawberries or raspberries, can also provide an elegant touch while requiring minimal preparation.
What type of cake is easiest to decorate?
The type of cake that is easiest to decorate depends on personal preference and familiarity with different baking techniques. However, generally speaking, cakes with flat surfaces are usually easier to decorate than those with multiple layers or intricate shapes. Sheet cakes offer ample space for creativity and allow for simple yet impactful designs.
Bundt cakes are also quite convenient as their unique shape already adds visual appeal without needing much extra decoration. Ultimately, any type of cake can be decorated easily with practice and taking into consideration one’s own skill level.

Welcome to our cake decorating blog! My name is Destiny Flores, and I am the proud owner of a cake decorating business named Cake Karma. Our mission is to provide delicious, beautiful cakes for all occasions. We specialize in creating custom cakes that are tailored specifically to each customer’s individual needs and tastes.


