Are you looking to take your cake decorating skills to the next level? One way to do so is by learning how to decorate a cake with chocolate.
Chocolate is not only a delicious addition to any dessert, but it can also be used to create beautiful and intricate designs on cakes. In this article, we will explore the art of cake decorating with chocolate, from essential tools and ingredients to techniques for melting and tempering chocolate, as well as creating decorative effects and patterns.
When it comes to decorating a cake with chocolate, there are a few essential tools and ingredients that you will need. From piping bags to different types of chocolate, these tools will help you achieve the perfect decorative effect on your cakes. We will discuss each of these tools and ingredients in detail, so you can be fully prepared to start creating your masterpiece.
Not all chocolates are created equal when it comes to cake decorating. Choosing the right type of chocolate is crucial for achieving the desired look and taste. Whether you prefer dark, milk, or white chocolate, we will guide you through the process of selecting the best chocolate for your cake decorating needs. So let’s get started on this sweet journey into the world of cake decorating with chocolate.
Essential Tools and Ingredients for Decorating With Chocolate
When it comes to decorating a cake with chocolate, having the right tools and ingredients is essential for achieving professional-looking results. Here are some essential items you will need to have in your kitchen before you start decorating with chocolate:
Tools
To decorate a cake with chocolate, you will need the following tools: a double boiler or microwave for melting the chocolate, piping bags and tips for piping the melted chocolate onto the cake, offset spatulas for spreading and smoothing the chocolate, a parchment paper or silicone mat for creating chocolate decorations, and a sharp knife or vegetable peeler for making chocolate curls and shards.
Ingredients
The type of chocolate you use will significantly impact the flavor and appearance of your decorated cake. It’s vital to choose high-quality chocolate that contains at least 60% cocoa solids. Additionally, you may want to consider using different types of chocolate, such as dark, milk, and white chocolate, to create contrast in your decorations. Other essential ingredients include heavy cream for ganache and butter for added richness and smoothness.
Additional Tips
In addition to tools and ingredients, it’s essential to have patience and attention to detail when decorating a cake with chocolate. Make sure to set aside enough time for the decoration process and allow yourself to experiment with different techniques and designs.
Practice makes perfect – don’t be discouraged if your first attempt doesn’t turn out exactly as planned. With practice and creativity, you’ll be able to create beautifully decorated cakes that showcase your skills using chocolate as an art medium.
Choosing the Right Chocolate for Cake Decorating
Types of Chocolate
There are several types of chocolate to choose from, including milk chocolate, dark chocolate, and white chocolate. Each type has its own unique flavor profile and can create different decorative effects on a cake.
Couverture Chocolate vs. Compound Chocolate
Couverture chocolate is made with cocoa butter, which gives it a rich flavor and smooth texture, making it ideal for melting and tempering. On the other hand, compound chocolate is made with vegetable fats instead of cocoa butter, resulting in a cheaper alternative that doesn’t require tempering but may not have the same depth of flavor as couverture chocolate.
Flavor Considerations
When choosing chocolate for cake decorating, consider the flavor of the cake itself. For example, if you’re decorating a rich dark chocolate cake, you may want to use a contrasting white chocolate for decorative elements. Alternatively, if you’re working with a light and fluffy vanilla cake, you might opt for milk or dark chocolate to complement the flavors.
Ultimately, choosing the right chocolate for cake decorating involves considering your desired decorative effects as well as the overall flavor profile of your cake. Experimenting with different types of chocolate can help you discover unique and creative ways to elevate your cake decorations.
Techniques for Melting and Tempering Chocolate
Melting and tempering chocolate is a crucial step in the cake decorating process. Properly melted chocolate will result in a smooth and glossy finish, while tempered chocolate will set properly and have a nice snap when bitten into. One of the essential tools for melting and tempering chocolate is a double boiler or a heatproof bowl set over a pot of simmering water. This gentle heating method helps to avoid scorching the chocolate and ensures a smooth consistency.
To melt the chocolate, chop it into small, uniform pieces to help it melt evenly. Place the chopped chocolate in the double boiler or heatproof bowl, stirring occasionally until completely melted. It’s important to avoid getting any water or steam into the chocolate during this process, as it can cause the chocolate to seize and become lumpy.
Once the chocolate has been melted, it can then be tempered to ensure that it sets properly at room temperature. To temper the chocolate, follow a specific temperature pattern – typically heating it up to around 115°F (46°C) for dark chocolate or 110°F (43°C) for milk or white chocolate, then cooling it down to about 82°F (28°C) before gently reheating to 88-90°F (31-32°C).
This process aligns the cocoa butter crystals within the chocolate, resulting in a stable and glossy finished product. Mastering these techniques will enable you to create stunning decorative effects on your cakes using melted and tempered chocolate.
How to Pipe and Drizzle Chocolate for Decorative Effects
Piping and drizzling chocolate is a great way to add beautiful decorative effects to your cake. Whether you want to create intricate designs or simply add a touch of elegance, mastering the art of piping and drizzling chocolate can take your cake decorating skills to the next level.
To pipe and drizzle chocolate effectively, you’ll need some essential tools and ingredients. Here’s what you’ll need:
- High-quality melted chocolate in dark, milk, or white
- Piping bags or squeeze bottles
- Parchment paper or wax paper
- A baking sheet or flat surface for cooling
- Optional: food-grade paintbrushes for more detailed work
When working with melted chocolate, it’s important to choose the right type for the desired effect. Dark chocolate will provide a rich and intense flavor, while milk or white chocolate can lend a sweeter taste. It’s also essential to properly melt and temper the chocolate to achieve the right consistency for piping and drizzling.
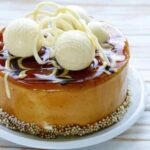
Once you have all your tools and ingredients ready, it’s time to start piping and drizzling. You can use different techniques such as creating swirls, loops, or zigzags with the piped chocolate. For drizzling, simply use a spoon or fork to create delicate lines of chocolate over the cake’s surface. These decorative effects can instantly elevate the look of your cake and make it stand out as a masterpiece.
Creating Chocolate Shards and Curls for Cake Toppings
When it comes to decorating a cake with chocolate, one of the most visually stunning techniques is creating chocolate shards and curls to adorn the top of your cake. These delicate and artful decorations can take your cake from ordinary to extraordinary, adding elegance and sophistication to any dessert. Not only do they add a beautiful decorative element, but they also provide a delightful textural contrast to the softness of the cake.
To make chocolate shards and curls, you will need to start with high-quality chocolate. Dark, milk, or white chocolate can all be used to create these decorations, depending on the flavor profile you desire. Using a sharp knife or vegetable peeler, carefully shave thin strips from a solid block of chocolate. These strips can then be twisted or curled into elegant shapes and left to set before placing them on top of your cake.
Another method for creating chocolate shards is by pouring melted chocolate onto a baking sheet and spreading it into a thin layer. Once it has started to set but is still slightly pliable, use a chef’s knife or bench scraper to carefully push the chocolate into long shards. These can then be gently pressed into the frosting or ganache on top of your cake for an eye-catching finish.
In addition to their aesthetic appeal, chocolate shards and curls also offer versatility in terms of flavor combinations. You can use different types of chocolate, add sprinkles or edible glitter for extra pizzazz, or even incorporate complementary flavors like sea salt or citrus zest for a unique twist. The possibilities are truly endless when it comes to using chocolate shards and curls as cake toppings.
| Chocolate Type | Recommended Flavors |
|---|---|
| Dark Chocolate | Sea salt, espresso, orange zest |
| Milk Chocolate | Caramel, toasted nuts, cinnamon |
| White Chocolate | Raspberry, coconut, lemon zest |
Using Chocolate to Make Intricate Designs and Patterns
When it comes to cake decorating, using chocolate to make intricate designs and patterns can take your creations to the next level. Whether you’re creating a simple yet elegant design or a more complex pattern, working with chocolate allows for endless creativity. Here are some techniques and tips for using chocolate to make intricate designs and patterns on your cakes:
- Chocolate Piping: One of the most common ways to create intricate designs with chocolate is by piping it onto the cake. Using a piping bag fitted with a small round tip, you can create delicate swirls, flowers, vines, or any other design you desire. Practice your piping skills on parchment paper before applying the designs to your cake.
- Chocolate Stenciling: Another way to add intricate patterns to your cake is by using stencils. Place a stencil over the surface of the cake and then use melted chocolate to carefully fill in the design. Once the chocolate sets, carefully remove the stencil to reveal a beautifully detailed pattern.
- Chocolate Transfer Sheets: Chocolate transfer sheets are pre-printed acetate sheets that can be used to easily transfer intricate designs onto your cake. Simply spread melted chocolate over the transfer sheet, allow it to set, and then press it onto the surface of your frosted cake for a professional-looking finish.
In addition to these techniques, you can also use tools like toothpicks or skewers to create marbleized patterns in melted chocolate on your cakes. With some practice and experimentation, you’ll be able to showcase stunning and intricate designs on all of your chocolate cakes.
Remember that working with chocolate requires precision and patience. It’s important to temper the chocolate properly before using it for decorative purposes, as this will ensure that it sets correctly and has a beautiful sheen. With these techniques and tips in mind, you’ll be well-equipped to decorate a cake with chocolate in an intricate and visually stunning way.
Tips for Using Chocolate to Write or Draw on Cakes
When it comes to cake decorating, using chocolate to write or draw on cakes can add a personal and artistic touch to your creations. Whether you want to add a special message, create intricate designs, or simply elevate the visual appeal of your cake, mastering the art of using chocolate for writing and drawing can take your cake decorating skills to the next level.
To achieve successful results when using chocolate for writing or drawing on cakes, it is essential to have the right tools and ingredients. You will need high-quality chocolate that is suitable for melting and piping, as well as piping bags and tips for precise control over the chocolate. Additionally, having a steady hand and practicing your design beforehand on parchment paper will help you achieve the desired outcome when decorating the actual cake.
One important tip for using chocolate to write or draw on cakes is to ensure that the chocolate is at the right consistency for piping. Properly melted and tempered chocolate will flow smoothly from the piping bag, allowing you to create clean lines and intricate details.
It’s also crucial to work quickly but carefully when working with melted chocolate, as it can harden rapidly once it comes into contact with a cool surface like a chilled cake. By following these tips and techniques, you can effectively use chocolate to write messages, draw designs, or add decorative accents to your cakes with precision and flair.
Troubleshooting
When it comes to decorating a cake with chocolate, there are a few common issues that may arise. One of the most frustrating problems is when the chocolate seizes, turning into a grainy and thick mess.
This can happen if water comes into contact with the chocolate while melting, so it’s important to ensure that all utensils are completely dry before using them for melting chocolate. If your chocolate does seize, adding a small amount of vegetable oil or clarified butter can help smooth it out again.
Another issue that decorators often encounter is chocolate that doesn’t set properly, resulting in decorations that remain soft and melty instead of firming up. To avoid this problem, make sure to use high-quality chocolate with a higher cocoa butter content. Proper tempering of the chocolate is also crucial to ensure that it sets correctly. Additionally, placing the decorated cake in the refrigerator for a short period of time can help firm up the chocolate decorations.
Finally, blooming – a white, powdery film that forms on the surface of set chocolate – can be a common problem when decorating cakes with chocolate. This occurs when the chocolate is not tempered properly or when it has been stored at incorrect temperatures. To prevent blooming, make sure to temper your chocolate carefully and store your decorated cake in a cool but not cold environment.
| Common Issue | Solution |
|---|---|
| Chocolate seizing | Add vegetable oil or clarified butter to smooth out seized chocolate |
| Chocolate not setting properly | Use high-quality chocolate with higher cocoa butter content and ensure proper tempering; refrigerate decorated cake if needed |
| Blooming on set chocolate | Prevent by careful tempering and correct storage temperature after decorating the cake. |
Conclusion
In conclusion, decorating a cake with chocolate can truly elevate your baking skills to the next level. Whether you are a beginner or an experienced baker, mastering the art of chocolate cake decorating can be a rewarding and enjoyable experience. By using the essential tools and ingredients, choosing the right type of chocolate, and practicing various techniques such as melting, tempering, piping, drizzling, and creating decorative designs and patterns, you can showcase your creativity and individuality through beautifully decorated cakes.
One of the most exciting aspects of decorating a cake with chocolate is the endless possibilities for creativity. From simple drizzles and swirls to intricate designs and patterns, chocolate offers a versatile medium for expressing your artistic flair.
Whether it’s for a special occasion or just to indulge in some well-deserved self-care, mastering the art of cake decorating with chocolate allows you to create visually stunning masterpieces that are sure to impress your family, friends, or even potential clients if you’re in the business.
As you continue to develop your skills in using chocolate for cake decorating, remember that practice makes perfect. Don’t be discouraged by any initial challenges or hiccups – troubleshooting common issues such as seizing or blooming will only make you more resilient and knowledgeable in handling different types of chocolates. So go ahead, grab your essential tools and ingredients, choose the right chocolate, and let your imagination run wild as you decorate a cake with chocolate – your masterpiece awaits.
Frequently Asked Questions
How to Decorate a Cake With Chocolates?
Decorating a cake with chocolates can be done in various ways. You can use chocolate chips, shavings, or even whole pieces to create beautiful designs on the cake’s surface. Melted chocolate can also be used to drizzle over the cake for a more elegant touch.
How Do You Melt Chocolate for Cake Decorating?
When melting chocolate for cake decorating, it’s essential to do so gently to avoid burning or seizing the chocolate. One method is to use a double boiler or microwave in short intervals, stirring frequently until smooth and melted. Be sure to keep an eye on the chocolate to prevent overheating.
Which Chocolate Is Best for Cake Decorating?
The best chocolate for cake decorating is one that has a good balance of flavor and workability. High-quality bittersweet or semi-sweet chocolate is often preferred due to its rich taste and smooth texture when melted.
However, milk or white chocolate can also be used depending on the flavor profile desired for the cake decoration. Overall, it’s important to choose a chocolate that complements the overall taste of the cake while being easy to work with for decorating purposes.

Welcome to our cake decorating blog! My name is Destiny Flores, and I am the proud owner of a cake decorating business named Cake Karma. Our mission is to provide delicious, beautiful cakes for all occasions. We specialize in creating custom cakes that are tailored specifically to each customer’s individual needs and tastes.


