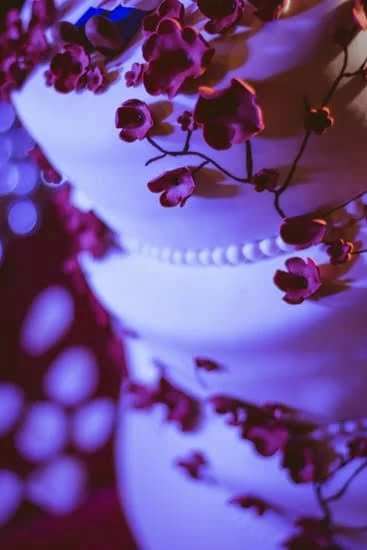
Decorating a cake is not just about creating a delicious dessert, it’s also an art form that allows bakers to showcase their creativity and skills. Whether you’re a seasoned baker or just starting out, having a comprehensive cake decorating tip guide is essential to elevate your baking experience and create stunning cakes.
A cake decorating tip guide serves as your go-to resource for understanding the different types of tips available in the market. From basic piping techniques to mastering advanced designs, this guide will provide you with step-by-step instructions, expert tips, troubleshooting advice, and inspiration for various occasions.
One of the first things you’ll learn in this guide is the importance of selecting the right cake decorating tip for specific decoration techniques. There are various types of tips, each with its own unique features and functionalities. Understanding these differences will help you achieve the desired results in your cake designs.
Additionally, this guide will provide you with a list of must-have tools and supplies for successful cake decorating. Piping bags, couplers, offset spatulas, and more – every tool has its purpose in creating beautiful and intricate designs. You’ll also find tips on how to choose high-quality tools that will last, saving you money in the long run.
So whether you’re planning to bake a simple birthday cake or an elaborate wedding masterpiece, this cake decorating tip guide will be your trusty companion throughout. Get ready to dive into the wonderful world of cake decoration and unleash your inner artist.
Understanding Different Types of Cake Decorating Tips
Cake decorating tips are essential tools for any baking enthusiast looking to create beautiful and stunning cakes. With the wide range of cake decorating tips available in the market, it can be overwhelming to choose the right tip for specific decoration techniques. Understanding the different types of cake decorating tips is crucial to achieving professional-looking results.
There are various types of cake decorating tips, each with its own unique features and functionalities. Some common types include round tips, star tips, petal tips, leaf tips, and specialty tips. Round tips are perfect for creating outlines, letters, and dots. Star tips can be used to make rosettes, shells, and borders.
Petal tips are ideal for creating flower petals and ruffles. Leaf tips are excellent for making realistic leaves and foliage designs. Specialty tips come in a range of shapes such as basketweave, grass/hair/fur, and open star.
To select the right cake decorating tip for specific decoration techniques, it’s important to consider factors such as the size of the tip opening and the desired design outcome. Smaller openings create finer details while larger openings are great for bold designs. It’s also helpful to experiment with different sizes and styles of tips to discover which ones work best for your preferred cake decorating style.
| Type | Features | Common Uses |
|---|---|---|
| Round Tips | Small round opening | Outlines, letters, dots |
| Star Tips | Serrated edges with various points | Rosettes, shells, borders |
| Petal Tips | Tapered tip with curved sides | Flower petals, ruffles |
| Leaf Tips | L-shaped with a narrow opening | Realistic leaves, foliage designs |
| Specialty Tips | Unique shapes for specific designs | Basketweave, grass/hair/fur, open star |
Understanding the different types of cake decorating tips is just the first step. It’s also important to practice using them to achieve the desired results. Experimenting with different techniques and designs will help build your skills and creativity in cake decorating. So whether you’re a beginner or a seasoned baker, having a comprehensive understanding of cake decorating tips will elevate your baking experience and allow you to create stunning cakes that are sure to impress.
Must-Have Cake Decorating Tools and Supplies
Cake decorating is a creative and rewarding hobby that allows bakers to express their artistic talents through beautifully adorned cakes. However, in order to achieve professional-looking results, it is essential to have the right tools and supplies at hand. This section will discuss the must-have cake decorating tools and supplies that every baking enthusiast should consider.
One of the most important tools for cake decorating is a piping bag. These bags are used to hold various types of frosting and allow for precise control when applying decorations to a cake. When selecting a piping bag, it is important to choose one that is made from durable materials such as nylon or silicone. Additionally, considering the size and grip of the piping bag can make a difference in comfort and ease of use during long decorating sessions.
Another essential item for cake decorating is a coupler. Couplers are used in conjunction with piping tips to easily change between different tips without having to change the entire piping bag. This allows for quick and efficient transitions when creating various designs on a cake. It is recommended to invest in a high-quality coupler that fits securely onto your piping bags for hassle-free switching.
Offset spatulas are also indispensable tools for any cake decorator. These long, narrow spatulas allow for smooth icing application and precise leveling of frosting on cakes. They come in various sizes, with smaller ones being ideal for intricate detail work while larger ones are great for spreading icing over larger areas of the cakes.
In addition to these basic tools, there are many other supplies that can enhance your cake decorating experience. Some examples include pastry brushes for brushing away excess crumbs, turntables for easy rotation while working on the cake, stencil sets for creating intricate patterns, and flower nails or foam pads for creating delicate floral decorations.
When purchasing these supplies, it is important to choose high-quality products that will last through multiple projects. Look out for brands with good reviews and seek recommendations from experienced cake decorators. Investing in durable and reliable tools will not only make your cake decorating journey more enjoyable but also yield better results.
By having the right tools and supplies, bakers can unleash their creativity and create stunning cakes that will impress friends, family, or customers. Whether you are a beginner or an experienced decorator, equipping yourself with these must-have cake decorating tools will undoubtedly elevate your baking creations to the next level.
Basic Piping Techniques
Piping is a fundamental skill in cake decorating and mastering basic piping techniques will set the foundation for creating beautiful designs on your cakes. Whether you’re a beginner or looking to enhance your skills, this section will provide you with step-by-step instructions to help you create rosettes, shells, and dots.
1. Rosettes:
To create rosettes, start by filling a piping bag fitted with a star tip (such as Wilton 1M) with buttercream icing. Hold the piping bag perpendicular to the surface of the cake and apply even pressure while squeezing the bag. Begin in the center and as you pipe outward, rotate your wrist slightly to create a swirling motion. Continue piping until the desired size is reached, then release pressure and pull the tip away.
2. Shells:
Shells are versatile and can be used to line borders or cover entire surfaces. Use either a star tip (such as Wilton 18) or an open-star tip (such as Wilton 32). Hold the piping bag at a 45-degree angle and apply steady pressure while moving your hand back and forth in a wave-like motion. As you finish one shell, overlap it slightly with the next for a continuous design.
3. Dots:
Dots are simple yet effective in adding texture and interest to your cake design. Fill a piping bag fitted with a round tip (such as Wilton 5) with buttercream icing. Hold the bag perpendicular to the surface of the cake and apply even pressure to create small dots of equal size. Space them evenly or cluster them together for different visual effects.
| Piping Technique | Recommended Tip |
|---|---|
| Rosettes | Wilton 1M |
| Shells | Wilton 18 or 32 |
| Dots | Wilton 5 |
Remember, practice is essential to achieving perfect results. Start with a practice board or wax paper before piping directly onto your cake. Experiment with different pressure and speed to control the size and shape of your designs. With time and patience, you’ll be able to create impressive piping decorations.
Troubleshooting Tip: If your buttercream icing is too soft and the piped design collapses or loses its shape, try refrigerating the icing for a few minutes to firm it up before continuing.
With these basic piping techniques at your disposal, you can add dimension, texture, and visual interest to your cakes. Practice these techniques regularly and build upon them as you progress in your cake decorating journey. The possibilities for creative designs are endless.
Mastering Advanced Piping Techniques
Advanced piping techniques are the next level in cake decorating, allowing bakers to create intricate and impressive designs that are sure to impress. Whether you want to make beautiful floral decorations or create lace patterns on your cakes, mastering advanced piping techniques will take your cake decorating skills to new heights. In this section, we will dive into the world of advanced piping techniques and provide expert tips and tricks to help you achieve professional-looking designs.
- Floral Decorations: Creating lifelike flowers using buttercream or royal icing is a popular technique in cake decorating. Start by practicing simple flowers like roses, daisies, and tulips before moving on to more complex ones like peonies or orchids. Use different piping tips and techniques such as scrolling, petal ruffling, and layering to add dimension and realism to your flower decorations.
- Lace Patterns: Lace patterns can add an elegant touch to any cake design. To achieve delicate lace patterns with icing, use a fine piping tip and pipe intricate lace designs onto wax paper or a silicone lace mat. Allow the piped lace to dry completely before gently lifting it off the surface and attaching it to your cake using a small amount of frosting or edible glue.
- Filigree Designs: Filigree is an intricate form of decorative art that involves using thin lines of icing to create elaborate patterns on cakes. This technique requires steady hands and precision. Start by practicing simple filigree designs such as scrolls and loops before progressing to more intricate patterns like braids or lattices. Use a very fine round piping tip for this technique.
Remember, practice makes perfect when it comes to mastering advanced piping techniques in cake decorating. Take your time to familiarize yourself with different piping tips, consistency of icing, and hand movements required for each technique. It’s also helpful to have reference images or tutorials handy for inspiration and guidance.
By honing your skills in advanced piping techniques, you’ll be able to create cakes that are not only delicious but also stunning works of art. Don’t be afraid to experiment and push your creative boundaries. With time and practice, you’ll become a master of advanced piping techniques and wow everyone with your cake decorating skills.
Using Fondant and Gum Paste for Cake Decorating
Fondant and gum paste are two versatile mediums that are widely used in the world of cake decorating. They allow bakers to create smooth, flawless finishes and intricate designs that are often difficult to achieve with buttercream alone. In this section, we will explore the concept of fondant and gum paste and their relevance in cake decoration. We will provide step-by-step instructions on how to use these mediums for covering cakes and creating beautiful decorations.
The Basics: Fondant
Fondant is made from a mixture of sugar, water, and other ingredients like gelatin or glycerin. It has a smooth, pliable texture which makes it perfect for covering cakes and creating sculpted decorations. Here is a step-by-step guide on using fondant:
- Prepare the cake by ensuring it is levelled and crumb coated with buttercream.
- Roll out the fondant on a clean, smooth surface dusted with powdered sugar or cornstarch to prevent sticking.
- Lift the rolled-out fondant carefully using your rolling pin and gently drape it over the cake.
- Smooth the fondant over the sides of the cake using your hands or a fondant smoother.
- Trim off any excess fondant using a sharp knife or pizza cutter.
Getting Creative: Gum Paste
Gum paste is similar to fondant but contains added ingredients such as tylose powder or gum tragacanth, giving it a firmer texture and quicker drying time. This makes it ideal for creating delicate flower decorations, figurines, or lace patterns on cakes. Follow these steps to work with gum paste:
- Knead the gum paste until soft and pliable.
- Roll out the gum paste thinly on a surface dusted with cornstarch or powdered sugar.
- Use cookie cutters, silicone molds, or freehand techniques to create desired shapes and designs.
- Leave the gum paste decorations to air dry for a few hours or overnight until firm.
- Once dry, gently attach the decorations to your cake using edible glue or a small amount of water.
Tips and Tricks for Perfect Results
Achieving a smooth finish and intricate designs with fondant and gum paste requires practice and attention to detail. Here are some insider tips to help you achieve the best results:
- Keep your work surface clean and free from any debris that can transfer onto your fondant or gum paste.
- Use powdered sugar or cornstarch sparingly when rolling out fondant or gum paste. Too much can make it dry and crack.
- If your fondant becomes too sticky, lightly dust your hands with powdered sugar or use shortening to prevent sticking.
- When coloring fondant or gum paste, start with a small amount of gel food coloring at first and gradually add more until you achieve the desired shade. Remember that the color intensifies over time.
- To prevent drying out, wrap unused fondant or gum paste tightly in plastic wrap and store in an airtight container.
With these tips in mind, you can confidently embark on using fondant and gum paste for your cake decorating projects. Embrace creativity, practice patience, and enjoy the art of cake decorating as you explore the endless possibilities these mediums offer.
Troubleshooting Common Cake Decorating Issues
Addressing Icing Consistency
One common issue that cake decorators often encounter is achieving the right icing consistency. Icing that is too thin or runny can make it challenging to create clean lines and hold intricate designs, while icing that is too thick may be difficult to pipe smoothly. To address these issues, it’s important to understand the different consistencies of icing and how to adjust them.
Solving Cake Collapsing Problems
Another frustrating problem that decorators may face is cake collapsing. This can happen when the batter is not properly mixed, resulting in air bubbles that cause the cake to sink in the middle once it’s baked. To avoid this issue, ensure that you mix the batter thoroughly and gently tap the filled cake pans on a countertop before baking to release any trapped air bubbles.
Overcoming Piping Mishaps
Piping mishaps like uneven pressure, inconsistent flow, or accidental movements can happen even to experienced decorators. One important tip is to practice your piping techniques beforehand on parchment paper or a practice board to get a feel for the pressure and movement required. If you do make a mistake during piping, don’t worry. You can easily smooth out imperfections with an offset spatula or use decorative elements like flowers or edible embellishments to cover up any flaws.
Having a troubleshooting guide on hand will help you navigate through these common issues and save your cake from potential disasters. However, remember not to get discouraged if something doesn’t go exactly as planned – learning from mistakes is part of the journey towards becoming a skilled decorator.
Cake Decorating Tips for Special Occasions
When it comes to special occasions like birthdays, weddings, or baby showers, cake decorating takes on a whole new level of excitement. It is the perfect opportunity to showcase your creativity and make a truly memorable cake that will impress your guests. To help you make these occasions extra special, here are some cake decorating tips specifically tailored for different events.
Birthday Cakes:
- Personalize the cake with the birthday person’s favorite colors and themes.
- Use themed cake toppers or edible decorations related to their hobbies or interests.
- Try unique piping techniques like writing a heartfelt message or creating a number-shaped cake.
Wedding Cakes:
- Match the wedding theme or color scheme when selecting decorations.
- Consider incorporating real flowers or sugar flowers as beautiful and elegant touches.
- Experiment with different textures such as lace patterns or embossed designs using fondant.
Baby Shower Cakes:
- Choose pastel colors like pink or blue depending on the gender of the baby.
- Incorporate cute and playful elements like baby booties or rattles using fondant or gum paste.
- Create a tiered cake with varying flavors and fillings to cater to diverse taste preferences.
In addition to these specific tips, there are some general ideas that can elevate any occasion:
- Use stencils or molds to create intricate patterns easily.
- Experiment with various piping nozzles for different effects and textures.
- Play around with different types of buttercream frosting flavors to add depth and variety.
Remember, these ideas are just starting points – feel free to let your imagination run wild. The key is to plan ahead, practice different techniques before the big day, and have fun throughout the process. With these cake decorating tips for special occasions in mind, you will be able to create stunning cakes that not only taste delicious but also visually captivate your guests.
Conclusion
In conclusion, the art of cake decorating is a truly enjoyable and creative endeavor that allows baking enthusiasts to express their skills and imagination. With the help of a comprehensive cake decorating tip guide, bakers can enhance their baking experience and create stunning cakes that are guaranteed to impress.
Throughout this article, we have explored the different types of cake decorating tips available in the market, as well as the essential tools and supplies needed for successful cake decorating. We have also provided step-by-step instructions for both basic and advanced piping techniques, including tips and troubleshooting advice to ensure perfect results.
Additionally, we have delved into the use of fondant and gum paste for cake decoration, offering detailed instructions and insider tips on achieving smooth finishes and intricate designs.
Now armed with knowledge and inspiration from this comprehensive guide, it is time to embrace your creativity and dive into the wonderful world of cake decorating. Don’t be afraid to experiment with different techniques and designs, as each mistake will only bring you closer to mastering this art form. Whether it’s creating breathtaking floral decorations or making innovative designs for special occasions like birthdays or weddings, let your imagination soar.
Remember that Rome wasn’t built in a day, so don’t be discouraged if your first attempts aren’t perfect. Practice makes perfect in cake decorating just like any other skill. With determination and perseverance, you will continue to learn and improve your techniques over time. So go ahead, grab those piping bags, select your favorite tip, and let your creativity take center stage.
Frequently Asked Questions
What tip do you use to decorate a cake?
When it comes to decorating a cake, one tip that I find particularly useful is to start with a crumb coat. Before applying any decorative frosting or design, it’s important to create a smooth and even base layer by spreading a thin coat of frosting on the cake.
This not only helps in sealing in any crumbs but also provides a stable surface for the final decorative layer. Additionally, using a turntable while decorating allows for easy and consistent rotation, allowing you to apply frosting or piping with greater precision.
What is the best piping tip for writing on a cake?
When it comes to writing on a cake, the best piping tip to use is typically a small round tip like #3 or #4. These tips have a fine opening that allows for precise control when piping letters or numbers onto the cake’s surface.
The smaller size also ensures that the writing doesn’t overpower the overall design and fits well within limited spaces. It’s essential to practice beforehand by piping out your desired message on parchment paper to ensure you’re comfortable with the pressure needed and can achieve an even flow of frosting while maintaining legible writing.
Are cake decorating tip numbers universal?
Cake decorating tip numbers are generally universal within their respective brands. However, there can be slight variations between different manufacturers when it comes to the exact size and shape of the tips. While two different brands might both label their tips as “round #5,” there may be subtle differences in the actual dimensions or tapering of the tip openings which could impact how they perform during piping.
It’s always recommended to carefully compare tips from various manufacturers before purchasing and take note of any differences in size charts provided by each brand. This will ensure that you choose compatible tips based on your desired level of precision and specific decoration needs.

Welcome to our cake decorating blog! My name is Destiny Flores, and I am the proud owner of a cake decorating business named Cake Karma. Our mission is to provide delicious, beautiful cakes for all occasions. We specialize in creating custom cakes that are tailored specifically to each customer’s individual needs and tastes.


