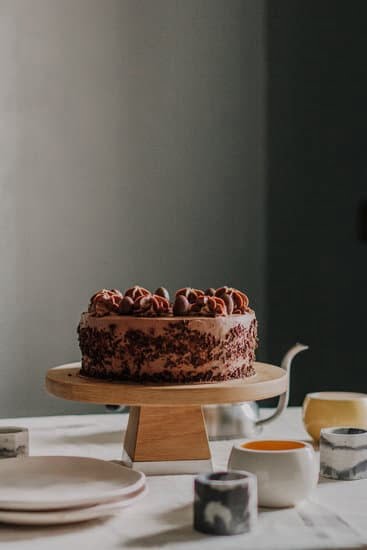
The cake decorating piping kit is a must-have tool for anyone looking to elevate their cake decorating skills. With its array of essential tools, a piping kit allows you to create stunning designs that will make your cakes stand out from the rest. Whether you’re new to cake decorating or a seasoned pro, the possibilities are endless when it comes to the art of piping.
A cake decorating piping kit typically includes a variety of tools such as piping bags, tips, and couplers. These tools are designed to help you achieve precise control over your icing and create intricate designs with ease. From simple rosettes and shells to elaborate lace piping and 3D designs, the possibilities for creativity are endless with a piping kit.
Using a piping kit in cake decoration not only enhances the visual appeal of your cakes but also adds depth and texture. The fine details and intricate piping techniques can transform an ordinary cake into a work of art. Whether you’re creating cakes for special occasions or simply want to add flair to your homemade treats, a piping kit is an essential tool that can take your cake decorating skills to the next level.
So, whether you’re a beginner looking to dip your toes into the world of cake decorating or an experienced decorator hoping to expand your repertoire, the art of cake decorating with a piping kit offers unlimited possibilities. In this article, we will delve into everything you need to know about cake decorating with a piping kit – from mastering different techniques to cleaning and maintaining your tools.
Get ready to unleash your creativity and create stunning cake designs that will impress everyone who lays eyes on them.
The Essential Tools in a Cake Decorating Piping Kit
A cake decorating piping kit contains several essential tools that are necessary for creating beautifully decorated cakes. These tools can help bring your cake designs to life and take them to the next level. Understanding the purpose and functionality of each tool is crucial for achieving professional-looking results.
One of the key tools in a cake decorating piping kit is the piping bag. Piping bags come in various sizes and materials, such as disposable plastic or reusable cloth. They are used to hold the icing or frosting that you will be applying to your cake. Additionally, piping bags can be fitted with different tips that create different shapes when piping.
Speaking of tips, they are another important component of a piping kit. Tips are attached to the end of the piping bag and determine the shape and style of the design being piped onto the cake. There are countless varieties of tips available, each with its own unique effect. Popular types include round tips for creating dots or beads, star tips for creating rosettes or shells, and petal tips for creating realistic flower petals.
Couplers are also included in most piping kits and serve as adapters between the tip and piping bag. Couplers allow you to easily change between different tips without needing a new bag for each one. This is especially helpful when using multiple techniques or switching between different colors of icing.
When choosing a high-quality piping kit, it is important to consider factors such as durability, ease of use, and compatibility with other brands’ tools. Look for materials that can withstand repeated use and cleaning without losing their shape or functionality. It may also be beneficial to invest in a kit that includes a variety of tips and couplers to give you more options when decorating your cakes.
By familiarizing yourself with these essential tools in a cake decorating piping kit, you will be well on your way to mastering various piping techniques and creating stunning designs on your cakes.
Mastering Different Piping Techniques
Exploring Popular Piping Techniques
One of the key aspects of cake decorating with a piping kit is mastering different piping techniques. These techniques allow you to create beautiful and intricate designs on your cakes that will impress everyone who sees them. Some popular piping techniques include rosettes, shells, and petals. Each technique has its own unique style and can be used to create various effects on your cake.
Step-by-Step Instructions
To master these piping techniques, it’s important to understand the step-by-step instructions for each one. For example, to create rosettes, start by holding the piping bag at a 90-degree angle to the cake surface and applying even pressure as you pipe in a circular motion.
To achieve shell designs, hold the piping bag at a 45-degree angle and apply steady pressure while moving in a zigzag or curved pattern. Petal designs require creating individual petals by squeezing out small teardrop-shaped icing blobs with a slight curve.
It’s helpful to practice these techniques on parchment paper or a smooth surface before attempting them on an actual cake. This allows you to familiarize yourself with the pressure needed for each design and improve your consistency. Remember that practice makes perfect, so don’t get discouraged if your first attempts don’t turn out exactly as you’d hoped.
Showcasing the Final Result
To inspire and guide aspiring decorators, it can be beneficial to provide images or videos showcasing the final result of each piping technique. Seeing how each design looks when applied to an actual cake can help individuals visualize how they might use these techniques in their own creations. By presenting clear visual examples, readers can better understand the potential of each technique and gain confidence in their ability to replicate similar designs.
Whether you’re working on elegant wedding cakes or whimsical birthday creations, mastering different piping techniques opens up endless possibilities for expressing your creativity and elevating your cake designs to the next level.
Piping Kit Tips and Tricks for Beginners
Decorating cakes with a piping kit may seem daunting for beginners, but with the right tips and tricks, anyone can create beautiful designs. Here are some helpful suggestions to get started with a piping kit:
- Start with the Basics: Before diving into intricate designs, it’s essential to practice basic piping techniques. Begin by getting comfortable holding and controlling the piping bag. Practice making simple lines, dots, and swirls on parchment paper or a practice cake before moving on to more complex designs.
- Use the Right Consistency: The consistency of the icing is crucial for successful piping. Too thin, and it will not hold its shape; too thick, and it will be difficult to pipe. Follow recipe instructions carefully and adjust the consistency as needed by adding more powdered sugar or liquid. It’s always better to start with a slightly thicker icing and gradually add liquid than vice versa.
- Piping Bag Techniques: Fill your piping bag correctly to avoid messy mishaps. Place one coupler inside the bag before cutting off the tip of the bag to fit snugly around the coupler base. Insert your desired piping tip over the coupler before twisting on the ring to secure it in place. This technique allows you to easily switch between different tips without needing multiple bags.
- Pressure Control: Experiment with applying different amounts of pressure while squeezing the piping bag. Practice light pressure for delicate designs like lace or petals and apply firmer pressure for bolder shapes like rosettes or shells. Achieving consistent pressure will help maintain uniformity in your design.
- Slow and Steady Wins the Race: When piping, maintain a steady hand movement while applying even pressure on the bag for consistent results. Avoid jerking or rushing movements that can disrupt the flow of icing and result in uneven designs.
- Practice Makes Perfect: Rome wasn’t built in a day, and neither will your piping skills be perfected overnight. Keep practicing regularly to refine your techniques and gain confidence. Try pipework on different surfaces like a cake dummy, cookies, or cupcakes to experiment with different designs and textures.
By following these tips and tricks, beginners can overcome initial challenges and quickly progress in their cake decorating journey. With time and practice, the possibilities of creating stunning designs are endless. So gather your piping kit, let your imagination soar, and create edible works of art that will impress everyone who sees them.
| Tip/Trick | Description |
|---|---|
| Start with the Basics | Practice simple lines, dots, and swirls before attempting complex designs |
| Use the Right Consistency | Follow recipe instructions for icing consistency; adjust as needed by adding more powdered sugar or liquid. |
| Piping Bag Techniques | Use couplers to easily switch between different tips without needing multiple bags. |
| Pressure Control | Vary pressure for delicate or bolder designs. |
| Slow and Steady Wins the Race | Maintain steady hand movement to ensure consistent flow of icing. |
| Practice Makes Perfect | Gather experience on various surfaces: cake dummies, cookies or cupcakes. |
Advanced Piping Techniques for the Experienced Decorator
For experienced cake decorators looking to take their skills to the next level, there are a variety of advanced piping techniques that can elevate their creations. These techniques require precision and practice, but they can result in truly remarkable and show-stopping cake designs. Here are some advanced piping techniques that every experienced decorator should try:
- Lace Piping: Lace piping involves creating intricate and delicate lace-like patterns on cakes using buttercream or royal icing. It adds a touch of elegance and sophistication to any design. To achieve this technique, decorators typically use a lace impression mat or stencil to create a pattern guide, then pipe over the guide with a thin round tip.
- Basket Weaving: Basket weaving creates the illusion of woven textures on cakes, mimicking traditional basketry. This technique requires attention to detail and patience as decorators alternate vertical and horizontal lines of piped icing with varying widths. The result is an impressive three-dimensional effect that adds texture and visual interest to the cake.
- 3D Designs: Taking cake decorating to another level, 3D designs add depth and dimension to cakes by creating sculptures or objects using piped icing. From flowers and animals to buildings and landmarks, decorators can bring almost anything to life using carefully piped layers of icing that build up into a three-dimensional shape.
To master these advanced piping techniques, it’s crucial for experienced decorators to ensure they have the right tools in their piping kit. High-quality piping bags, a variety of tips in different shapes and sizes, and couplers for easily switching between tips are essential for achieving precise results. Additionally, practicing these techniques regularly will help refine skills and develop confidence in creating more complex designs.
By incorporating these advanced piping techniques into their repertoire, experienced decorators have the opportunity to create truly exceptional cakes that wow clients, friends, and family alike. These techniques allow for endless creativity and artistic expression when it comes to cake decorating. So, if you’re an experienced decorator looking to push your boundaries and amaze others with your creations, don’t be afraid to try these advanced piping techniques and unlock a whole new world of possibilities.
Getting Creative with Piping and Design Combinations
Cake decorating is an art form that allows for endless creativity, and a piping kit is the perfect tool to unleash your imagination. With a piping kit, you can create beautiful and intricate designs on your cakes that are sure to impress your friends and family. One of the most exciting aspects of cake decorating with a piping kit is the ability to combine different techniques and designs to create truly unique and eye-catching cakes.
Experimenting with Piping Techniques
When it comes to combining piping techniques, the sky’s the limit. You can experiment with different shapes, textures, and patterns to create stunning effects on your cakes. For example, you can mix rosettes with shells to add depth and dimension to your design. Or, try combining petals and leaves to create a realistic floral arrangement on top of your cake.
Creating Unique Decorations
Combining various piping techniques opens up a world of possibilities for creating unique cake decorations. For instance, you can use basket weaving techniques along with piped flowers to create a beautiful spring-themed cake. Or, try combining lace piping with delicate scrollwork for an elegant wedding cake design. The key is to let your imagination run wild and experiment with different combinations until you find what works best for your desired effect.
Examples of Stunning Designs
To provide further inspiration, here are some examples of stunning cake designs that incorporate multiple piping techniques:
- The “Garden Delight” Cake: This cake features a combination of piped flowers in vibrant colors, along with delicate lace piping that creates a garden-inspired design.
- The “Winter Wonderland” Cake: This design combines snowflake-shaped piped details along with intricate scrollwork to create a frosty winter scene.
- The “Under the Sea” Cake: This creative design incorporates piped seashells, coral, and waves, bringing the ocean to life on top of a cake.
These examples showcase just a few of the countless possibilities when it comes to combining different piping techniques and designs. The key is to have fun, experiment, and let your creativity soar when using your piping kit.
By getting creative with piping and design combinations, you can take your cake decorating skills to new heights. Don’t be afraid to try new techniques or mix and match different designs – the results may surprise you.
With a piping kit in hand, you have the power to create beautiful and unique cake decorations that will leave everyone impressed. So go ahead and let your imagination run wild as you explore the endless possibilities that come with combining different piping techniques in cake decorating.
Piping Kit Maintenance and Cleaning Tips
Maintaining and properly cleaning your cake decorating piping kit is essential for its longevity and ensuring that you can continue to create beautiful cake designs. Here are some tips to help you keep your piping kit in top shape:
- Cleanliness is key: After each use, make sure to thoroughly clean all the tools in your piping kit. Start by removing any leftover frosting from the tips, couplers, and bags. Rinse them with warm water, using a small brush or toothpick to remove any stubborn residue. Avoid using soap or detergent as they can leave a residue that will affect the taste of future cakes.
- Be gentle: When cleaning the piping bags, avoid using abrasive sponges or brushes that may damage the material. Instead, turn them inside out and rinse with warm water until all frosting is removed. If needed, add a few drops of lemon juice to help remove any grease stains.
- Dry completely: After washing, ensure that all parts of your piping kit are completely dry before storing them away. Place the tips on a clean towel or drying rack and let them air dry for at least 24 hours. Ensure that the bags are also thoroughly dried before storing, as any moisture left can cause mold or bacteria growth over time.
- Store carefully: Proper storage is important to protect your piping tools from damage or loss. Keep your tips organized in a container designed specifically for tip storage, which will prevent them from bending or becoming misshapen. Store your piping bags in a cool and dry place where they will not be exposed to direct sunlight.
- Troubleshooting: If you find that some of your tips have become clogged or misshapen after storage, don’t panic. Try soaking them in warm water mixed with white vinegar or lemon juice for about 30 minutes to dissolve any hardened frosting or debris. Rinse thoroughly afterward and allow them to dry completely.
By following these maintenance and cleaning tips, you can ensure that your cake decorating piping kit remains in excellent condition, ready for your next creative project. Remember, a well-maintained piping kit will not only help you create stunning cake designs but also save you time and money in the long run.
Inspiration
Piping kits are a versatile tool that can take your cake decorating to the next level. With the right piping tips and techniques, you can create stunning designs and intricate details on your cakes. In this section, we will showcase some inspiring cake designs created using piping kits.
One popular technique is the rosette design, which involves creating beautiful rose-like swirls on the cake. To achieve this look, start by attaching a large star-shaped tip to your piping bag and filling it with buttercream or royal icing. Hold the bag at a 90-degree angle to the cake surface and apply even pressure while moving in a circular motion. This will create a unique and eye-catching design that adds texture and elegance to any cake.
Another technique that can be achieved using piping kits is the basket weaving design. This technique mimics the pattern of woven baskets and adds a rustic touch to your cakes. To create this effect, use a flat ribbon tip and pipe lines in one direction across the cake. Then, pipe parallel lines in the opposite direction, slightly overlapping them with the previous lines. Repeat this process until you have achieved the desired basket weave pattern.
For those looking for more advanced techniques, lace piping is a great option. It involves creating delicate lace patterns on your cakes using icing or fondant. To achieve this look, use a small round tip or a lace impression mat to pipe intricate designs onto your cake’s surface.
These are just a few examples of what can be achieved with a piping kit when it comes to cake decorating. The possibilities are endless, and with practice and creativity, you can create stunning designs to suit any occasion or theme.
| Cake Design | Piping Technique Used |
|---|---|
 | Rosette Design |
 | Basket Weaving Design |
 | Lace Piping |
Conclusion
Cake decorating piping kits are an essential tool for anyone looking to take their cake decorating skills to the next level. With a variety of tools and techniques at your disposal, these kits provide endless possibilities for creating stunning and artistic cake designs. From beginners to experienced decorators, there is something for everyone in the world of cake decorating piping kits.
By incorporating different piping techniques, decorators can unleash their creativity and create unique and personalized cake designs. Whether it’s mastering popular techniques like rosettes or shells, or experimenting with advanced techniques such as lace piping or 3D designs, a piping kit allows decorators to push the boundaries and create cakes that truly stand out.
The combination of different piping techniques and design elements can result in breathtaking creations that leave a lasting impression on both taste buds and eyes alike.
One of the joys of using a cake decorating piping kit is the satisfaction that comes from seeing your vision come to life. The ability to transform a simple cake into an edible work of art is an empowering feeling for any decorator. With each successful creation, confidence grows, leading to even more experimentation and bold design choices.
So why wait? Unleash your creativity with a cake decorating piping kit today. Whether you’re just starting out or have years of experience under your belt, these kits offer endless opportunities for self-expression through the artistry of cake decoration.
Let your imagination run wild, explore different techniques, combine various designs, and watch as your cakes become masterpieces that dazzle both visually and tastefully. You’ll be amazed at what you can achieve with a little practice and a lot of passion. So go ahead – get yourself a cake decorating piping kit and let your creativity soar.
Frequently Asked Questions
What do you use for piping on cakes?
For piping on cakes, pastry chefs commonly use various types of icing or frosting. The choice of piping material depends on the desired outcome and personal preferences. Buttercream is a popular option as it is versatile and can be easily flavored and colored.
It has a smooth texture that allows for intricate designs and can hold its shape for longer periods, making it suitable for more intricate piping work. Royal icing, made from powdered sugar and egg whites, is another common choice for cake decoration as it dries firm and offers a glossy finish.
What is the best piping tip for the top of a cake?
When considering the best piping tip for the top of a cake, it ultimately depends on the desired design or effect one wants to achieve. However, one particular tip that is often favored by bakers for its versatility and ability to create beautiful designs is the open star tip (also known as a 1M tip).
This tip features a star-shaped opening with small points, which allows for fine detail work when piped onto the surface of the cake. Its larger size also makes it suitable for creating rosettes, shells, or ruffles, adding dimension to the overall appearance of the cake.
What size piping bag for cake decorating?
The size of the piping bag used for cake decorating will vary depending on factors such as personal preference and the scale of the decorating project at hand. Piping bags typically come in different sizes ranging from 8 inches to 18 inches in length. A general guideline to follow would be to choose a piping bag size that comfortably fits your hand while leaving enough space to hold an adequate amount of icing or frosting without constant refilling.
It’s essential to have enough room in the bag to accommodate any required twisting or folding when fitting with piping tips securely. Ultimately, finding a size that feels comfortable and controllable in your hand will contribute to better control over your piping technique while working on cake decorations.

Welcome to our cake decorating blog! My name is Destiny Flores, and I am the proud owner of a cake decorating business named Cake Karma. Our mission is to provide delicious, beautiful cakes for all occasions. We specialize in creating custom cakes that are tailored specifically to each customer’s individual needs and tastes.


