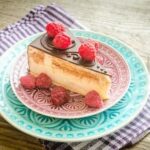
Cake decorating for chocolate cake is an art form that allows bakers to transform a simple dessert into a stunning centerpiece. In this blog post, we will explore the magic of cake decorating, with a specific focus on chocolate cakes. From choosing the perfect base recipe to learning essential techniques and tools, we will guide you through the process of creating irresistible designs that will impress your family and friends.
There is something undeniably tempting about the combination of rich chocolate and beautifully decorated cakes. With every decorative touch, you can elevate a chocolate cake from delicious to absolutely irresistible. Whether you are a novice baker looking to improve your skills or an experienced decorator seeking new inspiration, this article will provide you with all the guidance you need to master the art of cake decorating for chocolate cake.
Are you ready to enter the world of delectable designs and mouthwatering creations? Join us as we dive into the essentials, from selecting the perfect chocolate cake recipe as your canvas to mastering buttercream frostings and exploring artistic techniques unique to chocolate cakes. Get ready to unleash your creativity and take your cake decorating skills to new heights with our comprehensive guide. Let’s embark on this delightful journey together.
The Perfect Base
Choosing the right chocolate cake recipe is essential for achieving optimal decorating results. With the variety of chocolate cake options available, it’s important to select a recipe that not only tastes delicious but also holds up well during the decorating process. Here are some key factors to consider when choosing the perfect base for your chocolate cake:
- Moisture level: A moist cake is crucial for easy decorating and enjoyable eating. Look for recipes that incorporate ingredients like oil, sour cream, or buttermilk, as these contribute to a moist texture.
- Flavor profile: Chocolate cake recipes can vary in flavor intensity, from rich and deep to light and delicate. Consider the occasion and personal preferences when selecting a recipe. For an intense chocolate experience, try devil’s food cake or flourless chocolate cake. If you prefer a milder flavor, opt for a classic chocolate layer cake.
- Stability: Certain design techniques require a sturdy cake that can withstand layers of frosting and decorations without collapsing. Dense cakes like lava cakes or pound cakes work well as bases for elaborate designs, while lighter cakes may be better suited for simpler decorations.
Once you’ve chosen the best chocolate cake recipe for your project, it’s time to gather the necessary tools and materials for successful cake decorating.
Essential Tools and Materials for Cake Decorating
Cake decorating requires a few essential tools and materials to achieve professional-looking results. Whether you are a beginner or an experienced baker, having the right equipment can make all the difference in creating beautifully decorated chocolate cakes. Here are some must-have tools and materials to consider:
Piping Bags and Tips
Piping bags are essential for cake decorating as they allow you to control the flow of frosting or icing onto your cake. Opt for reusable silicone or disposable plastic piping bags depending on your preference. It is also important to have a variety of piping tips in different shapes and sizes to create various designs such as borders, flowers, or lettering.
Offset Spatulas
Offset spatulas are indispensable tools for applying buttercream or ganache evenly onto the cake surface. They provide precise control and help create smooth finishes. Consider having small and large offset spatulas to accommodate different sized cakes.
Turntable
A revolving turntable makes the process of frosting and decorating a cake much easier. It allows for effortless rotating of the cake while you work, ensuring even coverage and smoother finishes. Look for a sturdy turntable with a non-slip base for stability.
Edible Decorations
To enhance your chocolate cake design, there are various edible decorations specifically made for chocolate cakes. These include chocolate sprinkles, curls, pearls, or shavings that can add texture and visual interest to your creations. Edible ink markers or food coloring can also be used to draw intricate designs directly on the cake’s surface.
Furthermore, remember to have a palette knife for smoothing out buttercream and fixing any imperfections during decorating, as well as a set of measuring spoons and cups for accurately measuring ingredients. Additionally, an assortment of brushes can come in handy for applying edible luster dusts or painting intricate details on your cakes.
By having these essential tools and materials on hand, you will be well-equipped to create stunning chocolate cake designs. Remember that practice and experimentation are key to mastering the art of cake decorating, so don’t be afraid to unleash your creativity and have fun while honing your skills.
Prepping Your Chocolate Cake Canvas
Cleaning the Cake
Before starting the decorating process, it is crucial to ensure that your chocolate cake is clean and free from any loose crumbs or debris. Start by gently brushing off any loose crumbs from the cake using a pastry brush. Next, use a damp paper towel or a clean kitchen towel to wipe the surface of the cake, removing any residual crumbs. This will provide a smooth canvas for your decorations and prevent any unwanted debris from sticking to the frosting.
Cooling and Leveling
Proper cooling is essential for preventing your chocolate cake from becoming too soft or crumbly during decorating. Allow your cake layers to cool completely before proceeding with decorating. Placing them in the refrigerator for about 30 minutes can help expedite this process.
Once cooled, level your cakes if necessary. Uneven surfaces can make it challenging to achieve an even distribution of frosting and decorations. Use a long serrated knife or a leveling tool specifically designed for cakes to remove any domed or uneven portions of the cake layers. Take care while leveling to maintain an even thickness throughout.
Trimming for a Smooth Surface
To create an immaculate canvas for your decorations, consider trimming the edges of your chocolate cake. This step not only provides a neater appearance but also ensures consistent thickness throughout each layer of the cake. Using a sharp knife, carefully trim away any irregular edges or browned portions from the sides of the cake layers.
Remember to keep these trimmed sections aside as they can be used later for making delicious cake pops or indulgent layered trifle desserts.
With these simple steps, you can prep your chocolate cake canvas perfectly and set yourself up for success in creating beautifully decorated cakes that are sure to impress everyone who sees (and tastes) them.
Mastering Chocolate Buttercream
When it comes to cake decorating for chocolate cakes, mastering the art of chocolate buttercream is essential. Not only does it provide a smooth and delicious base for your designs, but it also adds that irresistible chocolaty flavor. Here, we will explore various chocolate buttercream frosting recipes and techniques that will help you achieve professional-looking results.
Chocolate Swiss Meringue Buttercream
One popular choice for chocolate buttercream is the Swiss meringue method. This technique creates a light and fluffy texture that pairs perfectly with the richness of chocolate cake. To make the Swiss meringue buttercream, you’ll need:
- 4 large egg whites.
- 1 cup granulated sugar.
- 1 ½ cups unsalted butter, softened.
- 8 ounces semisweet or bittersweet chocolate, melted and cooled.
Instructions:
- In a heatproof bowl, whisk together the egg whites and sugar.
- Place the bowl over a pot of simmering water, making sure the bottom of the bowl does not touch the water.
- Whisk constantly until the sugar is dissolved and the mixture reaches a temperature of 160°F (71°C).
- Remove from heat and transfer to a stand mixer fitted with a whisk attachment.
- Beat on medium-high speed until stiff peaks form and the mixture has cooled to room temperature (about 10 minutes).
- Add in the softened butter one tablespoon at a time until fully incorporated.
- Gently fold in the melted and cooled chocolate until well combined.
Dark Chocolate Ganache Frosting
For a glossy finish on your chocolate cake, dark chocolate ganache frosting is an excellent option. Its rich and decadent flavor will elevate your cake design. Here’s what you’ll need:
- 8 ounces semisweet or bittersweet chocolate, finely chopped.
- 1 cup heavy cream.
Instructions:
- Place the finely chopped chocolate in a heatproof bowl.
- In a small saucepan, heat the heavy cream over medium-low heat until just simmering.
- Pour the hot cream over the chocolate and let it sit for a minute to allow the chocolate to melt.
- Using a whisk or spatula, stir gently until the mixture is smooth and shiny.
- Let the ganache cool for about 30 minutes at room temperature, stirring occasionally to prevent a skin from forming on top.
- You can now use it as a pourable ganache or let it firm up slightly by chilling in the refrigerator before spreading it on the cake layers.
These are just two examples of chocolate buttercream frosting recipes that you can experiment with. Feel free to adjust the sweetness level by adding more or less sugar, depending on your preference. Remember to have fun while mastering these techniques, and don’t be afraid to get creative with different flavors and decorations.
Artistic Techniques for Cake Decorating with Chocolate
When it comes to cake decorating, chocolate opens up a world of artistic possibilities. Whether you’re a beginner or an experienced baker, there are several creative techniques that can take your chocolate cake designs to the next level. From elegant chocolate ganache drips to mesmerizing marble effects and delicate chocolate curls, these techniques will add sophistication and flair to your creations.
One popular technique is creating a chocolate ganache drip on the sides of the cake. This involves pouring warm ganache over the edges, allowing it to gracefully cascade down the sides for a stunning visual effect. You can experiment with different colors and consistencies of ganache to achieve various looks. Dark chocolate ganache adds an air of elegance, while white or colored ganache creates a more whimsical and playful design.
Another impressive technique is marbleizing. By mixing dark and white chocolate together on top of the cake, you can create beautiful swirls and patterns reminiscent of marble stone. This effect can be achieved by adding dollops of melted chocolate onto the cake surface and then using a toothpick or skewer to create swirling motions.
For those seeking a more intricate design, chocolate curls offer a touch of delicacy and sophistication. To make chocolate curls, simply melt chocolate and spread it thinly onto a cool surface like a baking sheet or marble slab. Once it hardens slightly but is still pliable, use a knife or spatula to carefully scrape the surface and create curls.
These artistic techniques can elevate any chocolate cake design from ordinary to extraordinary. With practice and experimentation, you’ll be able to master these methods and impress your friends and family with your creativity in cake decorating.
| Technique | Description |
|---|---|
| Chocolate Ganache Drip | Pouring warm ganache over the edges of the cake, creating a cascading effect. |
| Marbleizing | Mixing dark and white chocolate together to create swirls and patterns on the cake. |
| Chocolate Curls | Creating curls by spreading melted chocolate thinly and scraping it with a knife or spatula. |
Design Inspirations
One of the most exciting aspects of cake decorating is the endless possibilities it offers for creativity and design. When it comes to chocolate cakes, there is a wide range of stunning ideas that can elevate your cake into a true work of art. Whether you’re a beginner or an experienced decorator, these design inspirations will surely mesmerize and inspire.
For those who love nature-inspired designs, floral patterns are always a classic choice. Consider creating a bouquet of delicate chocolate flowers made from tempered chocolate or modeling chocolate. These flowers can be individually crafted and arranged on top of the cake to resemble a beautiful garden in bloom.
If you’re looking for a more abstract approach, consider incorporating geometric shapes into your chocolate cake design. Using different shades of chocolate or contrasting colors, like white chocolate against dark chocolate, you can create striking patterns such as chevron or mosaic designs.
For those with more advanced skills, realistic 3D figures made entirely out of chocolate can be extremely impressive. You can sculpt animals, faces, or even objects using modeling chocolate or other malleable forms of chocolate. These edible sculptures not only showcase your talent but also add personality and charm to your cake.
Another trend that has gained popularity in recent years is the use of mirror glazes on chocolate cakes. This technique involves pouring a glossy glaze over the cake, resulting in a beautifully reflective surface reminiscent of a mirror. Experiment with different colors and patterns to create mesmerizing effects that will leave everyone in awe.
No matter which design inspiration resonates with you the most, it’s important to always remember that practice makes perfect. Don’t be discouraged if your first attempts don’t turn out exactly as planned; every cake decorating journey starts with simple designs and gradually progresses to more complex ones. Embrace the process and enjoy unleashing your creativity into the world of chocolate cake decorating.
Troubleshooting Common Chocolate Cake Decorating Challenges
Decorating a chocolate cake can be a fun and rewarding experience, but it is not without its challenges. In this section, we will address some common issues encountered during chocolate cake decorating and provide helpful solutions to overcome them.
One of the most frustrating challenges that decorators often face is cracked ganache. Ganache is a rich mixture of chocolate and cream that is often used as a frosting or filling for chocolate cakes. Cracking can occur when the ganache cools too quickly or is spread unevenly.
To prevent cracking, it is important to allow the ganache to cool gradually at room temperature before using it on the cake. If cracks do appear, they can be smoothed out by gently heating a metal offset spatula and lightly running it over the surface of the ganache.
Another challenge that decorators may encounter is bulging fillings between cake layers. This can happen when the filling is too soft or when an excessive amount of filling is used. To avoid this issue, make sure that your filling has the right consistency – it should be firm enough to hold its shape but still spreadable. Additionally, spreading a thin layer of buttercream around each cake layer before adding the filling can act as a barrier and help prevent bulging.
Frosting consistency problems are also common in cake decorating with chocolate. If your frosting is too thick, it will be difficult to spread smoothly on the cake. On the other hand, if it’s too thin, it may slide off or become runny.
Achieving the perfect consistency begins with proper measurement of ingredients – follow your recipe closely and adjust as needed. If your frosting turns out too thick, you can add small amounts of milk or cream to thin it out gradually until you achieve your desired consistency.
By addressing these common challenges and following our troubleshooting tips, you will be better equipped to handle any hiccups that may arise during your chocolate cake decorating journey. Remember, practice makes perfect, so don’t be afraid to experiment and try new techniques. With patience and perseverance, you will soon be creating beautiful chocolate cake designs that are sure to impress.
| Common Challenge | Solution |
|---|---|
| Cracked ganache | Allow the ganache to cool gradually at room temperature before using it on the cake. |
| Bulging fillings between cake layers | Ensure that your filling has the right consistency – firm enough to hold its shape but still spreadable. Spread a thin layer of buttercream around each cake layer as a barrier. |
| Frosting consistency problems | Properly measure ingredients and adjust as needed. Gradually add small amounts of milk or cream to thin out frosting that is too thick. |
Final Tips and Tricks for Cake Decorating Domination
When it comes to cake decorating, the final touches can make all the difference. To help you master the art of cake decorating for chocolate cakes, here are some expert tips and tricks that will take your creations to the next level.
Firstly, always start with a solid plan before you begin decorating. Sketch out your design and gather all the materials you will need beforehand. This will help ensure a smooth and efficient decorating process, allowing you to focus on bringing your design to life.
Next, consider color combinations that complement chocolate. Dark or milk chocolate can be paired with vibrant colors such as red, orange, or purple to create a visually striking contrast. Additionally, don’t be afraid to experiment with different shades of chocolate icing or decorations to add depth and dimension to your design.
To add texture and visual interest to your chocolate cake, try incorporating different techniques such as piping, stenciling, or painting with edible colors. These techniques can add intricate details or patterns that will wow your guests and make your cake truly stand out.
Another important tip is to practice good time management. Decorating a cake requires patience and attention to detail, so be sure to allocate enough time for each step. Rushing through the process could lead to mistakes or uneven decorations. Remember, practice makes perfect.
Lastly, don’t forget the finishing touches. A beautifully decorated cake can be enhanced by adding small edible garnishes such as fresh berries, chocolate shavings, or edible flowers. These little additions can elevate your design even further and add an extra element of sophistication.
By following these final tips and tricks, you’ll be well on your way to mastering the art of cake decorating for chocolate cakes. So go ahead – unleash your creativity into the world of chocolate cake decoration and impress everyone with your stunning creations.
Conclusion
In conclusion, cake decorating for chocolate cakes is a truly enchanting art form that allows individuals to unleash their creativity and transform a simple dessert into a stunning masterpiece. The journey starts with selecting the perfect chocolate cake recipe as the base, ensuring that it complements the chosen design techniques. Equipping oneself with the essential tools and materials is key to successful cake decorating, including piping bags, tips, offset spatulas, turntables, and various edible decorations specific to chocolate cakes.
Preparing the chocolate cake canvas is an important step in achieving flawless decorating results. Cleaning, cooling, and leveling the cake are vital to create a smooth and even surface for design application. Mastering the art of chocolate buttercream frosting is crucial in attaining beautifully spread layers that are both visually appealing and mouthwateringly delicious.
The world of cake decorating provides a wide variety of artistic techniques specific to chocolate cakes. Experimenting with innovative methods like chocolate ganache drip, marbling, or creating delicate chocolate curls can elevate any design. Drawing inspiration from stunning design ideas such as floral patterns, abstract designs, or realistic 3D figures can open endless creative possibilities.
While facing challenges is inevitable during the cake decorating process, it is important to troubleshoot common issues like cracked ganache or frosting consistency problems. By following suggested solutions and maintaining patience and perseverance, aspiring decorators can overcome these obstacles and continue honing their skills.

Welcome to our cake decorating blog! My name is Destiny Flores, and I am the proud owner of a cake decorating business named Cake Karma. Our mission is to provide delicious, beautiful cakes for all occasions. We specialize in creating custom cakes that are tailored specifically to each customer’s individual needs and tastes.

