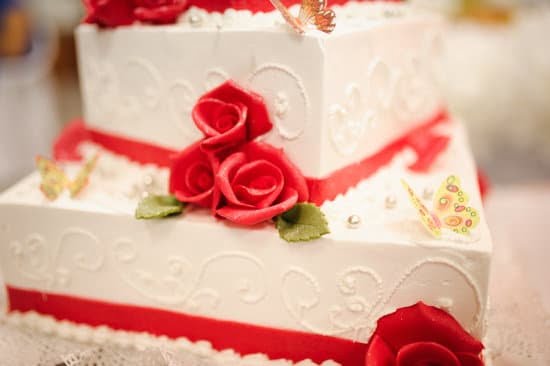
Cake decorating is an art form that combines creativity and culinary skills to transform a simple cake into a masterpiece. The joy and satisfaction of creating beautifully decorated cakes can be experienced by anyone, regardless of their skill level. However, for beginners, it is important to start with the basics of cake decorating techniques. By mastering these fundamental skills, beginners can lay a solid foundation for their journey into the world of cake decoration.
The versatility and endless possibilities of cake decorating are what make it such an exciting endeavor. Whether you dream of designing elegant wedding cakes or whimsical birthday creations, learning the basic techniques will enable you to bring your visions to life. From intricate piping work to fondant sculpting, there is no limit to what you can achieve with practice and dedication.
In this article, we will guide you through the essential tools and materials needed for cake decorating, as well as provide step-by-step instructions on how to prepare the perfect cake for decorating. We will introduce you to the world of buttercream frosting and teach you various techniques for creating beautiful designs. Additionally, we will explore rolled fondant and teach you how to work with this versatile medium.
From decorative borders to themed designs using edible decorations, we will show you how to add flair to your creations. Finally, we will address common troubleshooting issues and offer tips for successfully navigating the challenges that may arise during your cake decorating journey.
Embrace the joy of cake decorating as we dive into the basics that every beginner should know. With a little practice and a dash of creativity, there are no limits to what you can achieve in this exciting world of confectionery artistry. So roll up your sleeves, gather your tools, and let’s embark on this delightful adventure together.
Getting Started
In order to get started with cake decorating, it is essential to have the right tools and materials. The following is a comprehensive list of basic items that beginners should invest in:
- Decorating Tips: These are the metal attachments that go on the end of the piping bag. They come in various shapes and sizes and are used to create different designs with buttercream frosting.
- Piping Bags: These are cone-shaped bags made of cloth or plastic that hold the frosting. They can be reusable or disposable, depending on personal preference.
- Offset Spatula: This tool has a long, narrow blade that is bent at an angle. It is used for spreading and smoothing frosting onto cakes.
- Bench Scraper: A bench scraper is a flat tool with a straight edge. It is perfect for creating clean sides and sharp edges on cakes.
- Turntable: A turntable is a rotating stand that holds the cake while you decorate it. It allows for easy access to all sides of the cake without having to move it around constantly.
- Cake Leveler: This tool helps in creating an even surface by slicing off any domes or uneven layers of the baked cake.
- Cake Boards and Dowels: These provide support for tiered cakes by preventing them from collapsing under their own weight.
- Food Coloring: Gel or paste food coloring is ideal for achieving vibrant colors in your frosting without altering its consistency.
- Palette Knife: A palette knife is a thin, flexible knife with a rounded tip. It is great for smoothing buttercream frosting and applying fondant.
- Rolling Pin: In order to work with fondant, a rolling pin is needed to roll it out into thin sheets.
It’s important to note that investing in quality tools will save you time and frustration in the long run. Look for tools made specifically for cake decorating at specialty baking stores or online shops.
Once you have acquired your tools, it’s important to properly store and organize them for easy access. Consider using a dedicated box or drawer to keep everything together and prevent any damage.
With the right tools and materials at your disposal, you’ll be ready to embark on the exciting journey of cake decorating. Remember, practice makes perfect, so don’t be discouraged if your first few attempts aren’t flawless. Keep experimenting and trying new techniques, and soon you’ll be creating beautifully decorated cakes that will impress friends and family alike.
Preparing the Cake
A crucial step in cake decorating is ensuring that you have a solid foundation to work with. This means baking a cake that is not only delicious but also has a smooth and even surface for decorating. In this section, we will guide you through the process of baking the perfect cake for decorating and how to level it properly.
To start, gather all the ingredients needed for your chosen cake recipe. It’s important to accurately measure out each ingredient and follow the recipe instructions carefully. Remember, baking is a science, and even small deviations can affect the outcome of your cake.
Once your batter is mixed, preheat your oven according to the recipe instructions and prepare your baking pans. Properly greasing and flouring the pans will prevent the cakes from sticking. You can also use parchment paper for added insurance.
Next, pour the batter into each prepared pan, making sure to divide it equally if using multiple pans. This ensures that each layer bakes evenly. Smooth out the tops with a spatula or spoon to create an even surface.
Now it’s time to bake. Place the pans in the preheated oven and set a timer according to your recipe’s suggested baking time. Avoid opening the oven door too frequently as this can cause temperature fluctuations that may result in uneven baking.
When the timer goes off, insert a toothpick or cake tester into the center of one of your cakes. If it comes out clean or with just a few crumbs attached, your cakes are done. If not, continue baking for a few more minutes before retesting.
Once your cakes are baked, remove them from the oven and let them cool in their pans on wire racks for about 10-15 minutes. This allows them to firm up slightly before removing them from the pans.
To level your cakes, place each one upside down on a clean work surface. Using a long serrated knife, carefully trim off the domed top to create a flat surface. Take your time and use a gentle sawing motion to ensure an even cut.
Remember to save any cake trimmings for snacking or repurposing in other desserts. You can also opt to brush each layer with simple syrup or flavored liqueur for added moisture and flavor.
Now that you have a perfectly baked and leveled cake, you’re ready to move on to the next step of your cake decorating journey. With a smooth foundation in place, you’ll have a canvas that is ready for your creativity and imagination to run wild.
| Tools Needed | Materials Needed |
|---|---|
| Baking pans (various sizes) | Cake batter ingredients (flour, sugar, eggs, etc.) |
| Mixing bowls | Parchment paper |
| Mixing utensils (spatula, whisk, etc.) | Cooking spray or butter for greasing pans |
| Toothpick or cake tester | All-purpose flour or cocoa powder for dusting pans |
| Serrated knife for leveling |
Basic Buttercream Frosting
Buttercream frosting is a versatile and beginner-friendly medium for cake decorating. It is easy to work with, can be used to pipe intricate designs, and provides a deliciously creamy texture to cakes. In this section, we will explore various buttercream frosting recipes and techniques that beginners can use to create stunning cake decorations.
Choosing the Right Buttercream Recipe
There are different types of buttercream frosting recipes available, with the most common ones being American buttercream and Swiss meringue buttercream. The choice of recipe depends on personal preference and the desired texture of the frosting.
American buttercream is made using powdered sugar, butter, vanilla extract, and a small amount of milk or cream. It is quick to make and has a sweeter taste compared to other types of buttercreams. Swiss meringue buttercream is made by whisking together egg whites and sugar over a double boiler until it reaches a certain temperature, then mixing in softened butter. This type of buttercream has a lighter and smoother texture.
Piping Techniques with Buttercream Frosting
Piping is one of the most popular cake decorating techniques that can be easily achieved with buttercream frosting. By using different piping tips, beginners can create beautiful designs such as stars, rosettes, borders, flowers, and more.
To start piping with buttercream frosting, you will need a piping bag fitted with your desired tip. Begin by holding the piping bag perpendicular to the surface of the cake or cupcake and apply steady pressure while squeezing out the frosting. Experiment with different pressures and speeds to achieve different designs.
Creating Different Designs
Aside from basic piping techniques, there are several other ways to use buttercream frosting creatively for cake decoration. Crumb coating is an important step where a thin layer of frosting is applied to seal the crumbs before adding a final layer of frosting. This helps in achieving a smooth and polished look.
Other techniques include creating textured effects using spatulas or combs, adding dimension by layering different colors of frosting, and making rosettes or flowers by piping concentric circles. The possibilities are endless, and beginners are encouraged to explore their creativity with buttercream frosting.
Fondant
Fondant is a versatile and popular medium used in cake decorating. It is a smooth, pliable icing that can be rolled out and draped over cakes, creating a flawless finish. With its ability to be molded into various shapes and designs, fondant opens up a world of possibilities for beginners in cake decorating.
What is Fondant?
Fondant is a type of sugar paste that can be tinted with food coloring to achieve different colors. It has a sweet taste and a smooth texture, and it provides an excellent base for adding intricate details to cakes. Fondant is often used for wedding cakes or special occasion cakes where a polished look is desired.
Working with Rolled Fondant
Working with rolled fondant requires some practice, but once you get the hang of it, it allows you to create stunning cake designs. Here’s a step-by-step guide on how to work with rolled fondant:
- Prepare your cake: Before applying fondant, make sure your cake has been properly leveled and frosted with a thin layer of buttercream icing. This will create an even surface to work on.
- Roll out the fondant: Dust your work surface with powdered sugar or cornstarch to prevent sticking. Knead the fondant until it becomes soft and pliable, then roll it out using a rolling pin until it’s large enough to cover your cake.
- Cover the cake: Gently lift the rolled fondant over your rolling pin and place it onto your cake. Smooth the top first by using gentle strokes with your hands or a fondant smoother. Then, carefully smooth down the sides of the cake.
- Trim off excess fondant: Use a sharp knife or pizza cutter to trim off any excess fondant from the bottom edge of the cake.
Troubleshooting Tips
Working with rolled fondant can have its challenges for beginners. Here are some troubleshooting tips to help you overcome common issues:
- Cracking: If your fondant cracks while rolling or applying it to the cake, try kneading it again to make it more pliable. You can also use a small amount of vegetable shortening to soften it.
- Air bubbles: If air bubbles form under the fondant, gently poke them with a pin and smooth out the area.
- Tearing: If your fondant tears while covering the cake, you can patch it up by using a small piece of fondant and blending it into the tear.
Remember, practice makes perfect when it comes to working with rolled fondant. Don’t get discouraged if your first attempt isn’t flawless-each cake you decorate is an opportunity to learn and improve your skills.
In the next section, we will explore simple cake designs that beginners can create using buttercream icing techniques and different piping methods.
Simple Cake Designs
Creating simple cake designs is an essential skill for beginners in cake decorating. With just a few basic techniques, you can transform your cakes into stunning works of art. In this section, we will explore how to create decorative borders using piping techniques, outline and fill in basic cake shapes with icing, and provide visual examples with step-by-step instructions.
To create decorative borders on your cakes, piping techniques are essential. Piping involves using a piping bag fitted with different tips to apply icing in various patterns and designs. Start by selecting the desired tip for your border design. Popular choices include round tips for simple lines, star tips for rosettes or shells, and leaf tips for foliage-like borders.
Once you have chosen your tip, fill the piping bag with buttercream frosting or any other icing of your choice. Hold the bag at a 45-degree angle to the surface of the cake and gently squeeze out the icing while moving the bag in a steady motion. Practice on a parchment paper before working directly on your cake until you get comfortable with the technique.
Another way to enhance simple cake designs is by outlining and filling in basic shapes with icing. This technique allows you to add vibrant colors and patterns to your cakes. To start outlining, fill a piping bag fitted with a small round tip with icing that matches your desired color. Carefully trace around the shape you want to draw on top of the cake.
After outlining, switch to a larger round tip or an angled spatula to fill in the shape with another color of icing. Apply gentle pressure while spreading the icing smoothly across the outlined area until it is completely filled in. You can experiment with different combinations of colors and shapes to create visually appealing designs.
| Materials | Instructions |
|---|---|
| – Piping bag | 1. Fit the piping bag with a star tip |
| – Star tip | 2. Fill the piping bag with buttercream frosting |
| – Buttercream frosting | 3. Hold the piping bag at a 45-degree angle to the cake surface and gently squeeze out the icing while moving the bag in a circular motion to create rosettes |
With these techniques, you can easily elevate your cake designs from plain to eye-catching. The key is to practice and experiment with different techniques, patterns, and color combinations. Don’t be afraid to make mistakes; it’s through trial and error that you’ll discover your own unique style in cake decorating.
Remember, simplicity can be just as beautiful as intricate designs. With a few basic tools and some creativity, you can create stunning cakes that will impress your friends and family. So let your imagination run wild and have fun exploring the world of simple cake designs.
Adding Flair
When it comes to cake decorating, adding edible decorations is a fantastic way to take your cakes to the next level. Edible decorations not only enhance the appearance of your cakes but also add texture and flavor. Whether you are a beginner or a seasoned decorator, incorporating edible decorations can make your creations truly stand out. Here are some ideas and tips for decorating with edible decorations:
- Sprinkles: Sprinkles are a classic and versatile decoration that can instantly elevate any cake design. They come in various shapes, sizes, and colors, allowing you to customize your cakes according to different themes or occasions.
From simple rainbow sprinkles to themed ones like flowers or stars, sprinkles are an easy and fun way to add flair to your cakes. To achieve an even sprinkle distribution, gently press the desired amount of sprinkles onto the sides or top of the frosted cake. - Edible Glitter: Give your cakes a touch of sparkle with edible glitters. Edible glitter is available in many shades and can be used on both buttercream-frosted and fondant-covered cakes. It is important to use edible glitter specifically made for consumption to ensure its safety on the cake. To apply edible glitter effectively, lightly sprinkle it over the frosted cake using clean hands or a small sieve.
- Chocolate Chips: Chocolate chips can be used as decorative elements for various kinds of cakes, especially those with chocolate-based flavors. They add visual appeal as well as melt-in-your-mouth chocolate goodness. Consider using different sizes of chocolate chips or colored chocolate chips for added visual interest. You can either place them individually on top of the frosting or press them into the sides of the cake for a textured effect.
- Themed Designs: For special occasions or themed events, creating designs using edible decorations can make your cake truly unique. Use fondant cutters or molds to shape edible decorations like flowers, animals, or letters that match the theme or purpose of the cake. Simply place these creations strategically on top of the cake or around the borders to create an eye-catching design.
Remember, there are countless options when it comes to edible decorations, so don’t be afraid to experiment and let your creativity shine. Incorporating edible decorations can transform a basic cake into a stunning work of art. So go ahead and try these ideas to make your cakes even more impressive.
Troubleshooting and Tips for Success
Cake decorating, while rewarding and enjoyable, can sometimes come with its own set of challenges. In this section, we will address some common issues that beginners may encounter during the cake decorating process and provide valuable troubleshooting tips to help you overcome them. Additionally, we will offer some additional tips and tricks to ensure your success in creating professional-looking cakes.
1. Buttercream Frosting Consistency:
One common challenge beginners face is achieving the right consistency for buttercream frosting. If it’s too stiff, it becomes difficult to spread smoothly on the cake. On the other hand, if it’s too runny, it won’t hold its shape when piped or cause the decorations to slide off.
To achieve the perfect consistency, always start with room temperature ingredients, especially when using butter as a base. Gradually add powdered sugar and any liquid (milk or cream) called for in the recipe until you reach a smooth and spreadable texture.
2. Fondant Cracking:
Working with fondant can be tricky at times, especially when it starts to crack or tear. One possible cause is rolling the fondant too thin or stretching it excessively while covering the cake. To avoid cracks, make sure your work surface is clean and dusted with powdered sugar or cornstarch to prevent sticking.
Roll out your fondant evenly, rotating it frequently to maintain its shape. If cracks do occur while covering the cake, gently smooth them over with your fingers or use a small amount of water as an adhesive to patch them up.
3. Adding Realism to Decorations:
If you’re looking to bring more realism to your cake decorations such as flowers or natural elements like leaves or fruits made from gum paste or fondant, consider using petal dusts or food coloring powders specifically designed for cake decorating. These powders create depth and shade by adding color variation to your decorations subtly.
Use a soft brush to apply the powders and blend them as desired, building up the color gradually. This technique adds another layer of depth and realism to your decorations, making them truly stand out.
4. Additional Tips and Tricks:
- When piping decorations with buttercream frosting, be sure to practice your technique on parchment paper or a cake board before attempting it on the actual cake.
- Keep your hands clean and dry while working with fondant to avoid leaving fingerprints or moisture marks on the surface.
- Invest in small decorating tools like toothpicks or small paintbrushes for precise detailing work and correcting mistakes.
- If you make a mistake with a decoration or piping, don’t worry. Simply scrape off the mistake using an offset spatula or smooth it over with additional frosting or fondant.
By following these troubleshooting tips and additional tricks of the trade, you’ll be well-equipped to overcome common challenges in cake decorating. Remember, practice makes perfect, so keep experimenting, learning from your mistakes, and embracing the journey of cake decorating.
Conclusion
In conclusion, cake decorating is a delightful and fulfilling journey that allows beginners to unleash their creativity and bring their visions to life. Starting with basic techniques is essential for building a strong foundation in cake decorating. By investing in quality tools, learning how to bake and level cakes, mastering buttercream frosting techniques, working with fondant, creating simple cake designs, and incorporating edible decorations, beginners can begin to achieve professional-looking results.
However, it’s important to remember that cake decorating is a skill that requires practice and patience. It’s normal to encounter challenges along the way, such as inconsistent frosting consistency or fondant cracking. But don’t get discouraged. With troubleshooting tips and the ability to learn from mistakes, beginners can overcome these obstacles and continue improving their skills.
The joy and satisfaction that come from creating beautifully decorated cakes are worth the effort. So embrace the journey of cake decorating with an open mind and a willingness to experiment. Keep practicing different techniques and exploring new designs. Each cake you decorate is an opportunity for growth and learning.
For those who want to further enhance their skills, there are countless resources available for additional learning. Online tutorials, workshops, books, and communities of fellow cake decorators can provide valuable guidance and inspiration. So keep exploring, keep experimenting, and never stop enjoying the wonderful world of cake decorating.
Frequently Asked Questions
What does a beginner need for cake decorating?
As a beginner in cake decorating, there are a few essential things you will need to get started. Firstly, having a set of basic cake decorating tools is crucial. This includes items like an offset spatula, piping bags, and various tips for different designs.
Additionally, investing in a turntable can greatly help with smooth icing application and overall control while decorating. It’s also important to have an assortment of food coloring gels to create vibrant designs on your cakes. Lastly, having a good recipe for a cake base is essential as it needs to be sturdy yet moist enough for the decorations.
What is the easiest way to decorate a cake?
The easiest way to decorate a cake as a beginner is to start with simple techniques. One of the easiest ways is using buttercream frosting and practicing basic piping techniques such as stars or rosettes. This can be achieved by filling a piping bag with the desired tip and applying even pressure while squeezing out the frosting onto the cake surface.
Another easy technique is spreading buttercream evenly over the top and sides of the cake using an offset spatula or icing smoother for a clean finish. Adding some sprinkles or edible decorations can elevate the look without requiring advanced skills.
What is the first step in decorating a cake?
The first step in decorating a cake is to ensure that it is properly cooled before starting any decoration process. Once the cake has completely cooled, it should be leveled if necessary by cutting off any rounded top portion to create an even surface for decorating. Next, crumb coating is applied by spreading a thin layer of frosting all over the cake to seal in any loose crumbs and provide a smooth base for further decoration layers.
During this stage, it’s important to focus more on function rather than aesthetics since this layer will not be seen in the final product but helps achieve better results in subsequent steps. Once crumb coated, you can proceed with adding additional layers of frosting or other decorative elements based on your design plan.

Welcome to our cake decorating blog! My name is Destiny Flores, and I am the proud owner of a cake decorating business named Cake Karma. Our mission is to provide delicious, beautiful cakes for all occasions. We specialize in creating custom cakes that are tailored specifically to each customer’s individual needs and tastes.

