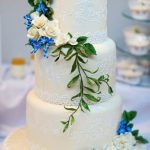
Cake decoration is an art that has captivated bakers and confectionery enthusiasts for centuries. From intricately piped designs to delicate fondant creations, the possibilities are endless when it comes to adorning a cake with beauty and creativity. One tool that has revolutionized the world of cake decorating is airbrush stencils.
These versatile tools allow decorators to achieve intricate and professional-looking designs with ease. Whether you’re a seasoned baker or just starting out, understanding the importance of airbrush stencils can help take your cake decorating skills to new heights.
Airbrush stencils for cake decorating are specially designed templates that are used in conjunction with an airbrush machine. These stencils come in various shapes, sizes, and patterns, allowing for countless design options.
They are typically made from food-safe materials like plastic or mylar, ensuring that they won’t contaminate your treats. By placing a stencil on top of the cake’s surface and using the airbrush machine to spray edible color over it, decorators can effortlessly create stunning designs in a matter of seconds.
The use of airbrush stencils offers numerous advantages for both novice and experienced cake decorators alike. Firstly, they provide consistent and flawless results every time. Unlike freehand painting or piping techniques which require precision and expert skill, airbrush stencils guarantee uniformity in design placement and color application.
This makes them particularly useful when working on large cakes or creating intricate patterns that might be challenging to achieve by hand alone. Additionally, using stencils saves time as you can quickly apply complex designs without laboring over individual details.
In summary, airbrush stencils have become indispensable tools in the world of cake decorating. With their ability to create professional-looking designs effortlessly, these stencils have gained popularity among both amateur bakers and professional pastry chefs. In the following sections of this article, we will explore different types of airbrush stencils, tips for selecting the right stencil for your project, step-by-step guides for using them effectively, and common mistakes to avoid.
Furthermore, we will showcase inspiring cake designs achieved with airbrush stencils and even provide a guide for making your own custom designs. So, whether you’re looking to enhance your cake decorating skills or simply add a touch of artistry to your baked creations, airbrush stencils are certainly worth considering.
What Are Airbrush Stencils for Cake Decorating
Airbrush stencils for cake decorating are essential tools that allow bakers and decorators to easily create intricate designs on cakes. These stencils are made from thin, flexible materials such as plastic or acetate and feature various patterns and designs. When used in conjunction with an airbrush, these stencils enable decorators to add detailed designs, textures, and even words onto cakes with precision and ease.
The Definition of Airbrush Stencils for Cake Decorating
Airbrush stencils for cake decorating are templates that are placed over a cake’s surface to create specific designs using an airbrush. The stencil acts as a guide for the decorator, ensuring that the design is accurately applied. From delicate lace patterns to bold geometric shapes, the possibilities are endless when it comes to utilizing airbrush stencils for cake decoration.
The Purpose of Using Airbrush Stencils
The main purpose of using airbrush stencils in cake decorating is to achieve clean and professional-looking designs on cakes. Without stencils, creating intricate designs by hand can be time-consuming and challenging, often resulting in inconsistent or messy results. Airbrush stencils eliminate these difficulties by providing decorators with a convenient tool that helps them achieve consistent patterns and images effortlessly.
Furthermore, airbrush stencils also offer decorators the ability to replicate complex designs that would otherwise require a significant amount of skill and practice to achieve freehand. This not only saves time but also allows both beginner and experienced decorators to take their cake decorating skills to new heights. With the assistance of airbrush stencils, decorators can produce stunning works of art that elevate any cake from ordinary to extraordinary.
Whether you’re a seasoned professional or just starting out in the world of cake decoration, investing in high-quality airbrush stencils is a wise decision. Not only will they save you time and effort during the decorating process, but they will also open up a world of creative possibilities. In the next section, we will delve deeper into the advantages of using airbrush stencils for cake decorating.
The Advantages of Using Airbrush Stencils
Airbrush stencils have become an indispensable tool for cake decorators. Their ability to create intricate designs and patterns with ease has revolutionized the art of cake decoration. In this section, we will explore the advantages of using airbrush stencils and why every cake decorator should invest in them.
Precision and Consistency
One of the main advantages of using airbrush stencils is the precision and consistency they offer. These stencils are designed with intricate patterns and shapes that allow decorators to achieve professional-looking designs on their cakes. The stencil acts as a guide, ensuring that every stroke of color is placed accurately, resulting in crisp edges and clean lines. Whether you are a beginner or an experienced decorator, airbrush stencils help you achieve consistent results every time.
Time-saving
Another advantage of using airbrush stencils is that they save valuable time during the decorating process. With traditional methods, decorators would have to spend hours hand-piping or hand-painting intricate designs onto cakes. However, with airbrush stencils, you can quickly apply complex patterns in a matter of minutes. Stenciling allows for faster completion of projects without compromising on quality, making it an ideal choice for busy professionals or those working under tight deadlines.
Versatility
Airbrush stencils offer endless possibilities when it comes to design options. There are various types of stencils available in the market, ranging from traditional designs such as flowers and lace to customizable options like monograms and logos. This versatility allows decorators to cater to a wide range of themes and occasions – be it birthdays, weddings, or corporate events. By investing in a collection of airbrush stencils, decorators can expand their creativity and offer clients unique and personalized cake designs.
Types of Airbrush Stencils
Traditional Designs
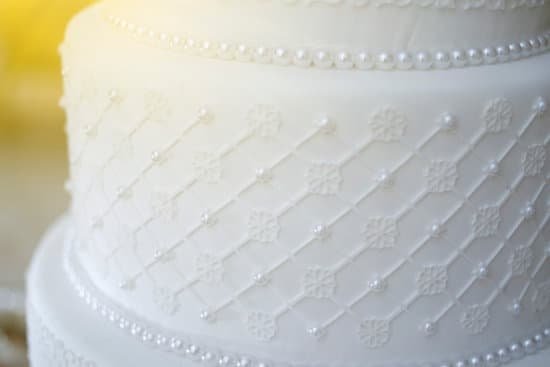
One common type of airbrush stencils for cake decorating is the traditional designs. These stencils feature classic patterns such as flowers, swirls, and lace motifs that are widely used in cake decoration. Traditional designs are versatile and can be paired with various themes and occasions, from weddings to birthdays. They provide a timeless elegance to cakes and are well-suited for those who prefer a more traditional aesthetic.
Themed Stencils
Another popular category of airbrush stencils is themed stencils. These stencils feature specific images or patterns related to a particular theme or event, such as baby showers, holidays, or sports. Themed stencils allow cake decorators to easily create cakes that match the specific style or atmosphere of the occasion. For example, a baby shower cake can be adorned with cute baby footprint designs using themed stencils.
Customizable Options
For those looking for more personalized options, customizable airbrush stencils are available. These stencils can be designed and created according to your specific requirements, allowing you to incorporate unique elements and details into your cake designs. Customizable airbrush stencils are often used by professional cake decorators who want to offer tailor-made creations to their clients. By creating your own stencil designs, you have the freedom to express your creativity and deliver truly one-of-a-kind cake decorations.
When it comes to choosing the right type of airbrush stencils for your cake decoration projects, it’s essential to consider the theme or design you have in mind. You should also take into account your skill level and familiarity with different stencil types.
If you’re new to cake decorating or prefer a classic look, traditional designs may be a suitable choice for you. On the other hand, if you’re experienced and enjoy experimenting with creative ideas, customizable options may be a better fit.
No matter which type of airbrush stencils you choose, they can greatly enhance your cake decorating skills and help you achieve professional-looking designs with ease. Experiment with different stencil types and techniques to find what works best for you and your project. With the wide range of options available, you’re sure to find airbrush stencils that inspire and elevate your cake decoration journey.
Choosing the Right Airbrush Stencils for Your Project
When it comes to choosing airbrush stencils for your cake decorating project, there are several factors to consider in order to ensure the best outcome. The right stencils can make a significant difference in the final result of your cake design. Here are some important factors to keep in mind when selecting airbrush stencils:
- Design Complexity: Consider the complexity of the design you want to achieve on your cake. Some stencils feature intricate patterns and details, while others have simpler designs. Choose a stencil that matches the level of complexity you desire for your cake.
- Size and Shape: Take into account the size and shape of both your cake and the stencil itself. Ensure that the stencil is proportionate to the size of your cake so that the design fits well without looking too small or too large.
- Material: Airbrush stencils are typically made from either plastic or metal. Plastic stencils are more affordable and easier to clean, but they may not last as long as metal ones. Metal stencils, on the other hand, are more durable and can be reused multiple times but tend to be more expensive.
- Theme and Style: Consider the overall theme or style of your cake when choosing airbrush stencils. There are stencils available in various themes such as floral, geometric, abstract, and more. Select a stencil that complements or enhances the theme you have in mind for your cake.
| Factor | Considerations |
|---|---|
| Design Complexity | Choose a stencil that matches the desired complexity level. |
| Size and Shape | Select a stencil that is proportionate to your cake’s size and shape. |
| Material | Decide between plastic (more affordable) or metal (more durable) stencils. |
| Theme and Style | Consider the overall theme or style of your cake when selecting stencils. |
By considering these factors, you can ensure that you choose the right airbrush stencils for your cake decorating project. Remember to also take into account any specific preferences or requirements you may have, such as reusable stencils or ones that allow for customization. Happy decorating.
Step-by-Step Guide to Using Airbrush Stencils for Cake Decoration
Airbrushing is a popular technique used in cake decoration to achieve stunning and intricate designs. Airbrush stencils play a crucial role in this process, allowing decorators to create precise and detailed patterns on their cakes. In this section, we will provide a step-by-step guide to using airbrush stencils for cake decoration, along with some techniques and tips to help you achieve professional-looking results.
Step 1: Prepare Your Cake
Before you begin using airbrush stencils, make sure your cake is properly prepared. This includes leveling the surface, applying a layer of frosting or ganache for smoothness, and chilling the cake to firm it up if necessary. A well-prepared cake will provide a clean canvas for your airbrush stencil designs.
Step 2: Choose Your Stencil Design
Select the airbrush stencil design that you want to use on your cake. There are endless options available, from floral motifs to geometric patterns and everything in between. Consider the theme or occasion of the cake and choose a stencil design that complements it.
Step 3: Secure the Stencil
Once you have chosen your stencil design, position it on your cake in the desired location. Use small pieces of tape or food-safe adhesive to secure the stencil in place, ensuring that it doesn’t move during the airbrushing process.
Step 4: Prepare Your Airbrush Gun
Fill your airbrush gun with the desired color of food coloring or edible paint. Practice spraying on a piece of parchment paper or practice board to adjust the pressure and get comfortable with controlling the flow of color before moving onto your cake.
Step 5: Airbrushing Techniques
When using an airbrush gun with stencils, there are two main techniques you can use – dry brushing and layering colors. Dry brushing involves holding the gun closer to the stencil while lightly misting color over it. This technique is ideal for achieving delicate and subtle designs. Layering colors involves applying multiple layers of color, starting with lighter shades and gradually building up to darker shades. This technique adds depth and dimension to your design.
Step 6: Remove the Stencil
Once you have finished airbrushing your design, carefully remove the stencil from the cake. Peel it off slowly to avoid smudging or smearing any parts of the design.
Step 7: Finishing Touches
After removing the stencil, you can add additional decorations or details to enhance your cake decoration further. This could include piping, edible glitter, or hand painting.
By following this step-by-step guide and experimenting with different techniques, you can create unique and eye-catching designs using airbrush stencils for cake decoration. Remember to practice beforehand and be patient as mastering this art takes time and experience. With each project, you will improve your skills and discover new possibilities for elevating your cake decorating game.
Common Mistakes to Avoid When Using Airbrush Stencils
When using airbrush stencils for cake decorating, it is important to be aware of the common mistakes that can occur and how to troubleshoot them. By avoiding these errors, you can ensure a flawless and professional-looking cake design. Here are some common mistakes to avoid when using airbrush stencils along with their corresponding solutions:
- Overspraying: One of the most common mistakes when using airbrush stencils is overspraying, which can result in blurry or messy designs. To avoid this, hold the airbrush at a consistent distance from the stencil and apply light layers of color. Start with a light hand and gradually build up the intensity as needed. Additionally, consider using a shield or barrier around the stencil to prevent any overspray from affecting other areas of the cake.
- Stencil Movement: Another mistake that can easily happen is when the stencil moves during application, causing smudged or distorted patterns. To prevent this, secure the stencil firmly in place using tape or weights before starting to airbrush. Alternatively, you can also use stencil adhesive sprays specifically designed for cake decorating to keep the stencil in position throughout the process.
- Clogged Airbrush: A clogged airbrush can lead to uneven spray patterns or even complete blockage of paint flow. To avoid this problem, make sure to thoroughly clean your airbrush before each use and check for any buildup or debris that may affect its performance. If you encounter a clog during spraying, stop immediately and clean your airbrush nozzle with warm water or an appropriate cleaning solution.
By being mindful of these common mistakes and knowing how to address them effectively, you can achieve precise and professional results when using airbrush stencils for cake decoration. Remember that practice makes perfect, so don’t be discouraged if you encounter some challenges at first – with time and experience, you will become more skilled in utilizing these stencils for stunning cake designs.
Showcase of Stunning Cake Designs Created with Airbrush Stencils
Airbrush stencils have revolutionized the world of cake decoration by allowing decorators to create stunning designs with precision and ease. These versatile tools offer endless possibilities for creating intricate patterns, textures, and even realistic images on cakes. In this section, we will showcase some awe-inspiring cake designs that were created using airbrush stencils, to inspire you and showcase the incredible potential of these tools.
- Tribal-Inspired Cake: This tribal-inspired cake design features a bold black and white pattern created using airbrush stencils. The geometric shapes and intricate lines add a modern and edgy touch to the cake, making it a real showstopper at any event. The use of different stencil sizes allows for variation in scale and creates an eye-catching visual effect.
- Floral Delight Cake: This beautiful floral cake design showcases the versatility of airbrush stencils in capturing delicate details. The intricate floral patterns are brought to life with vibrant colors and gradient effects achieved through layering different stencil designs. The result is a breathtakingly realistic flower garden on a cake that is sure to impress everyone.
- Tropical Paradise Cake: Transport yourself to a tropical paradise with this stunning cake design created using airbrush stencils. The intricately detailed palm leaves, exotic flowers, and vibrant colors make this cake a visual delight. By layering different stencil designs, decorators can achieve depth and dimension in their creations, turning an ordinary cake into a tropical masterpiece.
These examples demonstrate just a fraction of what can be achieved with airbrush stencils in cake decoration. Whether you’re looking to create bold graphic designs or intricate nature-inspired motifs, airbrush stencils offer endless creative possibilities to take your cake decorating skills to new heights.
To replicate these mesmerizing designs or create your own unique creations, it’s essential to choose the right airbrush stencils for your project. Consider factors such as the desired design, stencil size, and complexity. Whether you opt for traditional designs or customizable options, there are airbrush stencils available to suit every cake decorator’s needs.
Remember, practice is key to mastering the art of using airbrush stencils effectively. Experiment with different techniques such as layering stencils, using multiple colors, and adjusting the airbrush pressure to achieve desired effects. With time and effort, you’ll be able to create your own breath-taking cake designs that will leave everyone in awe of your skills.
DIY Airbrush Stencils for Cake Decoration
Creating your own DIY airbrush stencils for cake decoration allows you to unleash your creativity and add a personalized touch to your baked creations. Whether you’re a professional baker or an enthusiastic home cook, making your own custom designs can elevate the visual appeal of your cakes and make them truly one-of-a-kind.
Materials Needed
To create your own DIY airbrush stencils, you will need a few basic materials that are easily accessible:
- Stencil material: There are various options available for stencil material, such as acetate sheets, mylar sheets, or even thick plastic folders.
- Cutting tools: You will need scissors or a craft knife to cut out the design on the stencil material. Remember to handle sharp tools with caution and use a cutting mat to protect your working surface.
- Design template: Before you start cutting, it’s helpful to have a design template or pattern of what you want your stencil to look like. This could be hand-drawn and traced onto the stencil material or printed out on regular paper and then transferred onto the stencil material.
Steps to Create DIY Airbrush Stencils
Once you have gathered all the necessary materials, follow these steps to create your own airbrush stencils:
- Choose the design: Start by selecting a design that suits the theme or occasion of your cake. This could be anything from intricate patterns, floral motifs, to personalized messages or monograms.
- Transfer the design: If using a printed template, place it underneath the stencil material and trace the design onto it using a pen or pencil. If hand-drawing directly on the stencil material, ensure that it is well-proportioned and symmetrical.
- Cut out the design: Carefully cut along the traced lines using scissors or a craft knife. Take time with this step as precision is important for achieving clean edges in your stencil.
- Test the stencil: Before using your DIY airbrush stencil on a cake, it’s recommended to test its effectiveness on a piece of scrap paper or cardboard. This will allow you to assess if the design is properly outlined and if any adjustments need to be made.
- Clean and store: After each use, make sure to clean your DIY airbrush stencil thoroughly with warm soapy water to remove any food color residue. Once dried, store it in a clean and flat area to prevent warping or damage.
By creating your own DIY airbrush stencils, you have the freedom to experiment with different designs and themes, making each cake unique and memorable. Whether it’s for birthdays, weddings, or other special occasions, personalized stencils can take your cake decorating skills to new heights. So grab your materials and start exploring the endless possibilities of self-designed airbrush stencils for a truly exceptional cake decoration experience.
| Materials Needed | Steps to Create DIY Airbrush Stencils |
|---|---|
| – Stencil material | 1. Choose the design |
| – Cutting tools | 2. Transfer the design |
| – Design template | 3. Cut out the design |
Conclusion
The use of airbrush stencils allows decorators to achieve professional-looking results with minimal effort. These stencils can be used to create various effects such as patterns, textures, and even realistic images on cakes. With the wide range of designs available, decorators can choose from traditional motifs to more modern and customizable options. This versatility ensures that every cake can be personalized and tailored to meet the client’s needs and preferences.
Furthermore, using airbrush stencils saves time and reduces the risk of errors. Instead of spending hours hand-piping intricate designs or trying to achieve perfect symmetry by freehand, decorators can simply position the stencil on the cake surface and spray the desired colors or patterns. This not only speeds up the decorating process but also guarantees consistent results every time.
By incorporating airbrush stencils into their repertoire, cake decorators can unlock their creativity and achieve extraordinary designs that were previously unattainable. From elegant wedding cakes adorned with intricate lace patterns to whimsical birthday cakes featuring vibrant images, the possibilities are truly endless when it comes to using airbrush stencils in cake decoration.
- Learn more about airbrushing techniques and cake decoration with airbrush stencils in “The Complete Guide to Airbrushing for Cake Decoration” by Jane Smith.
- Discover a wide range of customizable airbrush stencils at www.cakedecor.com/stencils.
Additional Resources
In conclusion, airbrush stencils are an invaluable tool for cake decorators seeking to elevate their skills and create stunning designs. The use of airbrush stencils allows for precise and intricate details to be added to a cake, resulting in professional-quality results that would be difficult to achieve by hand alone. By investing in a set of airbrush stencils, decorators can unleash their creativity and explore endless possibilities in cake decoration.
To find airbrush stencils, there are various resources available. Many specialty baking supply stores carry a wide range of stencils specifically designed for cake decorating. Online retailers also offer a vast selection of airbrush stencils, making it easy to browse and find the perfect designs for your projects. Additionally, there are numerous websites and blogs dedicated to cake decoration techniques that provide further reading on how to use airbrush stencils effectively.
For those looking to take their creativity to the next level, creating custom airbrush stencils is also an option. DIY enthusiasts can design and cut their own stencils using materials such as acetate sheets or stencil vinyl. This allows decorators to personalize their designs and tailor them specifically to their vision.
Frequently Asked Questions
Can you airbrush a stencil on a cake?
Yes, it is possible to airbrush a stencil on a cake. Airbrushing allows for precise and intricate designs to be created on the surface of the cake using edible colors.
Stencils are used to guide the airbrushing process and help achieve clean lines and uniform patterns. By spraying the airbrush color over the stencil, you can easily transfer the desired design onto the cake.
How do you use airbrush cake stencils?
To use airbrush cake stencils, start by choosing a stencil that matches your desired design or pattern. Place the stencil gently onto the surface of the cake, ensuring it is flat against the surface so that no color seeps underneath. Secure it in place if necessary using pins or tape.
Next, load your airbrush with the desired edible color of your choice and adjust its pressure according to your preference. Holding the airbrush at an appropriate distance from the stencil, gradually apply even coats of color by moving across the entire area covered by the stencil. Lift off the stencil carefully once you are satisfied with the coverage, being cautious not to smudge or smear any part of it.
What is the best material for airbrush stencils?
When selecting material for airbrush stencils, it is important to consider durability and flexibility. The best material for these stencils would ideally be food-safe and reusable multiple times without losing its shape or integrity. Some common options include plastic sheets specifically designed for cake decorating purposes, such as Mylar or acetate sheets which are transparent and easy to clean after use.
These materials are flexible enough to adapt to different curved surfaces but still sturdy enough to prevent paint bleed when airbrushing. Using sturdy materials also ensures longevity, allowing you to reuse them for future cake projects without needing frequent replacements or repairs.

Welcome to our cake decorating blog! My name is Destiny Flores, and I am the proud owner of a cake decorating business named Cake Karma. Our mission is to provide delicious, beautiful cakes for all occasions. We specialize in creating custom cakes that are tailored specifically to each customer’s individual needs and tastes.

