Airbrush food coloring for cake decorating has revolutionized the world of confectionery artistry, allowing cake decorators to achieve incredible precision and stunning effects. Airbrushing has rapidly gained popularity in the realm of cake decoration due to its ability to create smooth gradients, realistic shading, and intricate designs with ease. In this article, we will delve into the magical world of airbrushing for cake decorating, exploring the benefits, essential tools, techniques, troubleshooting tips, and showcasing inspiring examples.
Airbrush food coloring works by utilizing a handheld device that sprays a fine mist of edible color onto the surface of cakes. This technique offers enhanced precision and control compared to traditional methods such as using brushes or spatulas. With an airbrush, decorators can achieve smooth transitions between colors and effortlessly blend shades to create stunning visual effects. The versatility of airbrushing allows decorators to bring their imaginative visions to life on cakes with utmost intricacy.
The benefits of using airbrush food coloring are numerous. Firstly, it offers enhanced precision and control in applying color onto cakes. The fine mist delivered by the airbrush allows decorators to easily target specific areas or create delicate details with ease.
Moreover, airbrushing enables decorators to achieve smooth gradients and seamless transitions between colors, resulting in realistic shading and depth in cake designs. Additionally, utilizing an airbrush significantly saves time compared to traditional methods as it covers a larger area with speed and efficiency.
In the following sections of this article, we will explore the essential tools required for airbrushing cake designs including types of airbrushes suitable for cake decorating and different airbrush compressors available on the market. We will also discuss various options for airbrush food coloring and share tips on how to properly prepare your airbrush and mix food coloring for optimal results.
Furthermore, we will provide a step-by-step guide for beginners as well as advanced techniques for creating intricate designs through freehand airbrushing.
Troubleshooting common challenges, showcasing stunning cake decorations, and encouraging readers to embrace the artistry of airbrushed cake decorating will also be covered. Stay tuned for a whirlwind journey into the captivating world of airbrush food coloring.
Benefits of Using Airbrush Food Coloring
Airbrush Food Coloring for Cake Decorating is a popular technique that has gained recognition in the world of cake decoration. This section will explore the benefits of using airbrush food coloring, highlighting why it has become a favored method among professional and home bakers alike.
One of the key advantages of using airbrush food coloring is the enhanced precision and control it offers in applying color to a cake. Unlike traditional methods such as painting with brushes or piping, airbrushing allows for a more even and controlled distribution of color. The fine mist that is emitted from the airbrush nozzle creates a smooth and seamless appearance on the cake surface.
Another benefit of airbrushing is its ability to achieve smooth gradients and realistic shading. By adjusting the pressure on the airbrush compressor and utilizing various techniques, bakers can create stunning effects such as ombre cakes or realistic shadows. This level of detail and artistry would be difficult to replicate with other methods.
Furthermore, airbrushing can save significant time compared to traditional techniques. With an airbrush, it is possible to cover a large cake with an even layer of color in just minutes. This not only speeds up the decorating process but also allows for more complex designs to be completed efficiently.
| Benefits |
|---|
| Enhanced precision and control in applying color |
| Ability to achieve smooth gradients and realistic shading |
| Time-saving compared to traditional methods |
The benefits listed above demonstrate why using airbrush food coloring has become increasingly popular in cake decorating. The next section will delve into the essential tools required for successful airbrushing, including types of airbrushes, compressors, and food coloring options available.
Essential Tools for Airbrushing Cake Designs
Airbrushing has become a popular technique in cake decoration due to its ability to achieve precise and realistic designs. To successfully airbrush cake designs, it is essential to have the right tools. In this section, we will discuss the types of airbrushes suitable for cake decorating, the different airbrush compressors available, and the options for airbrush food coloring.
When it comes to selecting an airbrush for cake decorating, there are two main types to consider: gravity feed and siphon feed. Gravity feed airbrushes are favored by many decorators as they allow for better control and precision. These airbrushes have a cup on top that holds the food coloring, which is fed into the nozzle through gravity.
On the other hand, siphon feed airbrushes have a larger color reservoir attached to the bottom of the tool. The choice between gravity feed and siphon feed depends on personal preference and the specific needs of each design.
In addition to considering the type of airbrush, it is important to choose an appropriate compressor. Airbrush compressors come in various sizes and power levels. It is recommended to use one specifically designed for cake decorating, as they provide consistent airflow and pressure control. Some compressors also offer additional features such as moisture traps or adjustable pressure settings.
When it comes to airbrush food coloring, there are several options available on the market. These food colors are specially formulated for use in airbrushes, ensuring that they flow smoothly through the nozzle without clogging or affecting performance. They come in both liquid and gel form, with liquid colors being more commonly used due to their viscosity and ease of mixing.
| Airbrush Type | Description |
|---|---|
| Gravity Feed | Airbrush with a cup on top that holds food coloring, which is fed into the nozzle through gravity. |
| Siphon Feed | Airbrush with a larger color reservoir attached to the bottom of the tool. |
How to Properly Prepare Your Airbrush and Food Coloring
Cleaning and Maintenance Tips for Your Airbrush
Before beginning the airbrushing process, it is crucial to ensure that your airbrush is clean and free from any residue. This will help prevent clogging and ensure the smooth flow of food coloring. To clean your airbrush, start by disassembling it according to the manufacturer’s instructions.
Using a mild cleaning solution recommended for airbrushes, soak the parts in a bowl or container for a few minutes. Gently scrub any stubborn residue using a soft brush or toothbrush. Rinse all the parts thoroughly with clean water and pat them dry with a lint-free cloth before reassembling the airbrush.
Regular maintenance of your airbrush is also essential to keep it in optimal condition. After each use, disassemble the airbrush and clean it thoroughly as mentioned above. It is crucial to remove any excess food coloring from the nozzle or needle to prevent clogging. Additionally, check for any damage or wear on the parts and replace them if necessary.
Choosing and Diluting the Right Food Coloring for Airbrushing
When selecting food coloring for airbrushing, it is important to choose ones specifically designed for this purpose. These colors are usually more concentrated than regular liquid food coloring, allowing you to achieve vibrant shades without oversaturating your cakes.
To dilute your food coloring properly for airbrushing, start by adding a small amount of color to a container. Gradually add edible alcohol or distilled water while stirring until you reach the desired consistency. The goal is to create a thin, flowing liquid that can be easily sprayed through your airbrush without clogging the nozzle.
It is essential to note that different brands and types of food coloring may require different amounts of dilution. It is best practice to experiment with small quantities first and adjust as needed until you find the right consistency.
Proper Mixing Techniques to Achieve Desired Shades
To achieve an array of shades and colors, it is crucial to understand the principles of color mixing. Mixing primary colors – red, blue, and yellow – can create a wide range of secondary colors. For example, combining equal parts of red and blue will yield purple. Experiment with different ratios and combinations to achieve your desired shades.
It is also important to keep in mind that airbrushing typically results in lighter hues than what you see in the container. Test your mixed colors on a white surface or a paper towel before applying them to your cake. This will give you a better understanding of how the colors will appear when airbrushed onto your cake design.
By properly preparing your airbrush and food coloring, you will be able to achieve optimal results in your cake decorating endeavors. Proper cleaning, appropriate dilution, and skillful mixing techniques are key factors in creating stunning airbrushed cake designs.
Step-by-Step Guide to Airbrushing Cake Designs
The process of airbrushing cake designs may seem intimidating at first, but with proper techniques and practice, it can be a rewarding and enjoyable aspect of cake decorating. This step-by-step guide will walk you through the process of airbrushing your cake designs, from preparing the surface to creating intricate designs.
Preparing the Cake Surface for Airbrushing
Before you begin airbrushing your cake, it is essential to ensure that the surface is ready for coloring. Start by crumb coating your cake with a thin layer of icing or buttercream to create a smooth base. Once the crumb coat has set, you can proceed to apply fondant if desired.
To achieve the best results when airbrushing, it’s important to have a clean and dry surface on which to work. Make sure that there are no crumbs or excess icing on the cake before starting.
Techniques for Creating Basic Designs Using Stencils
Using stencils is an excellent way to create precise and intricate patterns on your cake. Begin by selecting a stencil design that fits your theme or vision. Place the stencil gently on top of the fondant-covered cake, making sure it is aligned correctly.
To prevent any color bleeding under the stencil, hold it firmly against the cake surface and use light layers of color. Start spraying from a distance of about 6-8 inches, gradually building up intensity as needed.
Once you’re satisfied with the coverage, carefully lift off the stencil to reveal your design. Allow each layer of color to dry before applying additional stencils or colors if desired.
Advanced Tips for Freehand Airbrushing and Creating Intricate Designs
For those who want to take their airbrushing skills to the next level, freehand airbrushing allows for more creativity and freedom in creating intricate designs on cakes. Practice using different airbrush techniques such as layering colors, creating gradients, and adding shadows to add depth and dimension to your designs.
Start by practicing on a test surface or parchment paper to get a feel for the airbrush and different techniques. Gradually move on to applying these techniques directly onto your cake once you have gained confidence and control.
Remember that practice makes perfect. Don’t be discouraged if your first attempts don’t turn out exactly as planned. With time and practice, you’ll develop your own unique style and master the artistry of airbrushing cake designs.
By following these step-by-step instructions, you’ll be well on your way to creating stunning airbrushed cake designs. Keep experimenting with different techniques, colors, and designs to unlock the full potential of airbrush food coloring in your cake decorating repertoire.
Troubleshooting Common Airbrushing Challenges
Airbrushing cakes can be a fun and creative way to decorate, but like any technique, it does come with its own set of challenges. In this section, we will explore some common issues that may arise while airbrushing and provide solutions to help you overcome them.
One of the most frustrating problems encountered during airbrushing is clogged nozzles. This can happen when the food coloring or paint used is too thick or contains particles that are not sufficiently soluble. To prevent this issue, it is crucial to properly dilute your food coloring before using it in the airbrush.
If you do encounter a clogged nozzle, try soaking it in warm water or using a cleaning brush to remove any stubborn residue. Regular maintenance and cleaning of your airbrush will also help prevent clogs.
Overspray and bleeding of colors are other common challenges faced by cake decorators when airbrushing. Overspray occurs when the force of the air from the airbrush causes the food coloring to spread beyond the desired area. To reduce overspray, ensure that you have proper control over your air pressure and keep a consistent distance between the cake surface and the nozzle.
Bleeding of colors can happen when different shades blend together more than intended. To avoid this issue, allow each color layer to dry before applying another one.
Uneven color distribution is another problem that can occur during airbrushing. This happens when certain areas of the cake receive more color than others, resulting in an unbalanced appearance. To fix this issue, make sure to move your hand in a smooth and controlled manner while airbrushing. Keep a steady distance from the surface and apply even pressure on the trigger to achieve consistent color coverage.
By understanding these common challenges and employing simple solutions, you can overcome them with ease while mastering the art of airbrushed cake decorating. With practice and patience, you’ll soon be able to create stunning designs without any hiccups.
Showcasing Stunning Airbrushed Cake Decorations
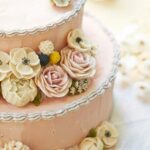
Airbrushing has revolutionized the world of cake decoration, allowing bakers and decorators to create stunning and intricate designs with precision and control. In this section, we will showcase some examples of airbrushed cake decorations that highlight the uniqueness and artistry of this technique.
One popular theme for airbrushed cake decorations is nature-inspired designs. From delicate petals and leaves on a floral-themed cake to majestic landscapes on a wilderness-themed creation, airbrushing allows for vibrant colors and smooth gradients that bring these designs to life. Imagine a towering mountain range with intricate details created through layers of airbrushed shades, or a bouquet of flowers with each petal individually shaded to achieve depth and realism.
Airbrushing also shines in creating themed cakes for special occasions such as birthdays or weddings. The precise control in applying color allows for unique patterns, textures, and effects. For example, an elegant wedding cake can be adorned with delicately airbrushed lace-like motifs or shimmering metallic accents. Airbrushing can also be used to create realistic-looking textures like woodgrain or marble on celebration cakes, giving them an extra touch of sophistication.
What truly sets airbrushed cake decorations apart is the level of detail that can be achieved. From fine lines and intricate patterns to shading that adds depth and dimension, this technique opens up endless possibilities for creativity. Whether it’s creating lifelike animal characters or replicating famous artworks on cakes, airbrushing offers the precision needed to capture even the smallest details.
By showcasing these stunning airbrushed cake decorations, we hope to inspire readers to embrace the artistry of this technique in their own cake decorating endeavors. With an airbrush in hand and a vivid imagination at play, there are no limits to what can be achieved in terms of design, texture, and visual impact. So why not try your hand at airbrushed cake decoration? Let your creativity soar as you experiment with different techniques and create your own masterpieces.
Experimenting with Airbrush Food Coloring Techniques
Airbrushing is not limited to simply adding color to cake designs. In fact, it offers a whole world of creative possibilities when it comes to experimenting with different techniques and effects. By thinking outside the box and pushing the boundaries of traditional cake decorating, you can create truly unique and stunning designs using airbrush food coloring.
One way to explore the potential of airbrushing is by combining it with other cake decorating techniques. For example, you can use the airbrush to enhance the texture of a buttercream frosting by lightly misting it with a complementary color. This creates an illusion of depth and dimension that cannot be achieved with traditional piping techniques alone.
Another technique to experiment with is creating watercolor-like effects on your cakes. By diluting your airbrush food coloring with a small amount of clear alcohol or extract, you can achieve beautiful, translucent washes of color that mimic the softness and fluidity of watercolors. This technique is particularly effective for creating dreamy backgrounds or ethereal details on wedding cakes or celebration cakes.
Additionally, airbrushing can be used to create intricate stenciled patterns on cakes. Simply place a stencil over your cake and apply a light layer of color using the airbrush. This technique allows for precise and consistent results that are difficult to achieve through hand-painting alone.
By experimenting with these techniques and exploring your own creative ideas, you can push the boundaries of what is possible with airbrush food coloring in cake decorating. Don’t be afraid to think outside the box and try new combinations or unconventional methods – you may just discover a new technique that will set your cake designs apart from the rest.
Conclusion
In conclusion, airbrush food coloring has revolutionized the world of cake decorating, bringing a new level of artistry and precision to the craft. The benefits of using airbrushing techniques are significant, offering enhanced control and precision in applying color, the ability to achieve smooth gradients and realistic shading, and saving valuable time compared to traditional methods. With the right tools, proper preparation, and practice, anyone can master the art of airbrushed cake designs.
Throughout this article, we have explored essential tools for airbrushing cake designs including different types of airbrushes suitable for cake decorating, an overview of airbrush compressors and their features, and a selection of airbrush food coloring options available. We have also provided step-by-step guidance on how to properly prepare your airbrush and food coloring for optimal results.
Moreover, we have discussed common troubleshooting challenges that may arise while airbrushing cakes such as clogged nozzles or unwanted bleeding of colors and how to address these issues. Additionally, we showcased stunning examples of airbrushed cake designs across various themes and occasions, highlighting the uniqueness and precision that airbrushing adds to cake decoration.
Finally, we encouraged readers to experiment with different techniques using airbrush food coloring. By combining airbrushing with other cake decorating techniques like piping or fondant work, one can create truly breathtaking effects. The possibilities are endless when it comes to incorporating airbrush coloring into your own unique designs.
Frequently Asked Questions
Can you use food coloring to airbrush a cake?
Yes, it is possible to use food coloring to airbrush a cake. However, it is important to note that not all food colorings are suitable for airbrushing. When choosing food coloring for this purpose, it is best to opt for liquid or gel-based colors that are specifically formulated for airbrushing.
These types of food colors have a thinner consistency and are designed to work well with the airbrush equipment. Using regular food coloring or powder-based colors may clog the nozzle of the airbrush, resulting in inconsistent spray patterns or blockages.
Can I use airbrush color as food coloring?
Airbrush color can be used as food coloring in certain cases, but it depends on the specific brand and formulation. Some airbrush colors are made with ingredients that are safe for consumption and can be used as food coloring without any concerns.
However, it is crucial to check the label or do some research on the particular brand before using it as a direct substitute for traditional food coloring. This is especially important if you plan to use the colored product on items that will be consumed, such as icing on cakes or frosting.
What kind of food coloring do you use for airbrush?
The type of food coloring that works best for airbrushing is typically liquid or gel-based colorings that are specifically labeled as suitable for airbrushing purposes. These types of food colorings usually have a thin consistency which allows them to flow smoothly through an airbrush gun without clogging or causing blockages in the nozzle.
It’s also important to look for colors that are highly concentrated so that you can achieve vibrant and intense shades without having to use excessive amounts of coloring liquid. Additionally, some brands offer special sets of airbrush-specific colors that come in a wide range of shades suitable for cake decorating and other culinary applications.

Welcome to our cake decorating blog! My name is Destiny Flores, and I am the proud owner of a cake decorating business named Cake Karma. Our mission is to provide delicious, beautiful cakes for all occasions. We specialize in creating custom cakes that are tailored specifically to each customer’s individual needs and tastes.

