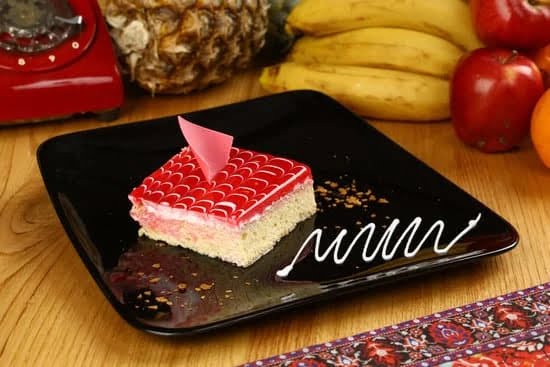
Decorating a chocolate cake at home is not only a delicious endeavor but also an incredibly fun and rewarding experience. Whether you are a novice or an experienced baker, taking the time to decorate your own chocolate cake allows you to let your creativity shine and create a beautiful masterpiece that is as pleasing to the eyes as it is to the taste buds.
There is something truly special about being able to customize every aspect of your cake – from the flavor of the cake itself to the design and decorations on top. By decorating a chocolate cake at home, you have complete control over the ingredients used, ensuring that it meets all dietary restrictions or personal preferences. Plus, there’s no better feeling than seeing the amazed expressions on your loved ones’ faces when they see what you have created.
To embark on this delightful journey, it is essential to have the right tools and ingredients in hand. From piping bags and tips to various types of frosting, sprinkles, and edible decorations, having a comprehensive list of necessary supplies will ensure that you can bring your vision to life.
Furthermore, understanding how to bake and prepare a delicious homemade chocolate cake as the base for decoration is crucial. With step-by-step instructions and tips, even those with limited baking experience can achieve mouthwatering results.
From mastering basic techniques such as smoothing frosting and piping borders to exploring advanced ideas like creating intricate roses or using fondant, there are endless possibilities when it comes to decorating your chocolate cake. The article will guide you through these techniques while also providing ample inspiration with various themes – seasonal designs, birthday cake decorations, elegant wedding inspirations – so you can find the perfect style for any occasion.
So why wait? Embrace your inner artiste and give home chocolate cake decoration a try.
With insider tips and tricks for professional finishes along with troubleshooting solutions for any mishaps that may occur along the way, this article has everything you need to ensure your homemade masterpieces impress your friends, family, and even your social media followers. The journey of decorating a chocolate cake at home is full of joy and deliciousness, and the results are sure to make all the effort worthwhile.
Essential Tools and Ingredients
Decorating a chocolate cake at home can be a fun and rewarding experience. To ensure success, it is important to have the right tools and ingredients on hand. Here is a comprehensive list of everything you will need to decorate your chocolate cake:
Tools
- Cake pans: Choose round or rectangular pans depending on the shape you desire for your cake.
- Mixing bowls: Have a variety of sizes available for mixing the batter and frosting.
- Electric mixer: This will make it easier to mix the batter until it is smooth and lump-free.
- Rubber spatula: Perfect for scraping down the sides of bowls and smoothing out frosting.
- Offset spatula: Essential for spreading frosting smoothly onto the cake layers.
- Piping bags and tips: These will come in handy for creating borders, decorative designs, and writing on the cake.
- Turntable: While not essential, it makes rotating the cake during decoration much easier.
- Cake leveler or serrated knife: Used to level off any domed tops or trim layers to create an even cake surface.
Ingredients
– Chocolate cake mix or homemade chocolate cake recipe ingredients such as flour, sugar, cocoa powder, baking powder, eggs, milk, butter, and vanilla extract.
- Frosting ingredients: Most commonly used frostings for chocolate cakes include buttercream (made with butter, powdered sugar, milk or cream, and flavorings like vanilla) or cream cheese frosting (made with cream cheese, butter, powdered sugar, and vanilla).
- Food coloring: To add different colors to your frosting if desired.
- Fondant (optional): Used for creating smooth finishes on cakes or shaping decorative elements like flowers or figurines.
- Decorations: This can include sprinkles, chocolate shavings/curls/chips/drops/nibs/vermicelli/powder/ganache drizzle/letters/writing gel/etc. to add texture and visual appeal.
By having these essential tools and ingredients ready, you will be well-prepared to start decorating your chocolate cake at home. Whether you are a beginner or experienced baker, having the right supplies will make the process easier and more enjoyable.
Getting Started
Before you can begin decorating your chocolate cake, it’s important to have a delicious homemade cake to serve as the canvas. Baking your own cake from scratch not only allows you to control the flavors and quality of ingredients, but it also adds a personal touch to your creation.
To start, gather all the necessary ingredients for a basic chocolate cake: flour, sugar, cocoa powder, baking powder, baking soda, salt, eggs, milk, vegetable oil or melted butter, and vanilla extract. Preheat your oven to the recommended temperature stated in the recipe.
Next, sift together the dry ingredients – flour, sugar, cocoa powder, baking powder, baking soda, and salt – into a large mixing bowl. In a separate bowl or measuring cup, whisk together the wet ingredients – eggs, milk, oil or butter (melted and cooled slightly), and vanilla extract.
Create a well in the center of the dry ingredients and gradually pour in the wet mixture. Combine them gently using a spatula or wooden spoon until no traces of flour remain. Be careful not to overmix as this can lead to a dense or tough cake texture.
Prepare your baking pans by greasing them with butter or cooking spray and lining them with parchment paper for easy removal later. Pour an equal amount of batter into each pan and smooth the surface with an offset spatula.
Place the pans in the preheated oven and bake for approximately 25-30 minutes or until a toothpick inserted into the center comes out clean. Rotate the pans halfway through baking to ensure even cooking.
Once baked, remove the cakes from the oven and let them cool completely in their pans on wire racks. This step is crucial as attempting to frost a warm cake can cause crumbs to mix into your frosting.
Now that you have successfully baked your homemade chocolate cake, it’s time to move on to the fun part – decorating.
Basic Decorating Techniques
Decorating a chocolate cake at home can be a fun and rewarding experience, even for beginners. With some basic decorating techniques, you can transform your homemade chocolate cake into a beautiful and delicious centerpiece for any occasion. In this section, we will explore the fundamental decorating techniques that will help you achieve professional-looking results.
Smoothing the Frosting
One of the first steps in decorating a chocolate cake is to ensure that the frosting is smooth and even. To achieve this, start by applying a thin layer of frosting all over the cake to create a base coat. Then, using an offset spatula or a bench scraper, gently smooth the frosting on the sides and top of the cake.
Take your time and use long strokes to create an even surface. If there are any uneven areas or air bubbles, you can go back and fix them by adding more frosting and smoothing it out again.
Piping Borders
Piping borders is another simple but effective way to decorate your chocolate cake. You can use different types of icing tips to create various border designs such as shells, beads, dots, or ruffles.
Fill a piping bag with your desired buttercream frosting or royal icing, making sure to secure the end tightly. Hold the bag at a 45-degree angle against the edge of the cake and apply gentle pressure while moving your hand in a continuous motion to create the desired border design.
Creating Simple Designs
If you’re new to cake decorating, starting with simple designs is a great way to practice your skills before moving on to more intricate decorations. You can use stencils or cutouts made from wax paper or parchment paper to create shapes on top of your cake. Sprinkle powdered sugar or cocoa powder over the stencil to transfer the design onto the cake surface.
Another easy technique is using colored buttercream frosting to pipe flowers or messages onto the cake. Start with basic shapes such as circles or stars and gradually build up your skills.
By mastering these basic decorating techniques, you will have a solid foundation to create beautiful chocolate cakes at home. Practice these techniques on smaller projects before attempting more complex designs. Remember to have fun and embrace your creativity. In the next section, we will explore advanced decoration ideas that will take your chocolate cake to the next level.
Advanced Decorating Ideas
Once you have mastered the basic decorating techniques, it’s time to take your chocolate cake decoration skills to the next level. In this section, we will explore advanced decorating ideas that will elevate your cake from ordinary to extraordinary. Get ready to impress your friends and family with stunning designs and intricate details.
- Creating Roses: Adding beautiful roses to your cake can make it look elegant and romantic. To create realistic-looking roses, you will need a piping bag fitted with a petal tip. Start by piping a small cone-shaped base for the rose on the cake, then pipe overlapping petals around it.
Continue building up layers of petals until you achieve the desired size and shape of the rose. Experiment with different colors and sizes to create a stunning floral arrangement on top of your chocolate cake. - Using Fondant: Fondant is a versatile icing that can be rolled out like dough and used to cover the entire cake or create decorative elements such as bows, ribbons, flowers, and figurines. To work with fondant, dust your work surface with powdered sugar or cornstarch to prevent sticking.
Roll out the fondant into a thin sheet using a rolling pin, then drape it over the cake or cut it into shapes for decoration. Fondant allows for endless creativity and can give your chocolate cake a professional finish. - Making Chocolate Garnishes: Chocolate garnishes are not only visually appealing but also add a delightful taste and texture to your cake. To create chocolate curls or shavings, melt high-quality chocolate and spread it thinly on a baking sheet lined with parchment paper. Allow it to cool slightly until it becomes pliable but not harden completely.
Use a sharp knife or spatula to scrape off curls or shavings from the surface of the chocolate. You can also use chocolate molds to create intricate chocolate shapes that can be placed on top of your cake for a dramatic and delicious effect.
By incorporating these advanced decorating techniques into your chocolate cake creation, you can truly make it a work of art. Experiment with different designs, colors, and flavors to let your creativity shine. Remember, practice makes perfect, so don’t be discouraged if your first attempts are not flawless. With time and patience, you will hone your skills and become a master at decorating chocolate cakes.
Decoration Inspiration
One of the most exciting aspects of decorating a chocolate cake at home is the opportunity to explore various decoration themes and ideas. Whether you are celebrating a special occasion or simply want to add some creativity to your dessert, there are countless ways to make your cake visually appealing and unique. In this section, we will provide you with inspiration for different decoration themes, including seasonal designs, birthday cake decorations, and elegant wedding cake inspirations.
Seasonal designs offer a fun way to decorate your chocolate cake according to the time of year. For example, during the spring season, you could adorn your cake with colorful flowers made out of frosting or edible sugar decorations. In the winter, you may choose to incorporate snowflakes or create a scene reminiscent of a winter wonderland using white fondant.
Birthday cakes provide an excellent opportunity for creativity and personalization. Consider the recipient’s hobbies and interests when designing their birthday cake. For a sports enthusiast, you can decorate the cake with their favorite team’s logo or recreate a ball from their beloved sport using fondant. If the birthday celebrant is an animal lover, incorporate animal-themed decorations such as paw prints or miniature edible figurines.
Elegant wedding cake inspirations can transform any homemade chocolate cake into a showstopper centerpiece for weddings or anniversaries. You can experiment with various decorative techniques such as lace piping using royal icing or delicate fondant flowers cascading down multiple tiers. The choice of colors and textures will help set the mood for this special occasion.
With these decoration theme ideas in mind, let your imagination run wild and create a truly personalized chocolate cake that reflects your style and celebrates the occasion appropriately.
| Decoration Theme | Ideas |
|---|---|
| Seasonal Designs | – Spring flowers made out of frosting
|
| Birthday Cake Decorations | – Sports-themed cakes with team logos or fondant sports balls
|
| Wedding Cake Inspirations | – Lace piping using royal icing
|
Tips and Tricks for a Professional Finish
Decorating a cake like a professional pastry chef may seem daunting, but with the right tips and tricks, you can achieve a stunning and polished finish. Here are some insider secrets to help you create a professional-looking decorated chocolate cake at home.
- Start with a crumb coat: Before applying the final layer of frosting, it’s crucial to apply a thin layer called a crumb coat. This initial layer helps seal in any loose crumbs and provides a smooth base for the final frosting. Once applied, refrigerate the cake for about 30 minutes to allow the crumb coat to set before adding the final layer.
- Use an offset spatula: An offset spatula is an essential tool for achieving smooth and even frosting on your cake. Hold the spatula at an angle and rotate the turntable while applying gentle pressure to create an even layer of frosting. For best results, dip your spatula in hot water and wipe it clean between each stroke.
- Get creative with piping techniques: Piping is a great way to add decorative elements to your cake. Experiment with different piping tips to create borders, rosettes, flowers, or any design that suits your style. Practice on parchment paper before decorating the cake directly to avoid mistakes and save time.
- Create texture with edible decorations: To add visual interest and texture to your cake, consider using edible decorations such as sprinkles, crushed nuts, or chocolate shavings. These simple additions can elevate the overall look of your creation and give it a professional touch.
- Pay attention to detail: Details make all the difference in creating a professionally decorated chocolate cake. Ensure that your lines are straight, your colors are vibrant but cohesive, and that any piped designs are symmetrical. Take your time and have patience while working on these fine details for an impressive finished product.
By incorporating these tips into your cake decorating process, you’ll be able to achieve a professional finish that will impress your friends and family. Remember to practice and have fun with your creativity, as it is what truly makes your homemade decorated chocolate cake unique.
Troubleshooting and Common Mistakes
Decorating a chocolate cake at home can be a fun and rewarding experience, but it’s not without its challenges. Even experienced bakers and decorators can encounter problems along the way. In this section, we will address some common issues that may arise during the decorating process and provide helpful solutions to fix any mistakes or mishaps.
One of the most common problems when decorating a chocolate cake is crumbs getting mixed into the frosting while applying the base coat. This can result in a messy appearance and an uneven finish. To avoid this, it is essential to properly prepare your cake before frosting.
Start by chilling your cake in the refrigerator for at least 30 minutes before applying the frosting. This will help firm up the cake and reduce crumb generation. You can also use a crumb coat technique where you apply a thin layer of frosting first, then refrigerate the cake again before adding the final layer of frosting.
Another issue that often arises is air bubbles trapped in your piping bag while decorating with buttercream or royal icing. These air bubbles can cause interruptions in your design and make it difficult to achieve clean lines. To prevent this, make sure to fill your piping bag properly by squeezing out any excess air before piping. Additionally, gently tap or twist the bag while piping to release any trapped air bubbles.
Sometimes, despite our best efforts, mistakes happen during decoration. For instance, you might accidentally squeeze too hard on your piping bag, resulting in an unwanted blob or smudge on your design. Don’t panic. There are ways to fix these mistakes.
If you notice a small mistake right away, quickly wipe off the excess using a clean cloth or paper towel before it dries or sets in. For larger mistakes, such as significant smudges or misplaced designs, you have a few options.
You can scrape off the mistake with a small spatula or knife and reapply the frosting or decoration. If it’s not possible to remove the mistake, consider incorporating it into your design by adding more decorations around it and turning it into a creative element.
To summarize, encountering challenges during the chocolate cake decorating process is common, but with some troubleshooting and quick thinking, you can remedy any mistakes or mishaps. Remember to properly prepare your cake before frosting to avoid crumb issues, eliminate air bubbles from your piping bag for clean designs, and have solutions in place for fixing mistakes when they happen. By being prepared and adaptable, you’ll ensure that your homemade decorated chocolate cake turns out beautifully every time.
Table: Common Decorating Issues and Solutions
| Issue | Solution |
|---|---|
| Crumbs mixed in frosting | Chill the cake before frosting or use a crumb coat technique |
| Air bubbles in piping bag | Squeeze out excess air, tap or twist the bag while piping |
| Mistakes or smudges on design | Quickly wipe off small mistakes; scrape off larger mistakes and reapply decoration or incorporate them creatively into the design |
Showcasing Your Masterpiece
Once you have put all your time and effort into decorating a beautiful chocolate cake, you’ll want to showcase your masterpiece in the best way possible. The way you display and photograph your cake can make a big difference in how it is perceived by others. Here are some tips to help you display and photograph your decorated chocolate cake to impress your friends and family, as well as capture social media-worthy shots.
First, choose an appropriate serving platter or cake stand for your chocolate cake. Consider the size and shape of your cake when selecting the display platform. A clean, white platter or a simple, elegant cake stand can provide a neutral backdrop that allows the decorations on the cake to shine. Make sure to clean and polish the platter or stand before placing the cake on it to ensure a polished look.
Next, consider the background when photographing your decorated chocolate cake. Choose a location with good lighting that complements the colors and style of your cake. Natural light is ideal for capturing vibrant colors and details, so try setting up near a window during daylight hours. If you’re shooting indoors, consider using soft diffused lighting or strategically placed lamps to avoid harsh shadows.
When composing your shot, think about the angles from which you want to capture your cake. Experiment with different perspectives such as overhead shots, side shots, or close-ups of specific details. You may also want to include some context in the photo by including props such as decorative plates, utensils, or ingredients related to chocolate.
Lastly, pay attention to presentation details that will make your decorated chocolate cake even more appealing in photos. Ensure that all edges are clean and smooth out any imperfections before taking pictures. You can also add some final touches like fresh flowers or powdered sugar sprinkled on top of the cake just before photographing it.
Remember that practice makes perfect when it comes to capturing stunning images of your decorated chocolate cakes. Play around with different styling and photography techniques to find your personal style. With these tips, you’ll be able to create enticing and visually appealing photos that will make everyone eager to try your delicious creations.
Conclusion
In conclusion, decorating a chocolate cake at home is not only a fun and rewarding experience but also an opportunity to showcase your creativity. By following the step-by-step instructions and utilizing the essential tools and ingredients outlined in this article, you can create a beautiful masterpiece that will impress your friends and family.
Whether you are a beginner or have some experience with cake decoration, there are techniques for everyone to try. From the basic decorating techniques like smoothing frosting and piping borders to more advanced ideas such as creating roses or making chocolate garnishes, there is no limit to what you can achieve. The article has provided inspiration for various decoration themes, including seasonal designs, birthday cake decorations, and elegant wedding cake inspirations, giving you the freedom to personalize your creation.
While it’s natural to encounter challenges along the way, don’t be discouraged. The article offers troubleshooting tips and solutions for common mistakes that may arise during the decorating process. Remember that practice makes perfect, so embrace each attempt as an opportunity to learn and improve your skills.
Finally, once your masterpiece is complete, don’t forget to showcase it. Displaying and photographing your decorated chocolate cake not only allows you to impress your loved ones but also gives you the chance to capture social media-worthy shots. Share your creation with pride and let others admire your talent.
So go ahead, unleash your creativity and give home chocolate cake decoration a try. With patience, practice, and passion, you will soon be able to create stunning cakes that not only look visually appealing but also taste delicious. Embrace this exciting journey into the world of cake decoration – the rewarding results await you.
Frequently Asked Questions
What can I use to decorate a chocolate cake?
There are various options available to decorate a chocolate cake, depending on personal preferences and desired visual appeal. One commonly used option is frosting or icing. Buttercream frosting is a popular choice as it can be easily spread onto the cake’s surface using a spatula or piping bag and creates a smooth finish.
Another option is ganache, which is made from melted chocolate and cream, resulting in a glossy and rich topping. Additionally, one can use chocolate shavings or curls to adorn the cake’s top, adding texture and elegance. Fresh fruit or edible flowers can also be arranged on top of the cake for a vibrant and natural touch, complementing the chocolate flavor.
How to easily decorate a chocolate cake?
Decorating a chocolate cake can be made easy by following a few simple techniques. To start, make sure the cake is completely cooled before attempting to decorate it. A crumb coat can be applied by spreading a thin layer of frosting all over the cake’s surface to seal in any loose crumbs.
This will create a smoother appearance for further decoration later on. For quick yet eye-catching designs, consider using pre-made decorative items such as fondant shapes or edible sprinkles that can be easily placed onto the frosted cake using your fingers or tweezers. Piping bags with different nozzle tips can also allow you to create beautiful patterns or borders effortlessly.
How do you decorate the top of a cake with chocolate?
Decorating the top of a cake with chocolate requires some skill but can yield impressive results with patience and practice. One method involves melting chocolate chips or bars in either a double boiler or the microwave until smooth and liquid-like consistency is achieved. Once melted, let the chocolate cool slightly to avoid it from melting any frosting underneath when poured onto the cake’s top.
Starting from the center of the cake, carefully drizzle or pour the melted chocolate in circular motions towards the edges, allowing gravity to spread it evenly across the surface. To create intricate designs, place melted chocolate into small piping bags with fine tips, and gently squeeze to create lines, swirls, or other shapes on top of the cake.

Welcome to our cake decorating blog! My name is Destiny Flores, and I am the proud owner of a cake decorating business named Cake Karma. Our mission is to provide delicious, beautiful cakes for all occasions. We specialize in creating custom cakes that are tailored specifically to each customer’s individual needs and tastes.

