Chocolate cake is a classic and beloved dessert that holds a special place in the hearts and palates of many. With its rich and indulgent flavor, it’s no wonder why chocolate cakes have stood the test of time and continue to be a favorite among people of all ages. The satisfaction and joy that comes from baking and decorating your own chocolate cake only adds to its allure.
When we think of desserts, chocolate cake often comes to mind as one of the most decadent and irresistible options. Whether it’s for a celebration, a special occasion, or simply as a sweet treat to enjoy at home, chocolate cake has become synonymous with pure delight. Its popularity can be attributed to its versatility – from simple single-layer cakes to multi-tiered masterpieces – there is a chocolate cake recipe for every baking enthusiast.
Baking your own chocolate cake not only allows you to control the ingredients used, but it also provides an opportunity for creativity and personalization. The process of measuring out each ingredient, folding them together, watching the batter transform in the oven, and finally unveiling your masterpiece is an experience like no other.
The aroma that fills your kitchen as the cake bakes is enough to create excitement and anticipation for the end result – a deliciously moist chocolate cake ready to be decorated according to your own unique style.
In this article, we will take you through all the steps required to bake and decorate a chocolate cake that will impress both yourself and others. We will start by gathering all the necessary ingredients and equipment, then move on to preparing the perfect cake batter. Proper baking techniques and timings are also crucial elements that will be discussed, followed by tips for cooling and leveling your cake.
We’ll guide you through making homemade chocolate frosting that perfectly complements your creation before diving into various decorating techniques. Lastly, we’ll provide storage tips so you can enjoy your beautiful creation for as long as possible. So let’s get started on this delightful journey of baking and decorating a chocolate cake.
Gathering the ingredients and equipment needed
To successfully bake and decorate a delicious chocolate cake, it is crucial to start by gathering all the necessary ingredients and equipment. Having everything prepared beforehand will make the baking process smoother and more enjoyable. Here is a comprehensive list of ingredients required to bake a chocolate cake from scratch.
For the cake batter, you will need:
- 2 cups of all-purpose flour.
- 2 cups of granulated sugar.
- 3/4 cup of unsweetened cocoa powder.
- 1 and 1/2 teaspoons of baking powder.
- 1 and 1/2 teaspoons of baking soda.
- 1 teaspoon of salt.
- 2 large eggs.
- 1 cup of milk (whole or buttermilk for a richer flavor).
- 1/2 cup of vegetable oil.
- 2 teaspoons of vanilla extract.
- 1 cup of boiling water.
When it comes to equipment, make sure you have the following items ready:
- Two 9-inch round cake pans (or one larger rectangular pan).
- Parchment paper or non-stick cooking spray for greasing the pans.
- Mixing bowls in various sizes, including a large one for the batter.
- Whisk or electric mixer for combining ingredients smoothly.
- Measuring cups and spoons for accurate measurements.
- Rubber spatula for scraping down batter and folding in ingredients gently.
It’s also helpful to have an oven thermometer to ensure your oven is at the correct temperature throughout the baking process. Another handy tool is a cooling rack so that air circulates around the cakes as they cool. Finally, don’t forget about any additional equipment you may need for decorating, such as piping bags, frosting tips, offset spatulas, and an icing smoother.
By having all these ingredients and equipment organized before starting your chocolate cake journey, you’ll be setting yourself up for success. So gather everything together, clear some space on your kitchen counter, and get ready to create a masterpiece that will delight your taste buds and impress your loved ones.
Preparing the cake batter
Step-by-step instructions for making the perfect chocolate cake batter
To begin preparing the cake batter, it is crucial to gather all the necessary ingredients and have them measured out accurately. This will ensure that the cake turns out moist and flavorful. Start by preheating the oven according to the recipe’s instructions and greasing the cake pans.
Next, in a large mixing bowl, combine the dry ingredients such as all-purpose flour, cocoa powder, baking powder, baking soda, and a pinch of salt. Whisk these ingredients together until they are well combined and there are no lumps.
In a separate bowl, cream together softened butter and granulated sugar until light and fluffy. This can be done using a hand mixer or a stand mixer fitted with a paddle attachment. Adding eggs one at a time, beat well after each addition until fully incorporated.
Once the butter and sugar mixture is smooth, add vanilla extract or any other desired flavorings to enhance the taste of your chocolate cake. Mix until evenly distributed.
Now it’s time to add alternating batches of dry ingredients and milk to the butter mixture. Gradually add about one-third of the dry ingredients followed by half of the milk. Continue this process, ending with the last batch of dry ingredients until everything is mixed well.
The importance of accurate measurements and recipe adherence
When preparing cake batter, it is important to measure each ingredient accurately for optimal results. Use measuring cups for dry ingredients and measuring spoons for smaller quantities such as vanilla extract or baking powder. Level off any excess ingredient using a straight-edged spatula or a knife.
It is equally important to follow the recipe closely in terms of ingredient amounts and mixing instructions. Deviations from the recipe may result in an unsuccessful outcome. The balance between wet and dry ingredients directly affects how moist or dense your chocolate cake will turn out.
By following these step-by-step instructions and measuring ingredients accurately, you will have a smooth and well-mixed chocolate cake batter ready for baking. Remember, the cake batter is the foundation of your chocolate cake, so make sure it is prepared correctly to achieve delicious results.
Proper baking techniques and timings
Baking a chocolate cake to perfection requires the right techniques and accurate timing. Follow these tips to ensure that your cake turns out moist, fluffy, and delicious:
- Set the appropriate oven temperature: Preheat your oven to the temperature specified in the recipe. It is important to preheat the oven as this ensures that the cake bakes evenly and rises properly.
- Adjust baking times based on thickness: The baking time mentioned in a recipe is usually an estimate for a standard thickness of cake batter. If you are using a different-sized pan or altering the thickness of your cake, you may need to adjust the baking time accordingly. A general rule of thumb is that thicker cakes require longer baking times, while thinner cakes may bake faster.
- Use a toothpick or cake tester: To determine if your cake is fully baked, insert a toothpick or a cake tester into the center of the cake. If it comes out clean or with only a few crumbs clinging to it, then your cake is ready. If there is batter sticking to the toothpick, continue baking for a few more minutes before testing again.
| Pan Size | Oven Temperature (°F) | Baking Time (minutes) |
|---|---|---|
| 6-inch round | 350 | 25-30 |
| 8-inch round | 350 | 30-35 |
| 9-inch round | 350 | 35-40 |
| 13×9-inch rectangular | 325 | 45-50 |
Remember that these are just general guidelines, and individual recipes may have specific instructions for baking times. Always refer to the recipe you are using for the most accurate timing.
By following proper baking techniques and timings, you will be able to achieve a perfectly baked chocolate cake every time. The next section will discuss how to cool and level your cake before moving on to the exciting part of decorating it.
Cooling and leveling the cake
Once the chocolate cake is baked to perfection, it is crucial to allow it to cool completely before moving forward with the decorating process. Cooling the cake is essential for several reasons. First, it prevents any melting of the frosting or decorations that you will add later on. Second, cooling allows the flavors of the cake to fully develop and intensify. Lastly, a completely cooled cake is much easier to handle and level.
To cool your cake properly, follow these steps:
- Remove the cake from the oven: Once you have determined that the cake is fully baked by using a toothpick or a cake tester, carefully remove it from the oven.
- Let it rest in the pan: Allow your cake to cool in its pan for about 10 to 15 minutes. This helps in maintaining its shape and prevents it from falling apart when you transfer it onto a cooling rack.
- Transfer onto a cooling rack: After the initial resting period, gently transfer your cake onto a cooling rack using oven mitts or kitchen towels. This allows air to circulate around all sides of the cake and helps in achieving an even cooling process.
While waiting for your cake to cool, you can take this opportunity to prepare any additional decorations or frostings that you plan on using. Once your cake has completely cooled down, you may proceed with leveling it.
Leveling your chocolate cake ensures that you have an even surface for decorating and stacking layers if desired. Here’s how you can level your cooled chocolate cake:
- Gather necessary tools: You will need a long serrated knife, preferably one with a thin blade since this makes achieving a straight cut easier.
- Place the cake on a flat surface: Set your cooled cake on a clean and level countertop or cutting board.
- Cut off any dome-shaped top: If your cake has risen unevenly during baking and has formed a domed top, use slow sawing motions with your serrated knife to level it out. Keep the knife as parallel to the countertop as possible to achieve an even cut.
By following these cooling and leveling steps, you are setting yourself up for success in creating a beautifully decorated chocolate cake. Remember that patience is key during this process, as rushing can affect the overall outcome of your cake’s appearance and taste.
Preparing the chocolate frosting
Once your chocolate cake has cooled completely, it’s time to prepare the delicious chocolate frosting to complement the rich flavors of the cake. While store-bought frostings are convenient options, making your own homemade chocolate frosting can take your cake to a whole new level of scrumptiousness. Here is a step-by-step guide on how to make a simple yet delectable chocolate frosting from scratch:
- Gather all the ingredients needed for the frosting: 1 cup of unsalted butter (softened), 3 cups of powdered sugar, 1/2 cup of unsweetened cocoa powder, 1/4 teaspoon of salt, 1/4 cup of milk, and 1 teaspoon of vanilla extract.
- In a large mixing bowl, cream the softened butter until light and fluffy using an electric mixer or stand mixer.
- Add the powdered sugar, cocoa powder, and salt into the bowl with the creamed butter. Mix on low speed until well combined.
- Pour in the milk and vanilla extract. Increase the speed to medium-high and continue mixing until the frosting becomes smooth and creamy.
- If you desire a thicker consistency for piping or spreading onto your cake layers, gradually add more powdered sugar until you reach your desired texture.
Feel free to experiment with different variations to enhance the chocolaty taste. For example, you could add a tablespoon of freshly brewed coffee for a hint of mocha flavor or a few drops of peppermint extract for a refreshing twist.
Remember that consistency is key when it comes to frosting your cake. If your frosting is too thick, just add small amounts of milk while mixing until it reaches the desired spreadable or pipe-able thickness.
Now that you have prepared your homemade chocolate frosting, you’re one step closer to creating the perfect chocolate cake. The next section will guide you through various techniques for decorating your cake like a professional.
Decorating the chocolate cake
Once your chocolate cake is baked and cooled, it’s time for the fun part – decorating. Decorating a chocolate cake allows you to add your personal touch and creativity to the final product. Whether you want a simple and elegant design or a show-stopping masterpiece, there are endless decorating techniques that can take your cake to the next level.
One popular technique is piping, which involves using a piping bag and different frosting tips to create intricate designs on the cake. You can pipe borders around the top and bottom edges of the cake, write messages or names with frosting, or create beautiful patterns and designs. Experiment with different tips to achieve various textures and effects.
If you’re looking to add some dimension to your cake, consider creating frosting flowers. Using flower-shaped frosting tips, you can pipe flowers directly onto the cake or make them separately on parchment paper before transferring them onto the cake. Play around with different colors and sizes to create a stunning floral arrangement.
For those who prefer a more minimalistic approach, consider adding texture to your chocolate cake by using a spatula or offset spatula to create swirls or waves in the frosting. You can also use a fork or toothpick to make patterns in the frosting or create a marbled effect by swirling different colored frostings together.
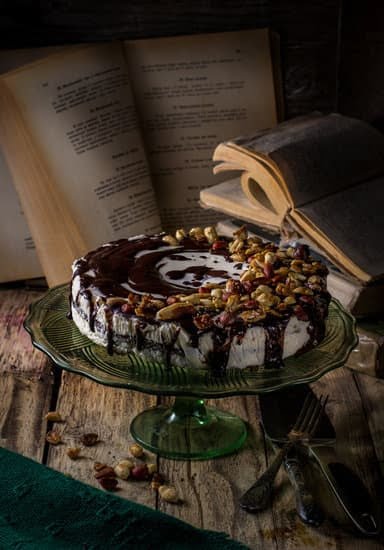
To give your chocolate cake an extra touch of elegance, consider garnishing with fresh berries, such as strawberries or raspberries. These colorful fruits not only add a pop of color but also provide a refreshing contrast to the rich chocolate flavor. Other popular garnishes include chocolate shavings, edible flowers, chopped nuts, or sprinkles.
Remember that decorating is all about expressing your creativity and having fun. Don’t be afraid to experiment with different techniques and decorations until you achieve the look you desire. Your homemade chocolate cake will undoubtedly impress family and friends when they see not only how delicious it tastes but also how beautifully it is decorated.
Creative garnishing ideas
Decorating with Fresh Berries
One delightful way to garnish your chocolate cake is by decorating it with fresh berries. Not only do the vibrant colors of the berries create an eye-catching presentation, but their natural sweetness also complements the richness of the chocolate cake. Consider using a variety of berries such as strawberries, raspberries, and blueberries to add a pop of color. You can arrange them neatly on top of the cake or scatter them casually for a more rustic look.
Adding Chocolate Shavings
Another classic and elegant way to garnish your chocolate cake is by adding chocolate shavings. Create beautiful curls or shavings using a vegetable peeler or grater. Use high-quality chocolate that melts smoothly for best results. Gently press the chocolate shavings onto the sides of the cake, creating a stunning texture and visual interest. For an extra touch, sprinkle some shavings on top as well.
Using Edible Flowers
For a unique and whimsical twist, consider garnishing your chocolate cake with edible flowers. Not only do they add a touch of natural beauty, but they also bring an element of surprise and elegance to your creation. Choose edible flowers that are safe for consumption, such as pansies or violets, and gently place them on top of the frosting. Make sure you use flowers that have not been treated with any pesticides or chemicals.
The key to creative garnishing is to let your imagination run wild. Don’t be afraid to experiment with different ideas and combinations – after all, it’s your own masterpiece that you’re creating. Whether it’s using colorful sprinkles, crushed nuts, or even drizzling caramel sauce over the top, don’t be afraid to think outside the box and add a personal touch to make your chocolate cake truly unique and unforgettable.
Tips for storage and serving
Once you have successfully baked and decorated your chocolate cake masterpiece, it is important to know how to properly store it to maintain its freshness and preserve all the hard work you put into decorating. Here are some tips for storing and serving your delicious creation.
Firstly, make sure your cake has completely cooled before attempting to store it. This will prevent any melting or smudging of the decorations. Once cooled, carefully place the cake on a serving plate or cake stand.
To protect the cake from drying out, cover it with a dome-shaped lid or large bowl. If you don’t have a suitable domed container, you can also use plastic wrap gently placed over the top of the cake, making sure not to touch the frosting.
It’s important to store your chocolate cake in a cool and dry location. Avoid placing it in direct sunlight or near any heat sources that could cause melting or spoilage. If possible, keep the cake in a room temperature environment away from humidity as moisture can quickly ruin the decoration.
When it comes time to serve your beautifully decorated chocolate cake, there are endless possibilities for presentation. You can slice it into individual portions using a sharp knife or a serrated knife for smoother cuts. For an added touch, accompany each slice with a dollop of freshly whipped cream or a scoop of ice cream.
If you want to get even more creative with presentation, consider drizzling some homemade chocolate sauce over each slice just before serving. Alternatively, garnish each piece with fresh berries such as strawberries or raspberries for a burst of color and added flavor.
Conclusion
In conclusion, baking and decorating a chocolate cake is not only a delicious endeavor but also a rewarding one. Throughout this article, we have explored the step-by-step process of creating the perfect chocolate cake from scratch, from gathering the ingredients to decorating and serving the final masterpiece.
Chocolate cakes have stood the test of time and are beloved by people of all ages. The joy that comes from baking and decorating your own chocolate cake is unmatched. It allows you to unleash your creativity and create a personalized dessert that will truly bring delight to both yourself and those you share it with.
While it may seem intimidating at first, with the right ingredients, equipment, and techniques, baking a chocolate cake can be an enjoyable experience. Remember to measure ingredients accurately, follow the recipe closely, set the right oven temperature, and adjust baking times accordingly to achieve optimal results.
Whether you choose to adorn your chocolate cake with intricately piped designs or keep it simple with a luscious layer of frosting and some creative garnishes, remember that experimentation is key. Don’t be afraid to add your own personal touch and let your imagination run wild.
So why wait? Take this opportunity to unleash your inner baker. Bake and decorate a chocolate cake today, and savor not only the sweet flavors but also the sense of accomplishment that comes with creating such a delectable treat from scratch. Enjoy every bite knowing that you have put your heart into it. Happy baking.
Frequently Asked Questions
How to decorate chocolate cake for beginners?
Decorating a chocolate cake for beginners can be a fun and rewarding experience. Start by making sure your cake is cooled completely before you begin, as decorating a warm cake can cause the frosting to melt or slide off. Next, choose your desired frosting or icing and apply a thin layer all over the cake to create a smooth base.
You can then experiment with different techniques such as piping designs, using edible decorations like sprinkles or chocolate shavings, or even adding fresh fruit on top. Remember, practice makes perfect when it comes to cake decorating, so don’t be afraid to try different techniques and have fun!
What do I need to bake a cake and decorate it?
To bake and decorate a cake, you will need several key ingredients and tools. For the cake itself, you will typically need flour, sugar, baking powder, eggs, butter or oil, milk (or another liquid), and flavorings such as vanilla extract.
Depending on the recipe you choose, additional ingredients like chocolate may be included as well. In terms of tools, you will need mixing bowls, measuring cups and spoons, an electric mixer or whisk for blending the ingredients together, a baking pan suitable for your chosen recipe (such as round pans for layer cakes), an oven to bake the cake in at the appropriate temperature and time indicated in the recipe instructions, cooling racks to let the cake cool after baking, and various utensils like spatulas for spreading frosting or icing onto the cooled cake.
How to make a chocolate cake look professional?
Making a chocolate cake look professional requires attention to detail and some specific techniques. One essential aspect is ensuring that your cake layers are level and evenly baked so that they stack neatly without any lopsidedness. Properly filling and frosting between layers is crucial as well – use an offset spatula to spread a generous amount of frosting between each layer while keeping them aligned straight.
After applying a crumb coat (a thin initial layer of frosting all over the outside of the cake), refrigerate the cake to set the frosting and then finish with a final layer of smooth, well-spread frosting. To add professional touches, you can use piping bags and different tips to create decorative borders, designs, or writing on the cake. Additionally, consider incorporating garnishes such as chocolate curls, fresh fruit, or edible flowers on top to add elegance and sophistication to your chocolate cake.

Welcome to our cake decorating blog! My name is Destiny Flores, and I am the proud owner of a cake decorating business named Cake Karma. Our mission is to provide delicious, beautiful cakes for all occasions. We specialize in creating custom cakes that are tailored specifically to each customer’s individual needs and tastes.


