Cake decorating is a delightful and creative art form that has gained immense popularity in recent years. With endless possibilities to bring imagination to life, it has become a beloved hobby for many. In this blog post, we will delve into the world of cake decorating and focus on 10 easy techniques that will elevate your cakes from ordinary to extraordinary.
As the demand for unique and personalized cakes continues to rise, cake decorating has become more than just a skill – it has become an artistic expression. From birthdays to weddings, cakes are now seen as centerpieces that not only taste delicious but also captivate the eyes. The joy of seeing a beautifully decorated cake cannot be overstated, and with the right guidance, anyone can master these techniques.
This article aims to equip you with the knowledge and skills needed to create stunning cakes at home. Whether you are a beginner or have some experience in cake decorating, this comprehensive guide will provide you with step-by-step instructions and valuable tips. So buckle up your aprons, gather your tools, and let’s dive into the wonderful world of cake decorating.
Basic Tools and Materials Required for Cake Decorating
Cake decorating is a wonderful art form that allows individuals to showcase their creativity and create beautiful designs on cakes. However, in order to achieve professional-looking results, it is essential to have the right tools and materials. This section will discuss the basic tools and materials required for cake decorating and provide tips on where to find them.
Essential Tools
To get started with cake decorating, there are several essential tools that you will need. These include piping bags, tips, spatulas, and fondant smoothers. Piping bags are used for applying buttercream or royal icing onto the cake in a decorative manner.
Tips come in various shapes and sizes and can be attached to the piping bags to achieve different designs. Spatulas are used for spreading icing on the cake and achieving a smooth finish. Fondant smoothers are used when working with fondant to create a polished look.
Necessary Materials
In addition to the tools mentioned above, there are also some necessary materials that you will need for cake decorating. One of these materials is fondant, which is a versatile confectionery product that can be rolled out like dough and used to cover cakes or create decorative elements. Other materials include food coloring gels or powders for tinting icing, edible glitter or luster dust for adding sparkle, and edible decorations such as sugar pearls or sprinkles for embellishing cakes.
Finding Supplies
Finding the right supplies for cake decorating can be quite easy nowadays with numerous options available both online and offline. Specialty baking stores often carry a wide range of cake decorating supplies including piping bags, tips, spatulas, fondant smoothers, food coloring gels or powders, edible glitter or luster dusts, as well as various edible decorations.
Online marketplaces also offer a vast array of options for purchasing cake decorating supplies at competitive prices. Additionally, many grocery stores carry basic cake decorating supplies in their baking aisle.
Having the necessary tools and materials for cake decorating is crucial to achieving professional-looking results. By investing in high-quality tools and sourcing the right materials, individuals can ensure that they are well-equipped to explore the art of cake decorating.
Step-by-Step Guide to Buttercream Piping Techniques
Buttercream is a versatile and delicious medium for cake decorating, and learning different piping techniques can take your cakes to the next level. In this section, we will provide a step-by-step guide to mastering buttercream piping techniques that will impress your friends and family.
Materials Needed
Before diving into the techniques, it’s essential to gather the necessary materials. You will need:
- Piping bags: These come in various sizes and can be disposable or reusable.
- Piping tips: Different tips create different designs, like round tips for dots and stars, or petal tips for ruffles and flowers.
- Couplers: These allow you to change tips without changing the piping bag.
- Spatulas: Use these to spread icing smoothly onto the cake before piping.
- Buttercream icing: You can use store-bought icing or make your own at home.
- Optional: food coloring, cake turntable.
Mastering Basic Techniques
To start, it’s crucial to perfect basic buttercream piping techniques. Here are a few essential ones:
- Crumb Coat: Apply a thin layer of buttercream on the cake to seal in any crumbs before adding additional decoration.
- Piping Borders: Use a star tip to create borders around the top or bottom edges of your cake by applying even pressure while moving in a circular motion.
- Rosettes: Attach a closed star tip to your piping bag and apply steady pressure while making spiraling motions from the center outward to create beautiful rosettes.
Creating Intricate Designs
Once you have mastered the basics, you can move on to creating more intricate designs using buttercream.
- Ruffles: Attach a petal tip to your piping bag and position it at a 45-degree angle against the side of the cake. Apply steady pressure while moving back and forth to create smooth, ruffle-like patterns.
- Basketweave: Start by applying a crumb coat and letting it set. Then, using a basketweave tip, create vertical lines on the cake. Next, pipe horizontal lines over the vertical lines, alternating each time to create a woven effect.
- Flowers: Use a flower tip with multiple openings and pipe flowers directly onto the cake or make them separately on wax paper and then transfer them to the cake.
By following these step-by-step techniques and practicing regularly, you will soon become confident in your buttercream piping skills. Remember to be patient with yourself and have fun experimenting with different designs and patterns.
Introduction to Fondant
Fondant is a versatile and popular medium used in cake decorating to achieve a smooth, professional finish. This pliable icing is made from sugar, water, and gelatin, and can be rolled out into thin sheets that cover the entire cake or molded into various shapes for decorative elements. In this section, we will explore the basics of working with fondant and provide step-by-step techniques for achieving a flawless finish on your cakes.
Before diving into the techniques, it’s important to understand why fondant is commonly used in cake decorating. One of the main advantages of fondant is its ability to create a polished and seamless appearance on cakes. Unlike buttercream icing, which can sometimes have visible lines or imperfections, fondant provides a smooth canvas for intricate designs and decorations. Additionally, fondant allows for unique sculpting capabilities that are not easily achievable with buttercream alone.
To work with fondant effectively, you will need a few essential tools. These include a rolling pin for flattening the fondant, cornstarch or powdered sugar for dusting the work surface to prevent sticking, and smoother tools to help shape and smooth out the fondant on the cake. Another crucial tool is an offset spatula or palette knife for applying ganache or buttercream onto the cake before covering it with fondant.
Here is a list of materials you will need when working with fondant:
- Fondant (pre-made or homemade).
- Rolling pin.
- Cornstarch or powdered sugar.
- Smoother tools.
- Offset spatula or palette knife.
- Small paintbrush (used for attaching decorations).
- Edible glue (optional but helpful for attaching decorations).
By having these materials readily available before you start working with fondant, you’ll be prepared to smoothly execute your cake decorating ideas.
Now that we have covered why fondant is preferred in many cake designs and the essential tools and materials needed, it’s time to dive into the techniques for working with fondant. In the next section, we will discuss step-by-step instructions on how to cover a cake smoothly with fondant and how to create decorative elements using this versatile medium.
Whether you’re a beginner or an experienced cake decorator, these techniques will provide you with a solid foundation for creating stunning cakes with a flawless finish.
Decorating with Chocolate
Decorating with chocolate is a delicious and visually appealing way to elevate the look of your cakes. Whether you’re looking to add depth, texture, or a touch of elegance to your creations, there are various techniques that can achieve stunning results. Here are some simple ways to incorporate chocolate decorations into your cake designs:
- Creating Chocolate Curls: Chocolate curls are an effortless yet impressive way to adorn your cakes. To make chocolate curls, start by melting high-quality chocolate and spreading it thinly over a flat surface, such as a baking sheet or marble slab. Once the chocolate has hardened slightly but is still pliable, use a sharp knife or scraper to carefully scrape curls off the surface.
Gently transfer them onto parchment paper and refrigerate until firm. Decorate your cake by arranging the curls on top or around the sides for an elegant finish. - Piping with Melted Chocolate: Another versatile technique is piping with melted chocolate. Simply melt chocolate and transfer it into a piping bag fitted with a small round tip or a parchment cone. You can create intricate lattice patterns, delicate swirls, or personalized messages on your cake using this method. Start by practicing on a piece of parchment paper before moving on to your cake to ensure better control over the flow of chocolate.
- Using Chocolate Molds: Chocolate molds are ideal for creating intricate designs that can easily be added to your cake decorations. Choose from an array of shapes and sizes that fit the theme of your cake and fill them with melted chocolate. Allow them to set completely before gently removing them from the mold. Arrange these molded chocolates on top of cupcakes, around the edges of layered cakes, or as decorative elements on specialty cakes.
When working with chocolate decorations, keep in mind these helpful tips:
- Use high-quality tempered chocolate for better results.
- Ensure that your work surface and utensils are clean and dry before working with melted chocolate.
- Always handle chocolate with dry hands as even a small amount of moisture can cause it to seize.
- Store your chocolate decorations in a cool, dry place before adding them to your cakes to prevent melting.
Decorating with chocolate opens up endless possibilities for creativity and adds a rich flavor experience to your cakes. Experiment with different techniques and have fun discovering new ways to take your cake decorating skills to the next level.
Creative Use of Edible Flowers and Fruit for Cake Decoration
When it comes to cake decoration, there are so many creative options to explore. One technique that can elevate the design of your cakes is the use of edible flowers and fruit.
Not only do these natural elements add a touch of beauty to your creations, but they also bring a fresh and vibrant flavor that complements the sweetness of the cake. In this section, we will delve into the creative use of edible flowers and fruit for cake decoration, providing you with inspiration and tips on how to incorporate them into your designs.
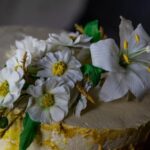
Firstly, let’s talk about edible flowers. These delicate blooms not only add color to your cakes but also bring a subtle floral taste. When selecting edible flowers, it’s important to ensure that they are organic and safe for consumption.
Flowers such as roses, lavender, pansies, violets, and marigolds are popular choices in cake decorating. To arrange these flowers on your cakes, it is best to gently wash them with water and pat them dry before use. You can then place them directly onto the frosting or opt for placing them on top of a thin layer of fondant for added stability.
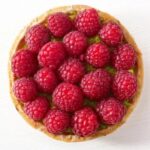
Fresh fruit is another fantastic option for adding both visual appeal and flavor to your cake designs. Achieving a beautiful arrangement of fresh fruit starts with choosing fruits that are in season and ripe. Berries like strawberries, raspberries, and blueberries work well due to their small size and vibrant colors.
Citrus fruits such as oranges or lemons can bring a tangy burst of flavor and contrast against the sweetness of the cake. To incorporate fresh fruit into your design, you can scatter them around the sides or arrange them in an attractive pattern on top of the cake.
Remember that when using edible flowers or fruit as decorations, it’s crucial to consider their placement in relation to the rest of the design. The colors should harmonize with the overall color scheme, while their arrangement should complement other elements on the cake.
Additionally, if you plan on serving the cake outdoors or in warm temperatures, it’s important to keep in mind that some flowers and fruits may wilt or lose their freshness quickly. To avoid this, consider placing the cake in a cool environment until it is ready to be served.
Incorporating edible flowers and fruit into your cake decoration not only makes for a visually stunning creation but also adds a natural and fresh element to your baked goods. So, go ahead and experiment with different combinations of flowers and fruits to create unique designs that will wow everyone who sees-and tastes-your cakes.
Fun and Easy Cake Topper Ideas for Every Occasion
Cake toppers are a fantastic way to add a touch of personality and style to any cake. Whether you’re celebrating a birthday, wedding, or any special occasion, there are endless possibilities for creating unique and eye-catching toppers. In this section, we will explore some fun and easy cake topper ideas that you can use for every occasion.
One simple yet effective idea is using paper cutouts as cake toppers. You can easily find printable templates online or create your own designs. Cut out the shapes from cardstock or patterned paper, and attach them to wooden skewers or toothpicks before inserting them into the cake. This is a great option for themed parties or personalized messages, as you can customize the design and colors to match the occasion.
Another popular choice is using themed figurines as cake toppers. Whether it’s superheroes, cartoon characters, or animals, there are countless options available in toy stores or online. Simply clean and dry the figurines before placing them on top of the cake. This not only adds a decorative element but also serves as a memorable keepsake for the guest of honor.
For those looking for edible decorations, consider using candies or chocolates as cake toppers. You can arrange colorful candies in various patterns on top of the frosted cake for a fun and playful look. Another option is molding chocolates into shapes like flowers or hearts by using silicone molds. These chocolate decorations not only add visual appeal but also offer a delicious treat for everyone.
| Cake Topper Idea | Description |
|---|---|
| Paper Cutouts | Printable templates cut from cardstock in various shapes and designs. |
| Themed Figurines | Small toys or figurines related to the party theme or the guest of honor’s interests. |
| Candies | Colorful candies arranged in patterns or as a border on top of the cake. |
| Molded Chocolates | Chocolates crafted into different shapes using silicone molds. |
These are just a few examples of fun and easy cake topper ideas that you can try for any occasion. Let your creativity and imagination run wild, and don’t be afraid to experiment with different materials and designs. Remember, the key is to have fun while personalizing your cakes and creating memorable experiences for your loved ones.
Mastering the Art of Writing on Cakes
Writing on cakes is a common and important aspect of cake decorating. Whether you want to write a special message or simply add some elegant lettering to your cakes, mastering the art of writing on cakes is essential. This section will provide you with guidance and tips on how to achieve beautiful and legible lettering on your cakes using various mediums.
Piping is one of the most popular techniques for writing on cakes. To pipe letters, you will need a piping bag fitted with a small round writing tip. Fill the piping bag with buttercream frosting, royal icing, or melted chocolate, depending on your preference.
Begin by practicing your letter formation on a piece of parchment paper before attempting it directly onto the cake. Apply gentle pressure to the piping bag as you slowly pipe each letter. Remember to keep a steady hand and maintain consistent pressure for even lines.
If you prefer a more precise and controlled approach to writing on cakes, stenciling can be an effective technique. Start by cutting out letters from parchment paper or use pre-made letter stencils that are readily available in baking supply stores.
Place the cut-out letters or stencil onto the cake surface, then use a fine-mesh sieve or powdered sugar shaker to lightly dust powdered sugar or cocoa powder over the stencil openings. Carefully remove the stencil to reveal your beautifully written letters.
Using edible markers is another simple method for creating lettering on cakes. These markers are specifically made for food decoration and are available in various colors. Before using an edible marker, ensure that your cake is fully cooled and dry to avoid smudging. Gently write your desired message onto the cake’s surface using light strokes for thin lines and applying more pressure for thicker lines.
| Technique | Description |
|---|---|
| Piping | Using a piping bag fitted with a small round writing tip to pipe letters using buttercream frosting, royal icing, or melted chocolate. |
| Stenciling | Cutting out letters from parchment paper or using pre-made letter stencils and dusting powdered sugar or cocoa powder over the stencil openings. |
| Edible Markers | Using food-safe markers in various colors to write directly on the cake’s surface. |
Exploring Unique Texture Techniques for Cake Decorating
Creating texture on cakes can add depth and visual interest to your designs. There are several unique techniques you can use to achieve different textures and elevate your cake decorating game. In this section, we will explore some of these techniques and how they can be incorporated into your cake designs.
One technique for adding texture to cakes is stenciling. Stencils are available in a wide variety of designs and patterns, allowing you to create intricate details on your cakes. To use a stencil, simply place it on the surface of the cake and gently dab or brush edible colors over it. Once you remove the stencil, you’re left with a beautifully textured design.
Another technique that can create an elegant and delicate texture is brush embroidery. This technique involves using a fine brush dipped in food coloring or petal dust to paint delicate strokes on the surface of the cake. The strokes are then softened and blended with a damp brush, creating a beautiful embroidered effect.
Textured mats are another tool that can help you achieve unique textures on your cakes. These mats are usually made from silicone or textured plastic and come in various patterns such as lace, brickwork, or woodgrain. To use a textured mat, press it onto the surface of rolled fondant or buttercream-covered cakes to leave an impression. This creates a realistic texture that adds dimension to your design.
By exploring these unique texture techniques, you can take your cake decorating skills to the next level. Incorporating stenciling, brush embroidery, and textured mats gives you endless possibilities for creating visually stunning cakes that are sure to impress. Experiment with these techniques and embrace the joy of adding texture to your cake designs.
Conclusion
In conclusion, this blog post has provided an overview of 10 easy cake decorating techniques that you can incorporate into your baking repertoire. From buttercream piping to fondant work, chocolate decorations to edible flowers and fruit, there are endless possibilities for creating stunning cakes that taste just as good as they look.
The key takeaway from this article is the importance of embracing the joy of cake decorating. This creative outlet allows you to express your artistic side while also creating delicious treats for yourself and others to enjoy. While these techniques may seem daunting at first, with practice and patience, you can become proficient in them.
Remember, cake decorating is an art form, and like any art form, it takes time to master. Don’t be discouraged if your first attempts don’t turn out exactly as planned. Through trial and error, you will learn what works best for you and develop your own unique style.
So go ahead, gather your tools and materials, explore these techniques with enthusiasm, and let your imagination run wild. Whether you’re decorating a cake for a special occasion or simply indulging in a creative outlet on a rainy day, the joy of cake decorating is waiting for you to embrace it. So grab your apron and get started on your next masterpiece.
Frequently Asked Questions
What kind of cake is easiest to decorate?
The kind of cake that is easiest to decorate is typically one with a smooth surface, such as a sponge or chiffon cake. These types of cakes have a light and airy texture, making them easier to work with when it comes to adding icing or decorations.
Their simple shape also makes it uncomplicated to apply frosting evenly and smoothly. Additionally, decorating cakes that are not too tall or have intricate designs will be less time-consuming and more straightforward for beginners.
How to make simple cake decoration at home?
Making simple cake decorations at home can be done in various ways using readily available ingredients and tools. One way is to use buttercream frosting, which can easily be made by combining butter, powdered sugar, and your preferred flavorings like vanilla extract or cocoa powder. You can then pipe the frosting onto the cake using different tips to create shapes like stars, shells, or rosettes.
Adding sprinkles, edible pearls, or crushed nuts on top can also enhance the appearance of the cake with minimal effort. For added creativity, you can opt for food coloring to tint your frosting in different shades.
How to decorate a cake in seconds?
Decorating a cake in seconds may seem challenging since most decorative designs require time and precision; however, there are a few quick ways to instantly add appeal. Using pre-made edible cake toppers or wafer paper designs is one option as they can be easily placed on the cake’s surface without any elaborate preparation. Alternatively, applying colorful dusting powders or edible glitter onto a plain frosted surface instantly adds sparkle and color without much effort.
Another quick technique involves using stencils along with powdered sugar or cocoa powder to create patterns on top of the cake quickly. Overall, these shortcuts allow for instant decoration while saving time in achieving an aesthetically pleasing result

Welcome to our cake decorating blog! My name is Destiny Flores, and I am the proud owner of a cake decorating business named Cake Karma. Our mission is to provide delicious, beautiful cakes for all occasions. We specialize in creating custom cakes that are tailored specifically to each customer’s individual needs and tastes.


